Cheerio Web Scraping: A Tutorial on How to Scrape Static Pages with Node.js
Interested in gathering data from static web pages? Cheerio and Axios libraries are great for the job. Learn everything you need to start your web scraping project.

Node.js is a great runtime used in web scraping. It’s mostly known for its powerful headless browser libraries for dynamic websites. But you can also gather data from static web pages and clean it for further use. One very popular Node.js library is Cheerio.
In this guide, you’ll learn what web scraping with Cheerio is and what advantages it can bring to your web scraping project. We’ll also explain what other tools you need to successfully gather data from a static web page and how to build a web scraper with Cheerio and Axios. All the information will be wrapped in a real-life example, so you can practice your skills.
What is Web Scraping with Cheerio?
Web scraping with Cheerio involves several steps.
Cheerio isn’t a standalone library: it can only parse, or structure web content. You’ll first need to pick an HTTP client like Axios that will fetch the HTML from your target web page.
Once you have the HTML content, you can load it into Cheerio. Then, the library will let you use jQuery syntax to traverse and manipulate the HTML structure. Cheerio allows selecting page elements and extracting the data using CSS selectors. This can be text, links, images, or any other information. You can also filter elements based on attributes or values.
Some websites require you to handle pagination or scrape data nested in JavaScript. Cheerio can’t execute JavaScript; if this is the case, you’ll need a headless browser library like Playwright or Puppeteer.
Advantages of Web Scraping with Cheerio
If you’re familiar with jQuery, web scraping with Cheerio is pretty simple because it has a similar syntax.
Cheerio is a pretty flexible tool. It’s built over parse5 for parsing HTML and htmlparser2 for XML documents. It combines their features; for example, parse5 ensures compliance with HTML standards. In essence, it can parse any HTML and XML document. What’s more, the library allows you to traverse the DOM structure, so you can select and manipulate specific elements.
It also supports a range of CSS selectors, so you can easily pinpoint elements within the document.
Like most parsing libraries, Cheerio is light on resources. The tool runs on the server side and doesn’t require a full browser environment, so you can deal with complex pages.
Web Scraping Static Pages Using Node.js Libraries Axios and Cheerio
In this step-by-step tutorial, we’ll scrape a list of books – their title, price, rating, stock, and URL – from books.toscrape.com. Even though Node.js has an integrated request library, it isn’t easy to use, so few people choose it for fetching data. For this reason, we’ll be using Axios to fetch the page.

Prerequisites
- Node.js. Make sure you have the latest Node.js version installed on your system. You can get it from the official website.
- Axios. You can add it by running npm install axios in your operating system’s terminal.
- Cheerio. You can add it by running npm install cheerio.
Importing the Libraries
Step 1. First, let’s import the necessary libraries
1) Import Node.js HTTP client axios.
import axios from 'axios'
2) Import Node.js parser Cheerio.
import { load } from 'cheerio'
3) Import the built-in Node.js file system module for writing results into a CSV file.
import fs from 'fs'
Downloading the Page
Step 1. Let’s download the target page.
const start_url = "http://books.toscrape.com/"
Step 2. Create a list to store the data.
const books_list = []
Step 3. Define the scrape() function.
async function scrape(url) {
Step 4. Make an HTTP request and wait for the response.
let resp = await axios.get(url)
Step 5. Extract HTML from the response.
let resp_html = resp.data
Extracting the Data Points
Step 1. Load the HTML into the Cheerio $ object.
const $ = load(resp_html)
Step 2. Pass the Cheerio instance to the parse() function.
parse($)
Step 3. Find the next page selector and the href attribute to scrape the next page.
					try {
        let next_href = $('.next > a').attr("href")
// In case the '/catalogue/' part of the URL is not found within
// the href attribute value, add it to the href
if (!next_href.includes('catalogue')){
next_href = `catalogue/${next_href}`
}
Step 4. Format the absolute URL of the next page we’re going to scrape.
					let next_url = start_url + next_href
console.log('Scrape: ' + next_url)
Step 5. Call the scrape() function again and pass the URL.
const book_price = $(element).find('.price_color').text().replace('£', '')
Parsing the HTML
Step 1. Define the parsing function.
function parse($){
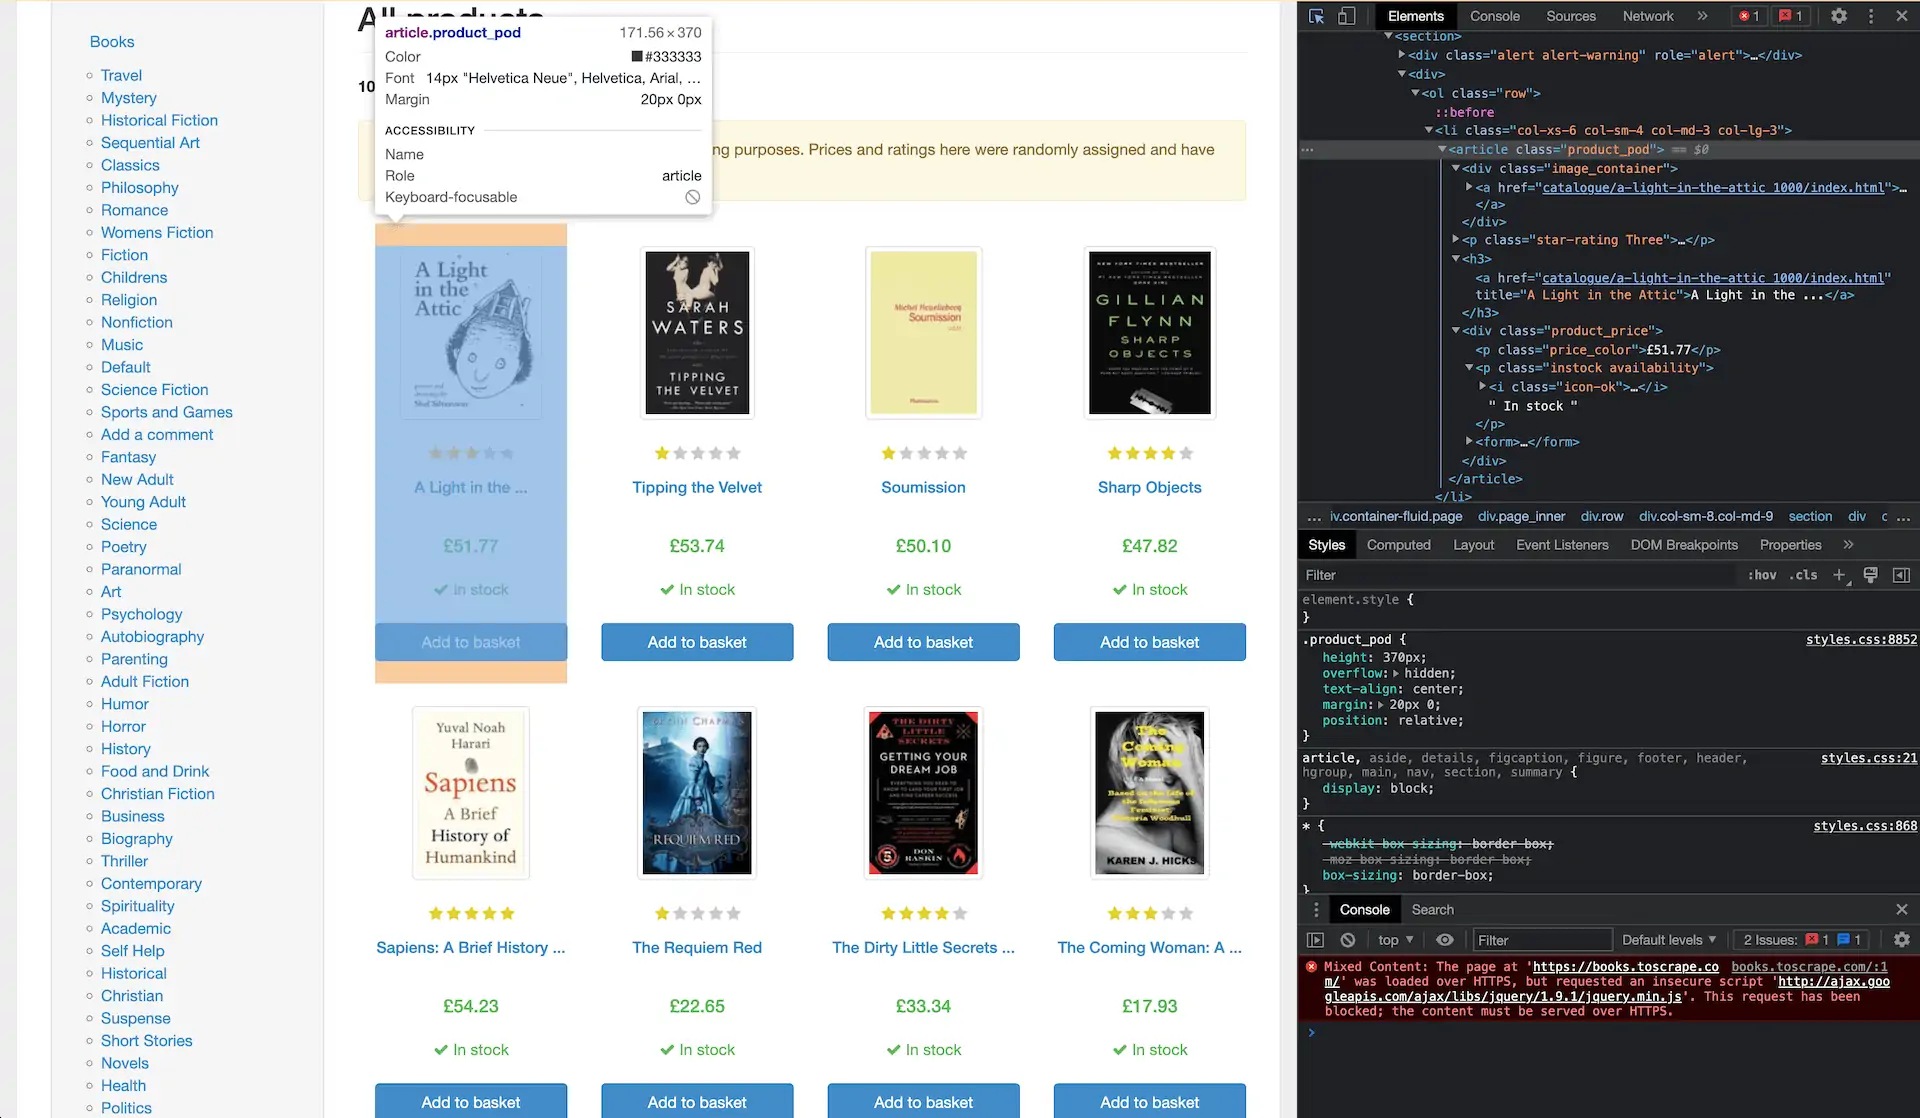
Step 2. Now, we need to figure out where the data points are located. Let’s scrape four elements: the book title, price, rating, and availability. Right-click anywhere on the page and press Inspect. You can see that they’re all under a class called product_pod:
Step 3. We can extract the whole class:
$('.product_pod').map((i, element) => {

But the data you get will be messy, so let’s be more specific.
1) Extract the book title by finding the H3 tag within the element.
const book_title = $(element).find('h3').text()
2) Then, extract the book price by getting rid of the pound sign.
const book_price = $(element).find('.price_color').text().replace('£', '')
3) Now, get the book rating from the p tag with the classes star rating and Num (the book’s rating). This part is a bit more complicated because the rating is in the name that includes two words, and we only need one.
So, you first need to find the element with that class and get the value of the class attribute, which returns the string. It’s possible to split this string into a list of words using spaces as separators and grab the second word.
					const book_rating = $(element).find('p.star-rating').attr("class")
.split(' ')[1]
4) Extract book stock information by finding the element by the instock class and trim unnecessary whitespaces.
const book_stock = $(element).find('.instock').text().trim()
5) Get the book URL by finding the a tag within the product_pod element and getting its href attribute which you’ll need to append to the start_url.
const book_url = start_url + $(element).find('a').attr("href")
Step 4. Now, let’s append our data points to the list:
					books_list.push({
    "title": book_title,
    "price": book_price,
    "rating": book_rating,
    "stock": book_stock,
    "url": book_url
})
Step 5. End the iteration.
					})
    //console.log(books)
}
Saving the Output to a CSV File
Step 1. Now, let’s structure all our data by writing it to a CSV file.
function write_to_csv(){
Step 2. Get the keys from the books object, this will become the first line of the csv file
var csv = Object.keys(books_list[0]).join(', ') + '\n'
Step 3. Iterate through each book dictionary element.
books_list.forEach(function(book) {
Step 4. Add a new line to the csv variable with the line break at the end.
					csv += `"${book['title']}", ${book['price']}, ${book['rating']}, ${book['stock']}, ${book['url']},\n`
})
//console.log(csv)
Step 5. Write the output to a CSV file.
					fs.writeFile('output.csv', csv, (err) => {
        if (err)
            console.log(err)
        else {
            console.log("Output written successfully")
        }
    })
}
Step 6. Then, pass the URL to the scrape function and tell Node.js for it to be awaited so that all of the scrapes finish before we move on to writing the output.
await scrape(start_url)
Step 7. Call the function to write the output.
write_to_csv()

Here’s the full code:
					import axios from 'axios'
import { load } from 'cheerio'

// For writing into the output file
import fs from 'fs'

const start_url = "http://books.toscrape.com/"

const books_list = []

    // Requesting the page with the help of Axios and waiting for the response
    let resp = await axios.get(url)
    let resp_html = resp.data
    // Loading the html into Cheerio. $ - Cheerio object
    const $ = load(resp_html)
    // Passing the Cheerio instance to the parse() function
    parse($)

    try {
        // Try finding the  next page selector and
        // extract the href attribute for scraping the next page
        let next_href = $('.next > a').attr("href")
        // In case the '/catalogue/' part of the URL is not found within
        // the href attribute value, add it to the href
        if (!next_href.includes('catalogue')){
            next_href = `catalogue/${next_href}`
        }
        // Formatting the absolute URL of the next page we are going to scrape
        let next_url = start_url + next_href
        console.log('Scrape: ' + next_url)
        // Calling the scrape() function again and passing it the URL
        await scrape(next_url)

    } catch {
        // Next page selector not found, end job
        return
    }

}

// Function for parsing the html of the page.
function parse($){
    // The selector for each distinct book element on the page is an article
    // tag with the class of "product_pod". This line finds all such elements
    // and begins iterating through them.
    $('.product_pod').map((i, element) => {
        // To get the title, we find the h3 tag within the element and
        // extract its text.
        const book_title = $(element).find('h3').text()
        // Price is also simple, we just get rid of the pound sign
        const book_price = $(element).find('.price_color').text().replace('£', '')
        // The book ratings are easily scraped from the p tag with the classes
        // "star rating" and "Num" where "Num" is the rating the book has
        // received. To extract the rating, we first find the element with that
        // class, get the value of the "class" attribute which returns a string:
        // e.g. "star-rating One", split that string by whitespaces and assign
        // the second element of the resulting list to our variable.
        const book_rating = $(element).find('p.star-rating').attr("class")
            .split(' ')[1]
        // Simply finding the element by the "instock" class, extracting the
        // text and trimming the resulting string to strip away unnecessary
        // whitespaces.
        const book_stock = $(element).find('.instock').text().trim()
        // To extract the url of the book, we find the a tag within the
        // product_pod element and get its "href" attribute which we append to
        // the start_url
        const book_url = start_url + $(element).find('a').attr("href")
        // Appending the results dictionary to the books_list
        books_list.push({
            "title": book_title,
            "price": book_price,
            "rating": book_rating,
            "stock": book_stock,
            "url": book_url
        })
    })
    //console.log(books)
}

function write_to_csv(){
    // Getting the keys from the books object, this will become the first line of the csv file
    var csv = Object.keys(books_list[0]).join(', ') + '\n'
    // Iterating through each book dictionary element
    books_list.forEach(function(book) {
        // Adding a new line to the csv variable with the line break at the end
        csv += `"${book['title']}", ${book['price']}, ${book['rating']}, ${book['stock']}, ${book['url']},\n`
    })
    //console.log(csv)
    // Writing the output to a output.csv file
    fs.writeFile('output.csv', csv, (err) => {
        if (err)
            console.log(err)
        else {
            console.log("Output written successfully")
        }
    })
}

// Script starts here, we pass the URL we are going to start our scrape on to
// the scrape function and tell node for it to be awaited so that all of the
// scrapes finish before we move on to writing the output
await scrape(start_url)
// Calling the function to write the output
write_to_csv()
Web Scraping Dynamic Pages Using Node.js and Puppeteer
If you want to scrape dynamic pages, we have also prepared a step-by-step tutorial using a headless Node.js browser library, Puppeteer. The guide will walk you through extracting data from quotes.toscrape.com., specifically the text, quote, author, and tag data points. We’ll also show you how to deal with delayed rendering, and where to integrate proxies in your script.
This is a step-by-step guide to web scraping using the Node.js library Puppeteer.
