How to Use Proxy SwitchyOmega on Chrome
Learn how to switch between proxies in just a few clicks.

Since March 2025, Proxy SwitchyOmega cannot be added to Chrome anymore.
It’s not that hard to set up a proxy in your browser. However, if you tried it, you know that it takes quite a few clicks to get a job done. In case you haven’t, you might want to take a look at this tutorial to know what we’re talking about. Now, just think about what it would be like going back and forth between these settings to set up several different proxies, one after another.
Sounds a bit tedious, doesn’t it? To save you the hassle, you could use a proxy management tool.
What Is SwitchyOmega?
SwitchyOmega is a browser extension that works as a proxy management tool. Think of it as a simple and easy-to-use version of the proxy settings dialog. With this extension, you don’t have to rummage through the advanced settings of your browser to configure proxies anymore. Instead, you’ll be making use of a convenient UI that allows you to set up and disable proxies in just a few clicks.
SwitchyOmega was created for the Google Chrome browser, but there’s also a version for Firefox.
However, since SwitchyOmega is not available for download on either Google or Firefox, we suggest opting for other proxy management tools, like FoxyProxy. The extension should still work for you if you have the it installed already.
Learn to control proxies on your browser the easy way.
Can SwitchyOmega Provide Anonymity While Browsing Online?
The main purpose of this extension is to configure your browser. So, if you expect that SwitchyOmega will help you access geo-restricted content or provide anonymity and privacy by itself – it won’t happen. That is, unless you power it up with proxies. If you don’t know where to get them, don’t worry, we got you covered. Scroll through our providers’ lists to figure out which proxy provider will work best for your needs.
Why Should You Use a Proxy Management Extension?
There are three main benefits of using proxy management extensions:
- Convenience. It takes 5 steps to turn on the proxy server and 6 steps to disable it on Chrome. If you have to switch between proxies a lot it only makes sense to automate the process. Once you set up your proxies, you can navigate them with just a few clicks. Quick and easy.
- Ability to use proxies on a browser-level. When you set up a proxy server on Chrome, it runs on an operating system level. The tools allow you to run proxies only on your browser without affecting global settings. Furthermore, you can set up separate proxies for different URLs and have them run automatically each time you visit the website.
- They’re (usually) free. That’s right. Proxy management tools are powerful and trustworthy at no cost to you. Just load your proxies into it and you’re ready to go.
How to Use SwitchyOmega?
This setup and usage guide will only work if you already have SwitchyOmega installed.
Step 1. To begin with, you’ll need to already have the extension installed. If you don’t, we suggest trying FoxyProxy.
If you have the extension installed, the proxy setup process is very similar for both Chrome and Firefox, that’s why we will be referring to the Chrome browser in this tutorial.
Step 2. Find the extension icon in the extension bar on the top right corner. Click on it and choose options.
![How to use switchyomega screenshot, [System Proxy] highlighted](https://proxyway.com/wp-content/uploads/2021/03/how-to-use-switchyomega-image1.png)
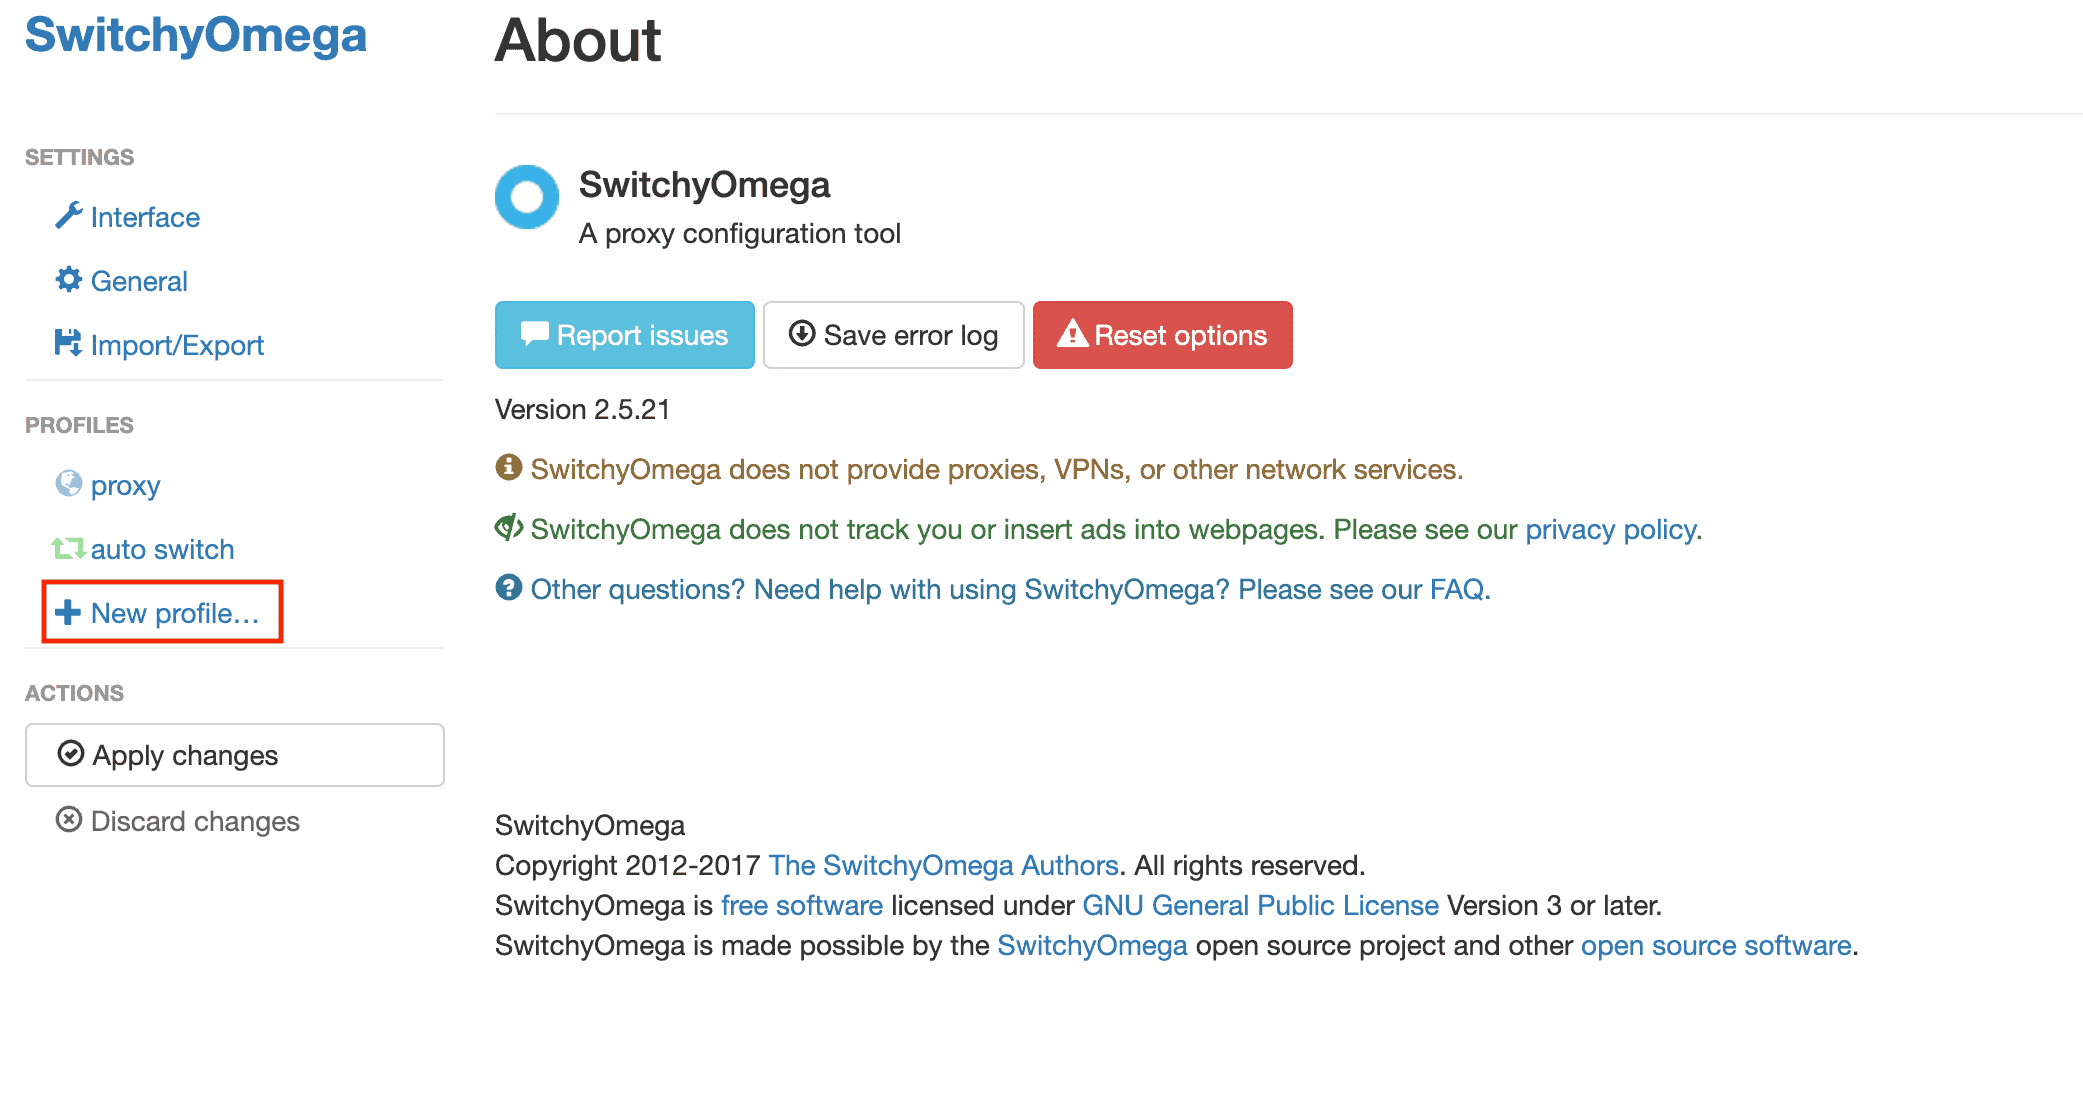
Step 3. Go ahead and navigate to the Profiles tab and click on New profile.
Here you’ll be asked to enter a Profile name and choose the specific type of the profile. For most purposes, you probably will be using either a Proxy Profile or a Switch Profile. The first one will allow you to tunnel traffic through proxy servers. The other one will allow you to automatically switch between proxies based on various conditions you created.
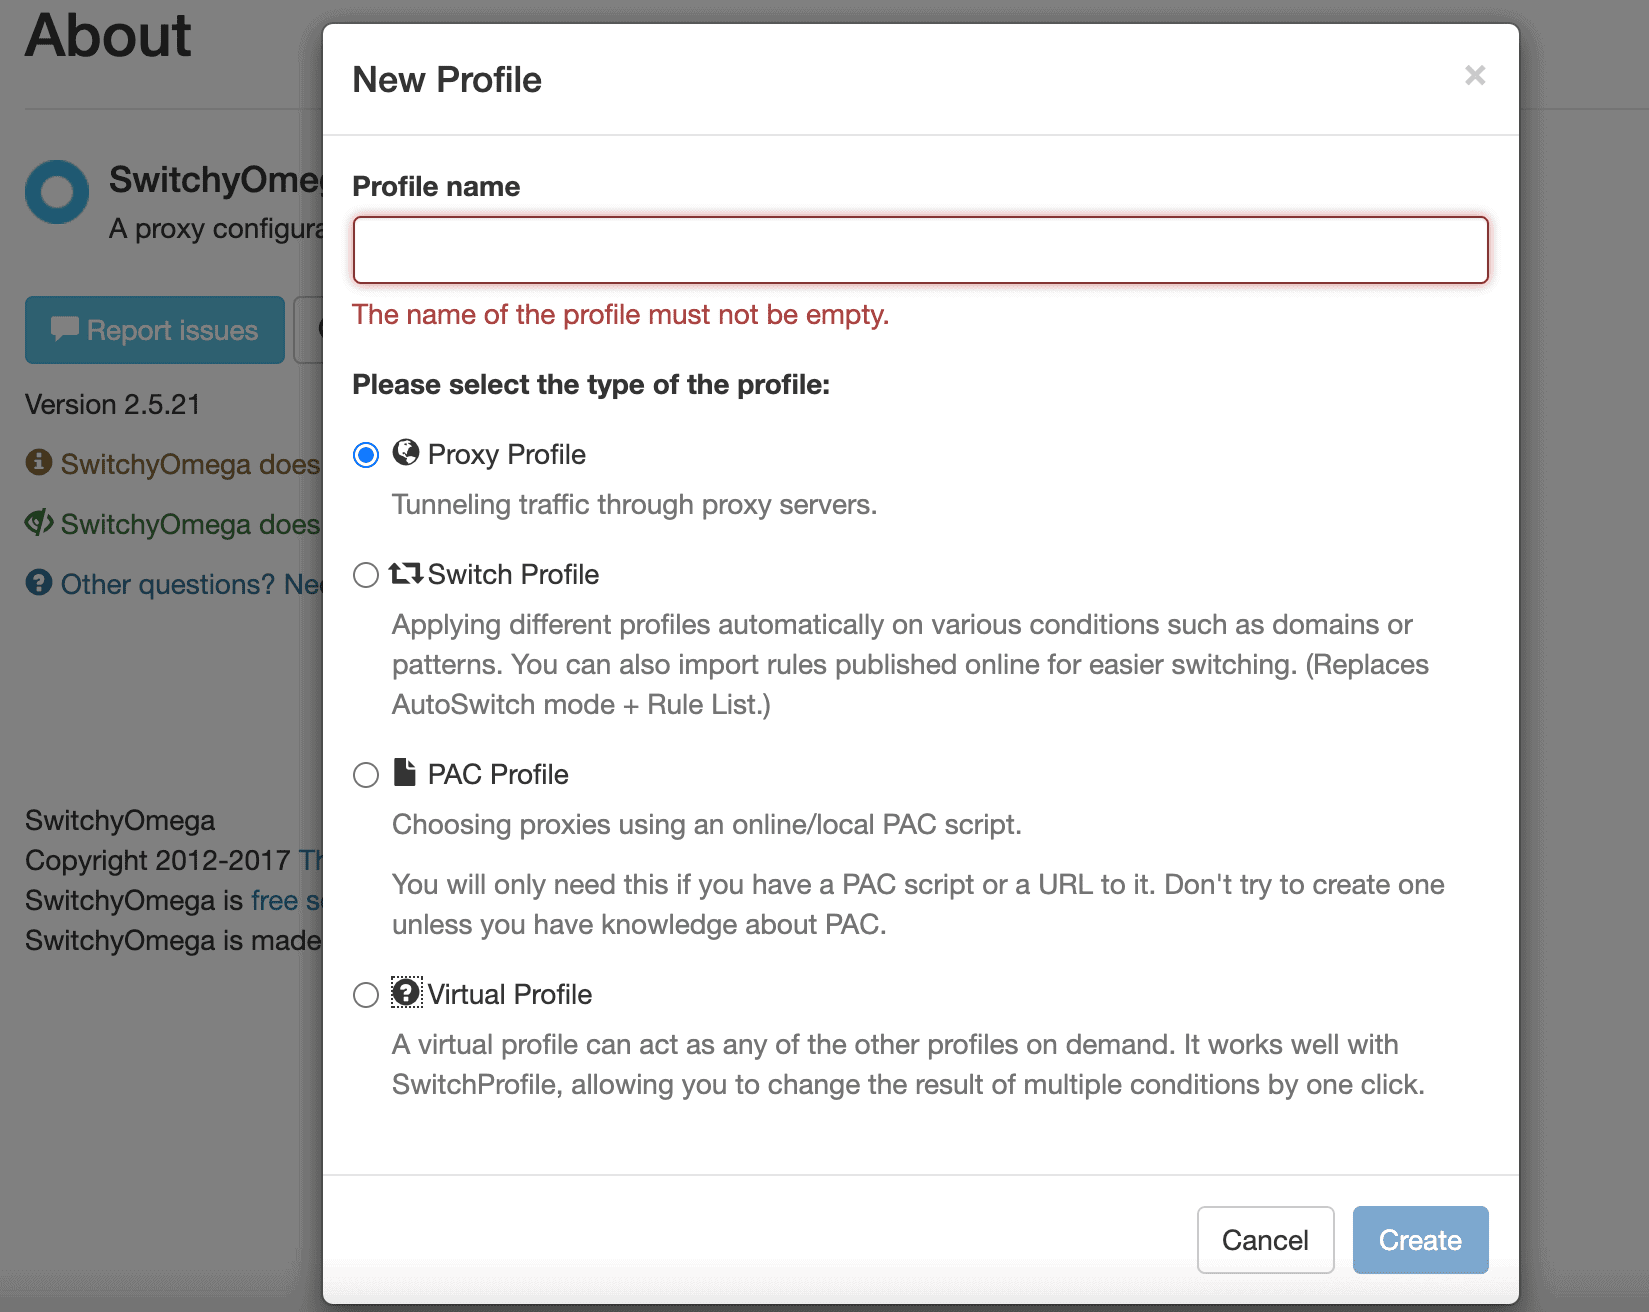
First, Let’s Create a Proxy Profile
Step 4. From the drop-down box under the Protocol and pick an option according to what protocol you’ll be using. The most common option is HTTPS. Then enter your Server’s IP address or DNS hostname and Port.
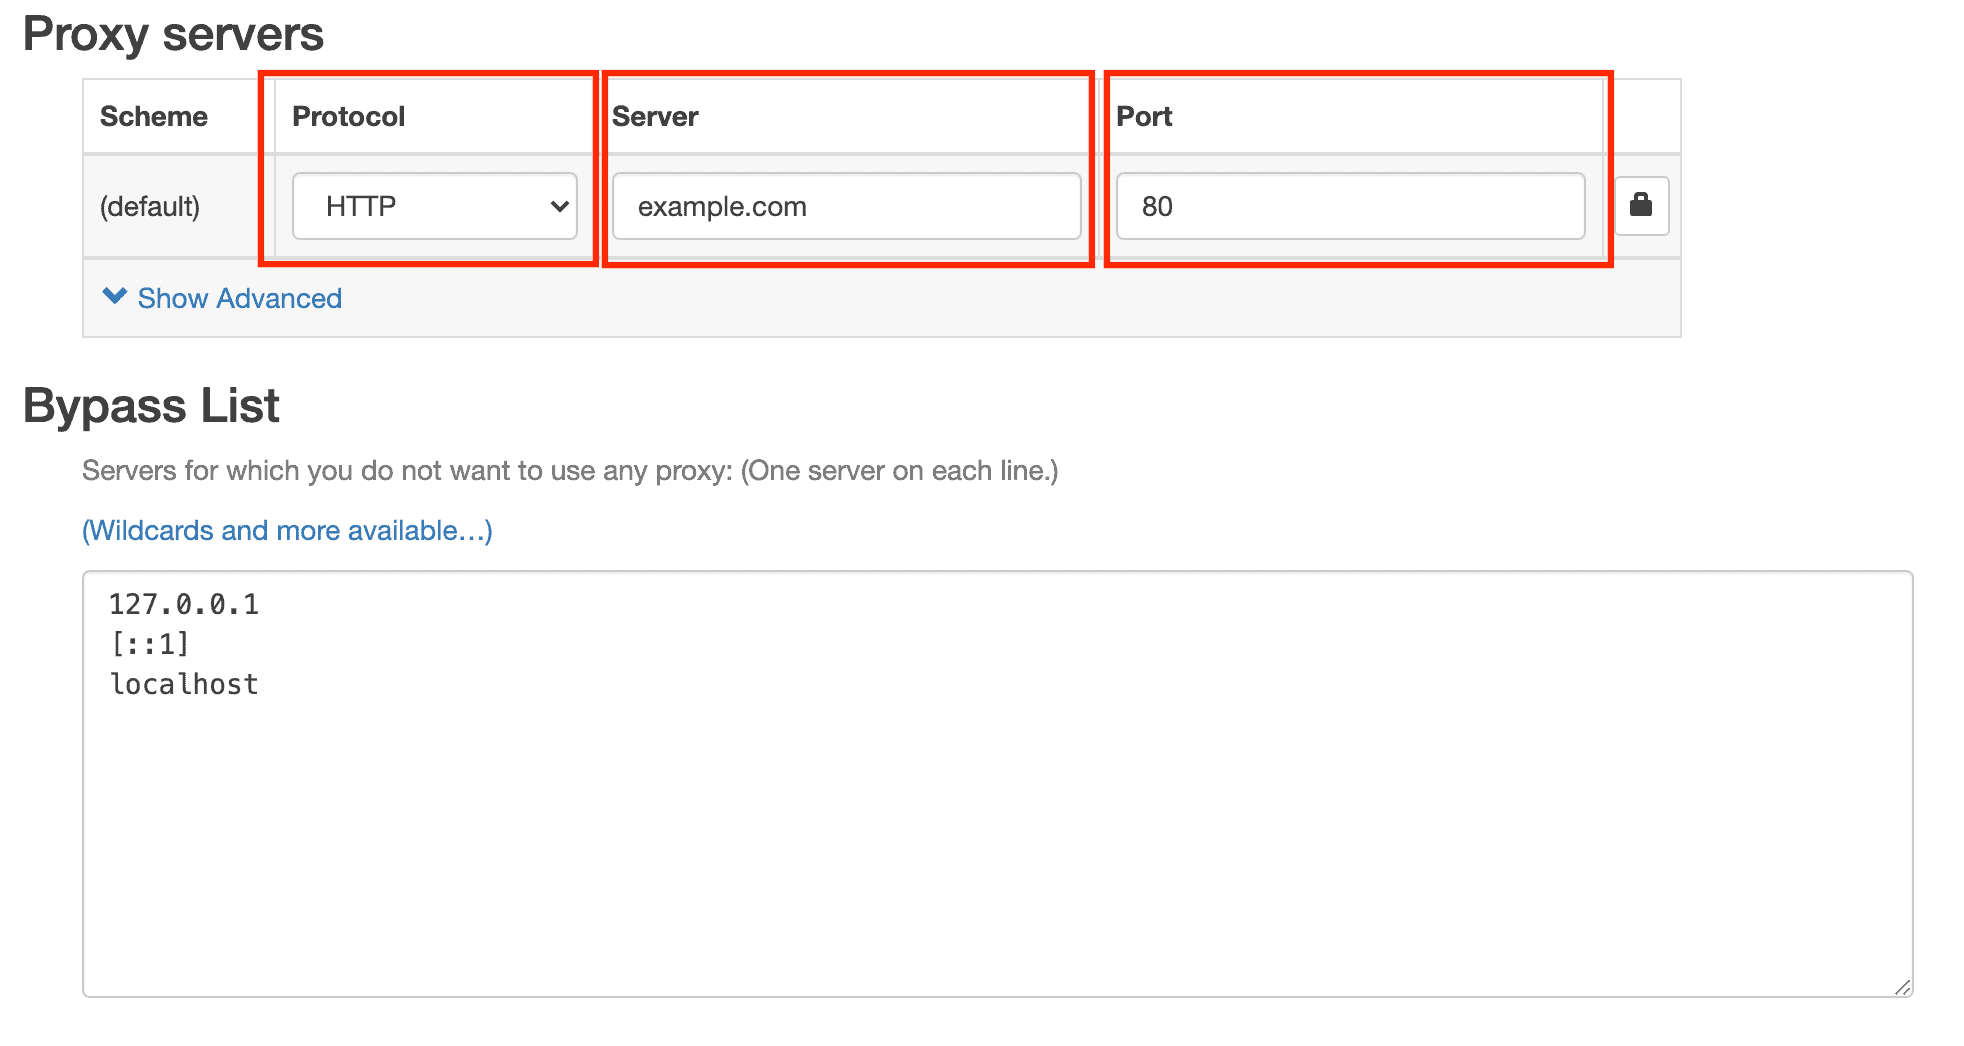
Step 5 (optional). If you’re authenticating via a username and password, click the lock icon and enter your credentials. You don’t need to do this if you have whitelisted your IP address.

Step 6. Once you’re done, click on Apply changes.
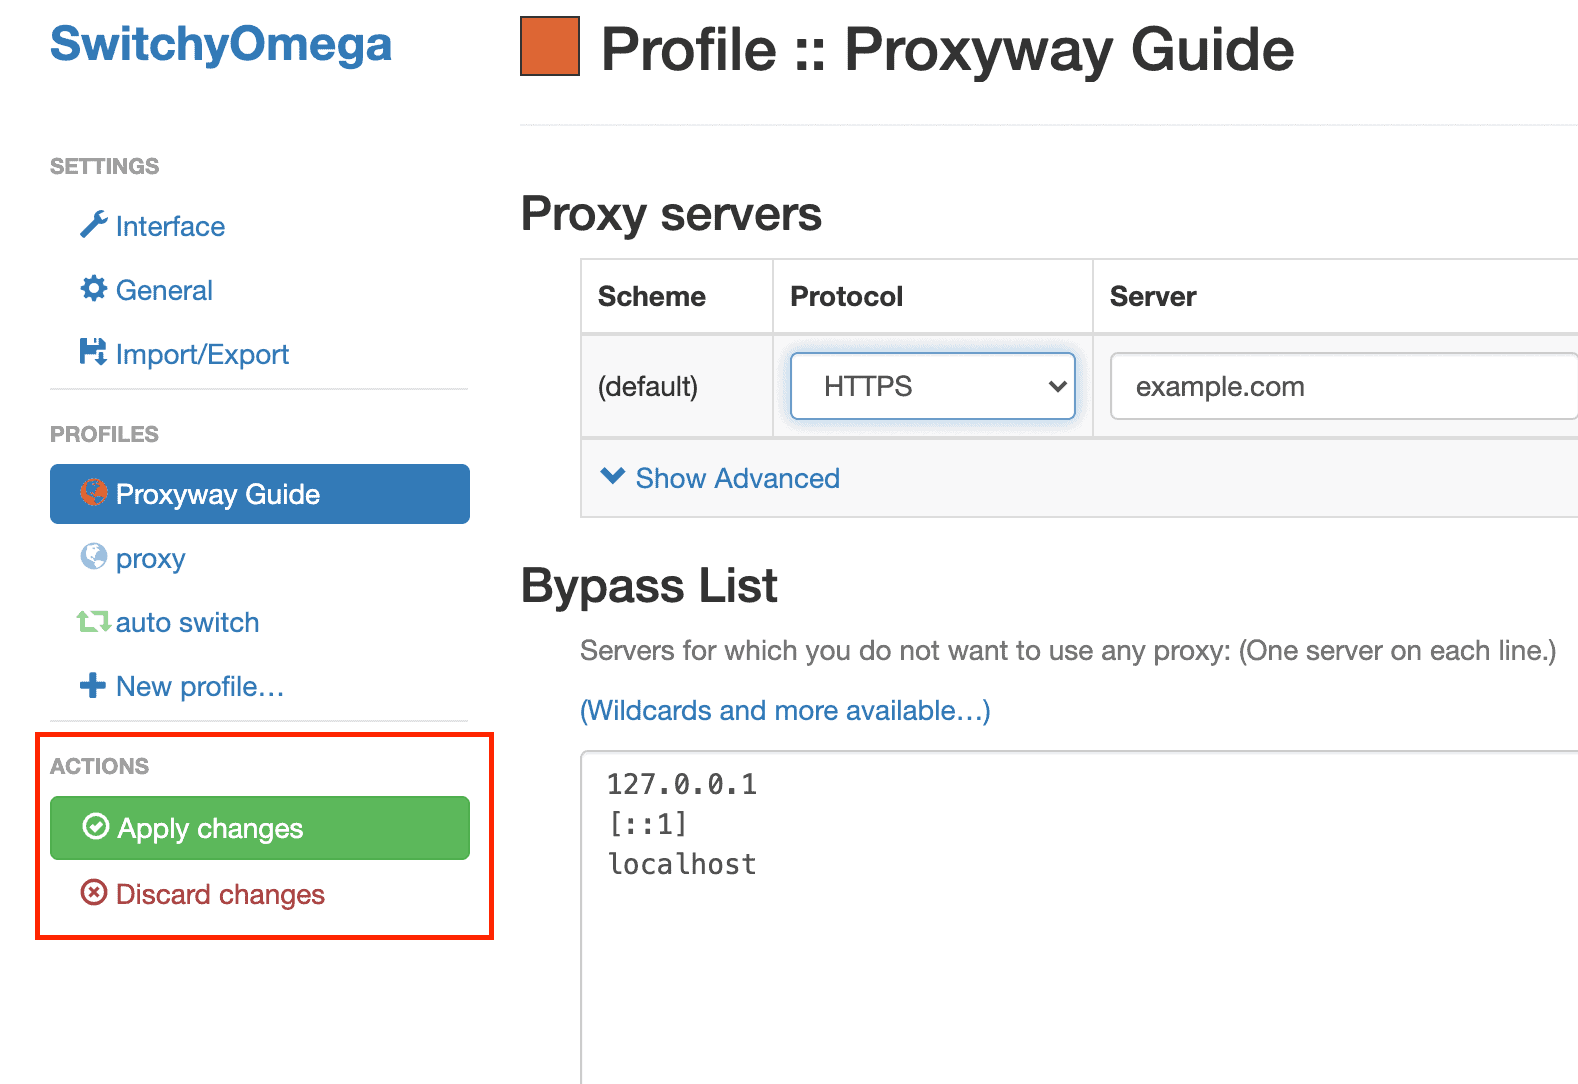
That’s it! You’ve created a profile that should appear on the left bar.
Creating an Auto Switch Profile
If you have your proxy profile ready, now you can create a Switch Profile.
Step 1. To create a Switch Profile, click on the New profile from the left bar.

Step 2. Now, name your profile to distinguish it from others and choose the Switch Profile type.
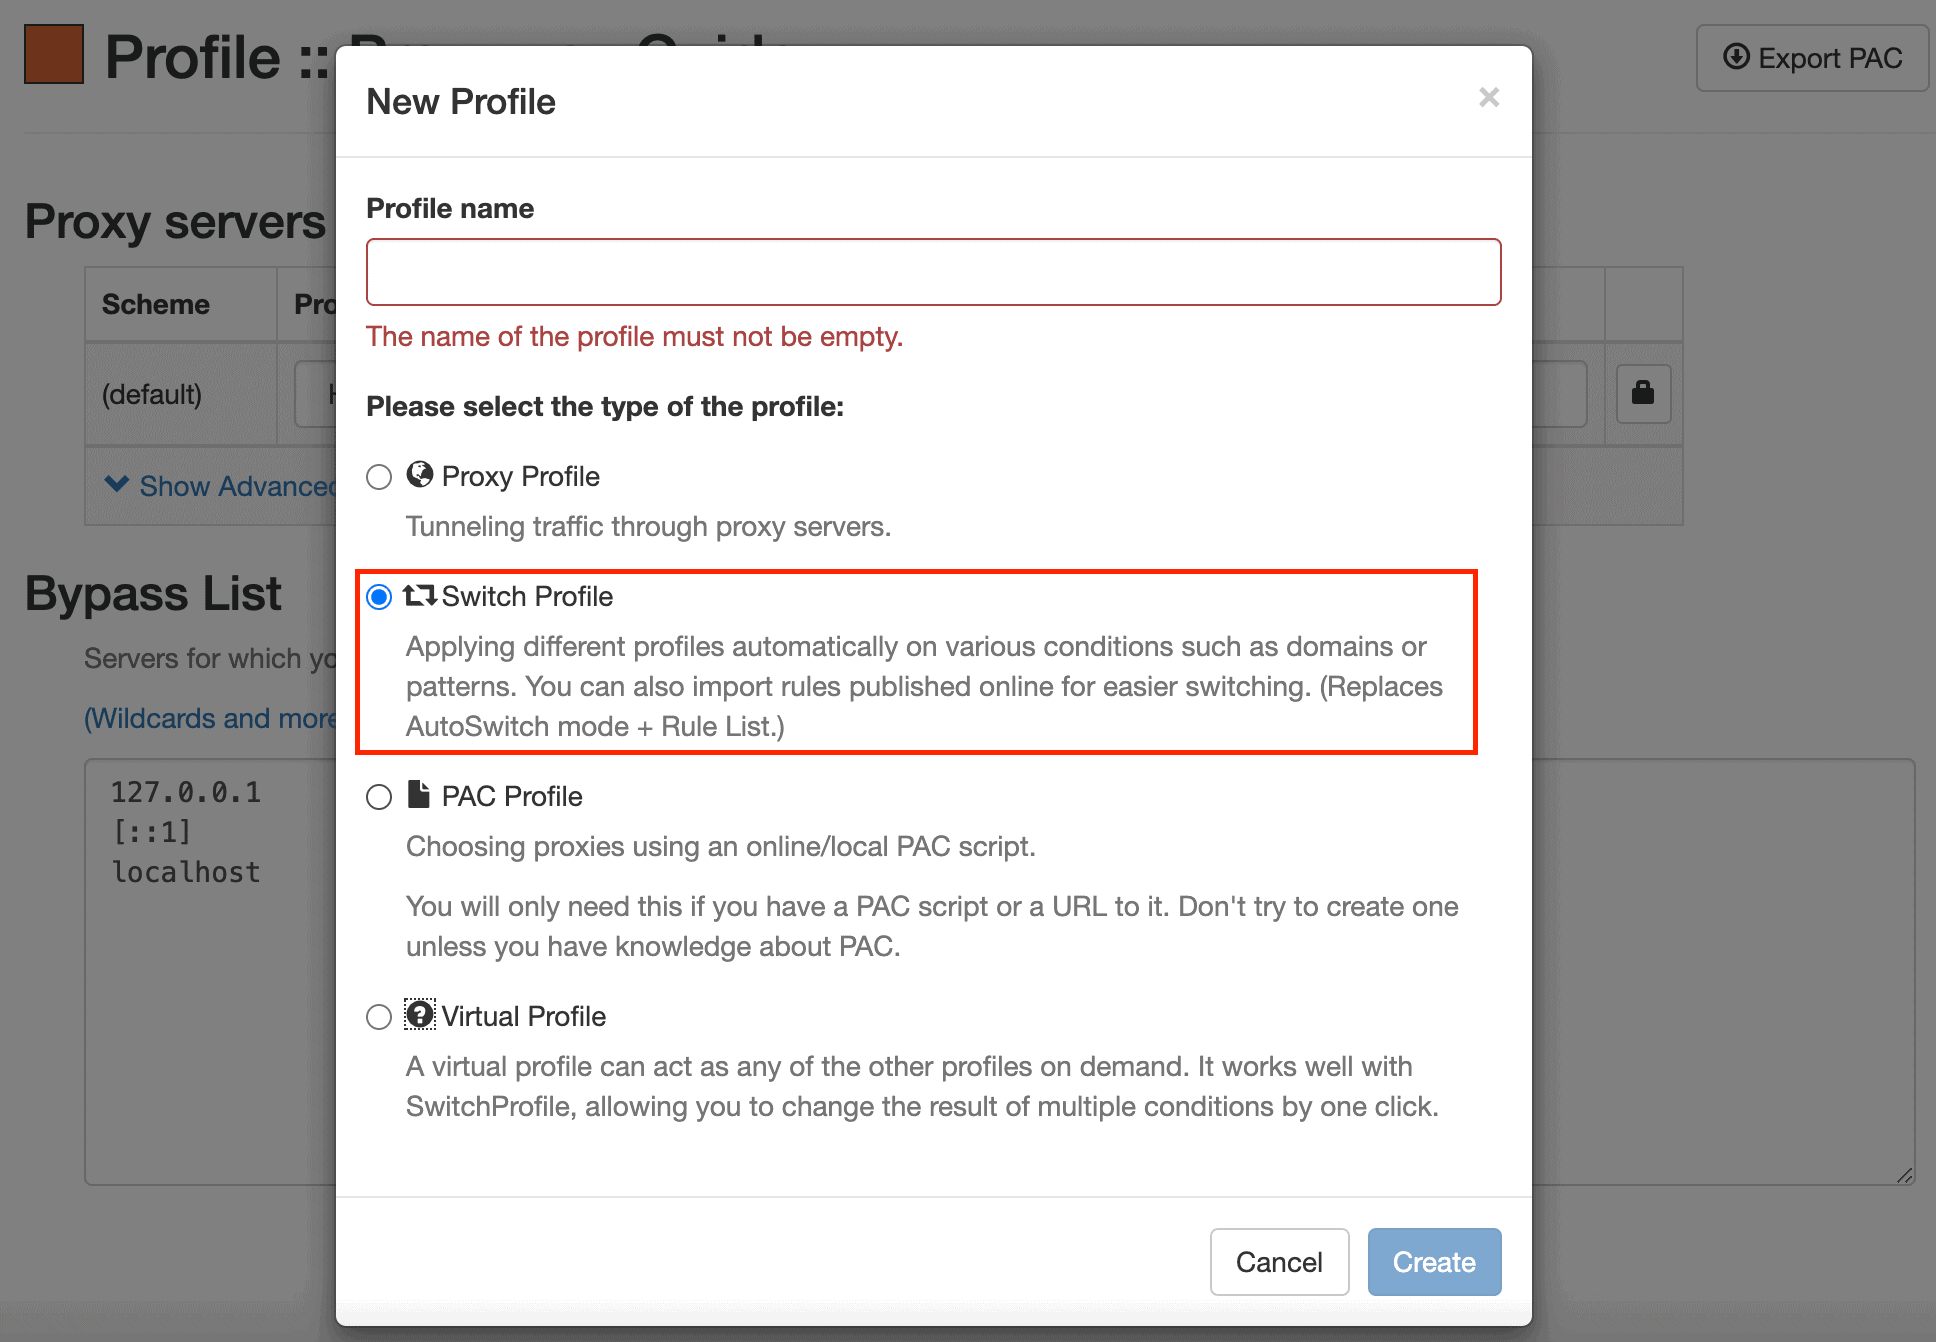
To set up this profile, you first have to understand how condition types work. If you are already familiar with them, just skip to Step 3.
Host Wildcard
This condition will allow you to match SwitchyOmega with all URLs in a domain.
If you’re unfamiliar with wildcards, here’s a simple explanation. A wildcard is a symbol used to replace or represent one or more characters. Symbols you’ll be using in this extension are * and ?.
The asterisk * is used to match zero or more characters.
It can work in several ways. For example, if you type in *.proxyway.com it will match both www.proxyway.com and proxyway.com.
If you want to only match subdomains, use two asterisks:
**.proxyway.com
The question mark ? matches exactly one character.
Example: *.proxyway.???*
Possible matches: www.proxyway.com, proxyway.com, www.proxyway.net, and proxyway.net.
URL Wildcard
URL Regex
This condition allows you to match URLs by a regular expression. They may be hard to construct for beginners, so we advise using wildcards instead.
(Disabled)
If you need to temporarily disable a condition, pick (Disabled).
Step 3. Now that you know how the conditions work, you can choose the one you need in the drop-down field under Condition Type.
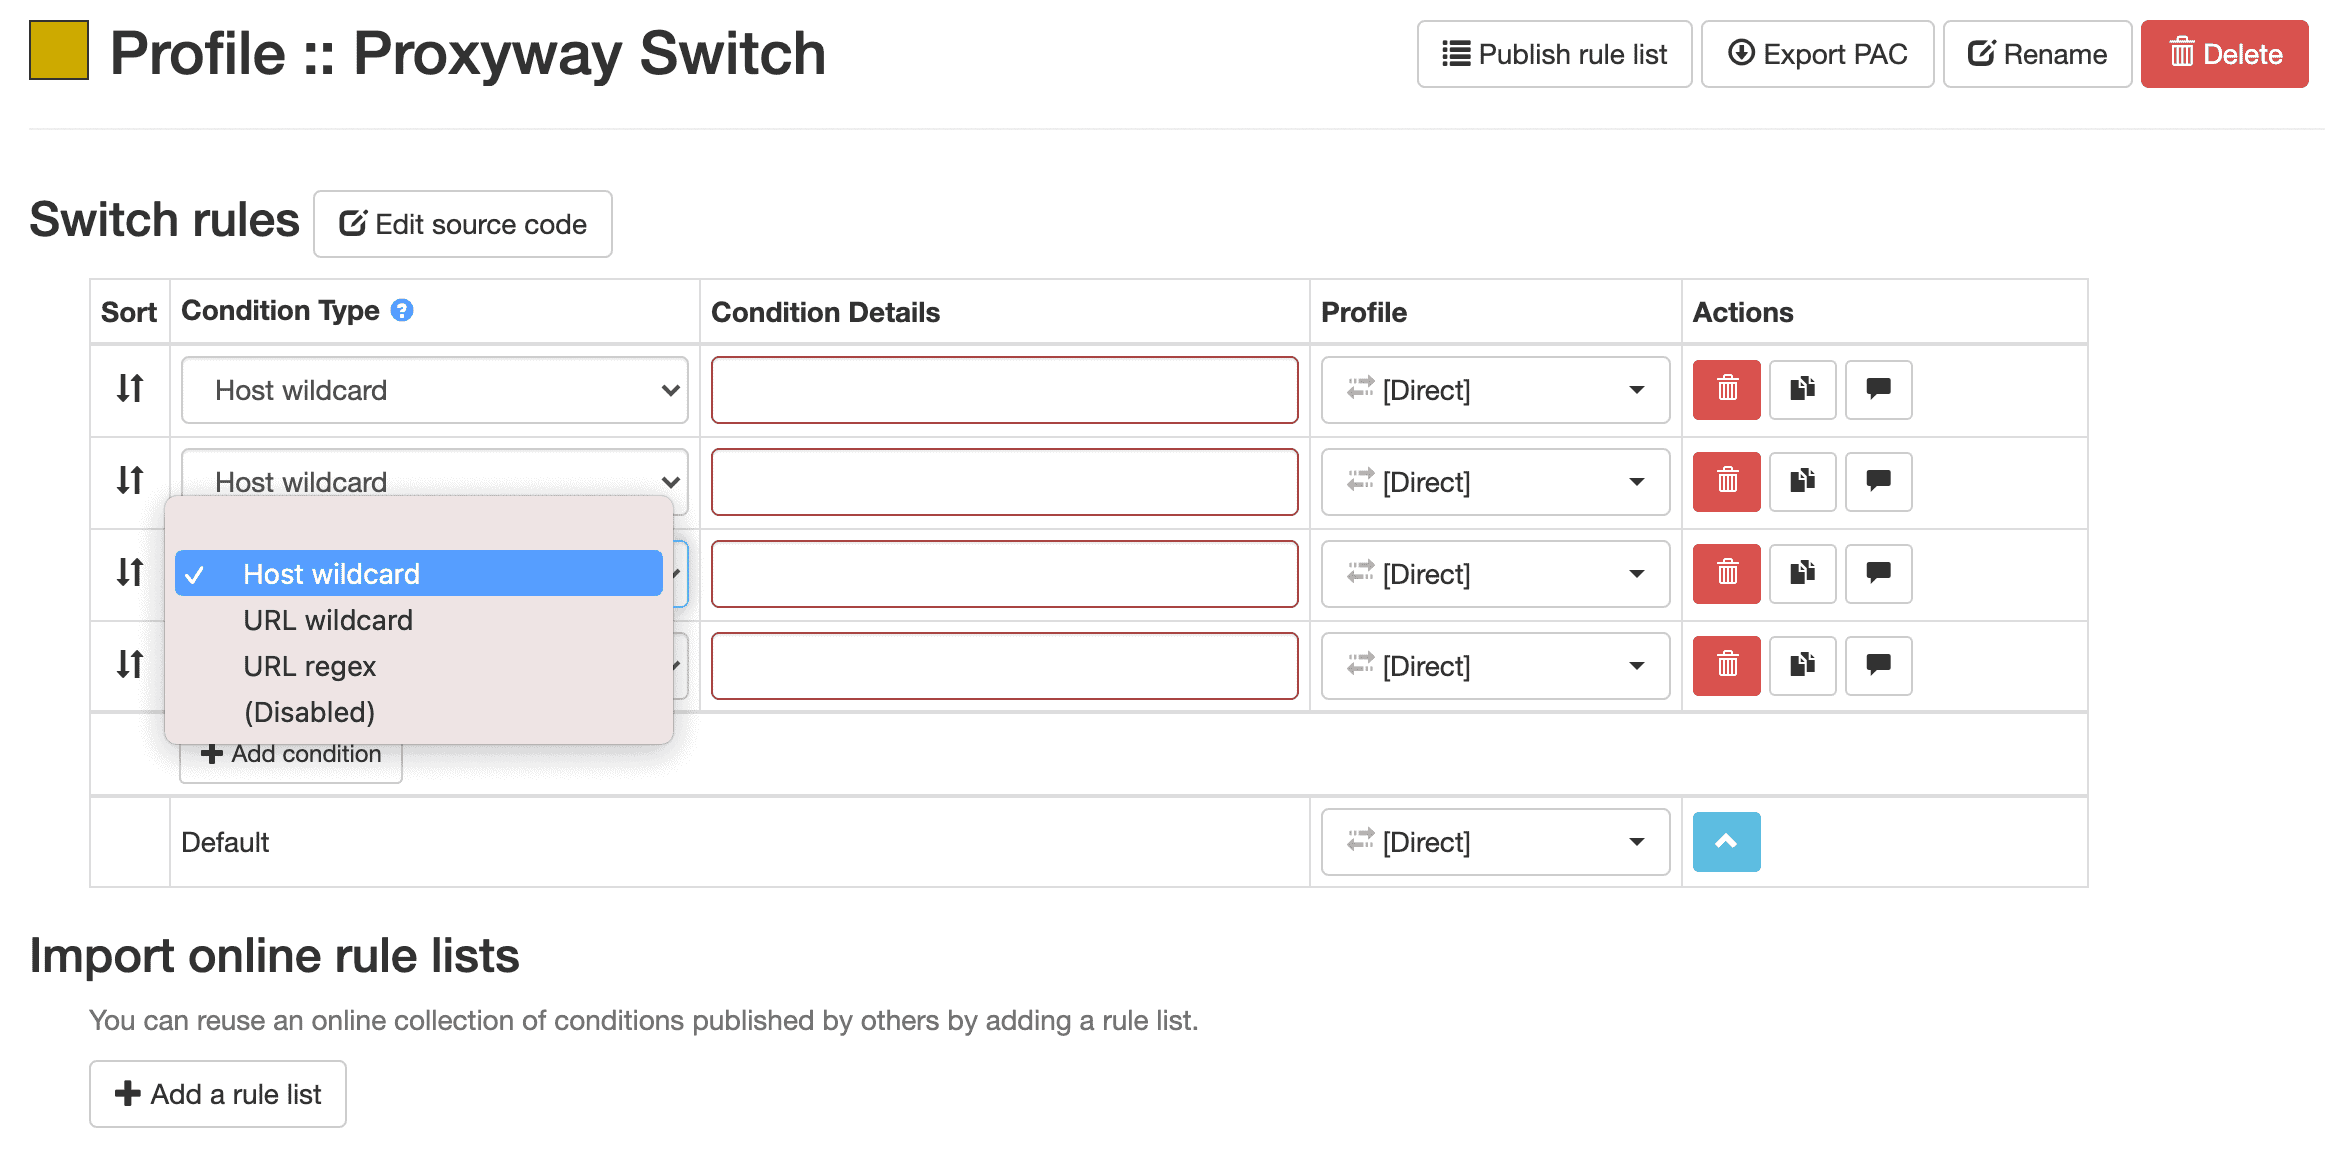
Input the condition information in the Condition Details field.
Step 4. Next, pick the proxy profile you’d like to use with the condition. If you choose Direct, no proxies will be applied to it.
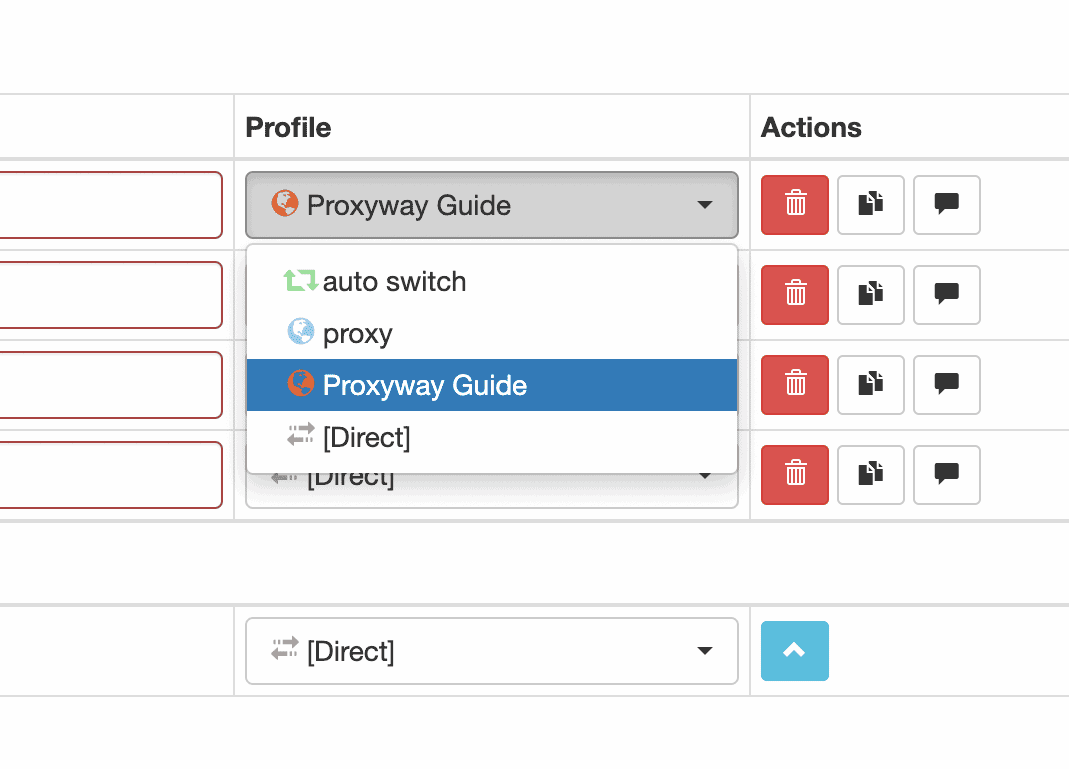
Step 5. Don’t forget to click Apply Changes when you’re done.
Step 6. When you finish setting up your profile, don’t forget to turn it on and see if the proxies are working.
Click on the extension icon: here you’ll see both of your proxy profiles and auto-switch profiles. Click on the one you’d like to activate. Now, check whether your IP address has changed. You can do it by either typing ‘What’s my IP’ to Google, or using any website that provides this function.
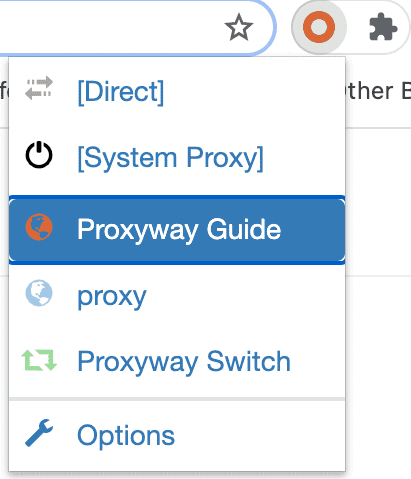
However, if you’re interested in running a deeper test of your proxies’ quality, we wrote a guide to help you get started.
Are There Any Alternatives?
While SwitchyOmega works well with Chrome, it’s not available for use anymore. That’s why we recommend using the FoxyProxy management extension, which works very well with Firefox and Chrome.
However, if you don’t feel like using third-party tools, your best bet is to set up proxies directly on your browser. Although, keep in mind that this process will not be quick and smooth.

Frequently Asked Questions About Using SwitchyOmega
SwitchyOmega is a browser extension for Chrome and Firefox that lets you set up and manage proxy servers on your web browser.
SwitchyOmega was created to configure your browser, so to access geo-restricted content you have to buy proxies and load them through the extension.
Yes, SwitchyOmega is free to use.
Sure, there’s an experimental version of SwitchyOmega for Firefox. However, it hasn’t been updated for quite some time, that’s why we recommend using FoxyProxy.