How to Use FoxyProxy on Chrome and Firefox
Learn to control proxies on your browser the easy way.

This article will help you set up a proxy server on FoxyProxy running in the Chrome or Firefox web browser. It will also briefly walk through the extension’s two versions and their features. Let’s get started!
What Is FoxyProxy?
FoxyProxy is a browser extension for Firefox, Chrome, and all the Chrome-based browsers like Vivaldi, Edge, and Opera. Its purpose is to simplify work with proxy servers on a web browser. FoxyProxy allows creating multiple proxy server profiles, switching between them with one click, and setting up different proxies to work with specific URLs.
The extension itself is free, but it doesn’t come with proxies out of the box. You’ll have to buy access to a proxy server separately: either from FoxyProxy itself or one of the commercial proxy service providers.
Comparing FoxyProxy Basic and Standard Versions
The FoxyProxy extension has two versions: Basic and Standard. You can freely download either of them.
The Basic and Standard versions share most of the same features:
- Proxy profiles
- Quick proxy server switching
- Proxy import
The main difference between them is something called Patterns, which is missing from the Basic version. Instead of enabling proxies for all domains, Patterns allows granular control over the proxy server: you can configure it to blacklist or whitelist specific domains, always or for a single session. Otherwise, the two versions are the same.
How to Use FoxyProxy on Chrome

Step 3. Select Add New Proxy.

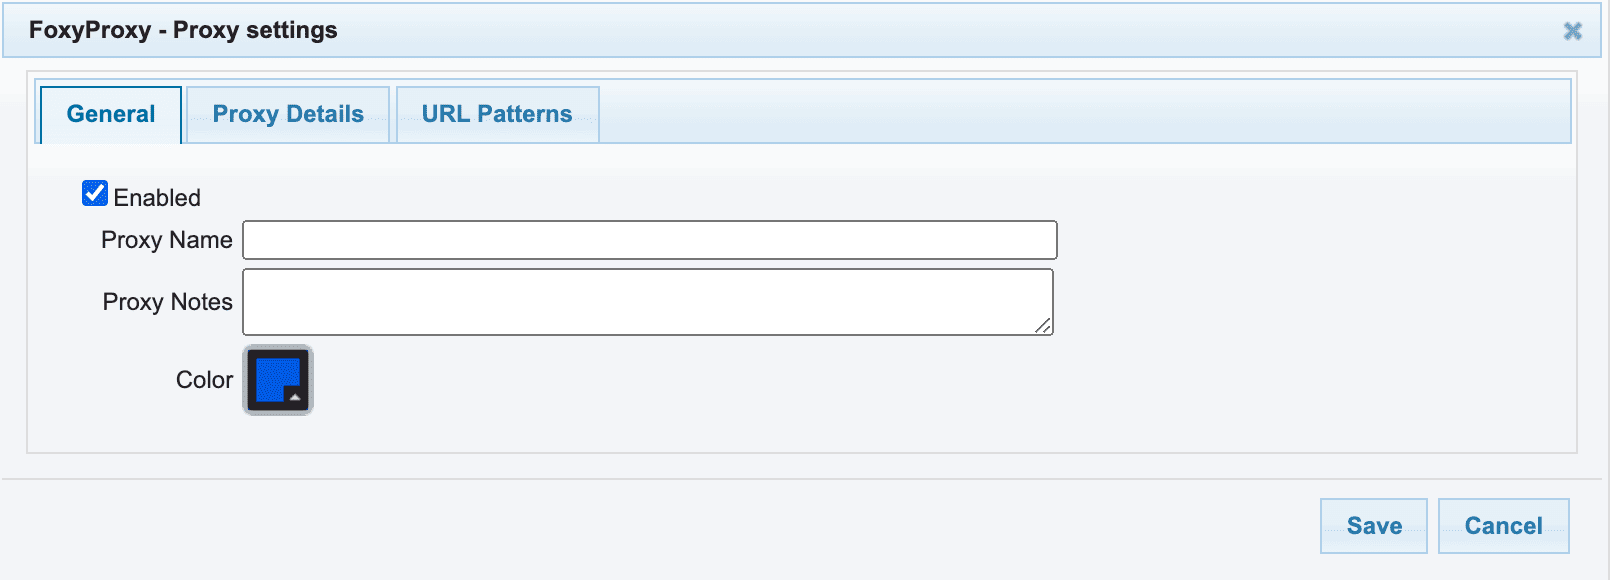
Step 4. In the General tab, enter your proxy profile’s name. It can be any name you like to distinguish this configuration from others.
You can also add notes and assign this profile a color.
Step 5. In the Proxy Details tab, select Manual Proxy Configuration and enter your proxy server’s information.
The Automatic proxy configuration URL comes in handy if you’re on a managed school or work network. It configures the proxy server without you having to do anything. Most commercial proxy providers won’t give you one.
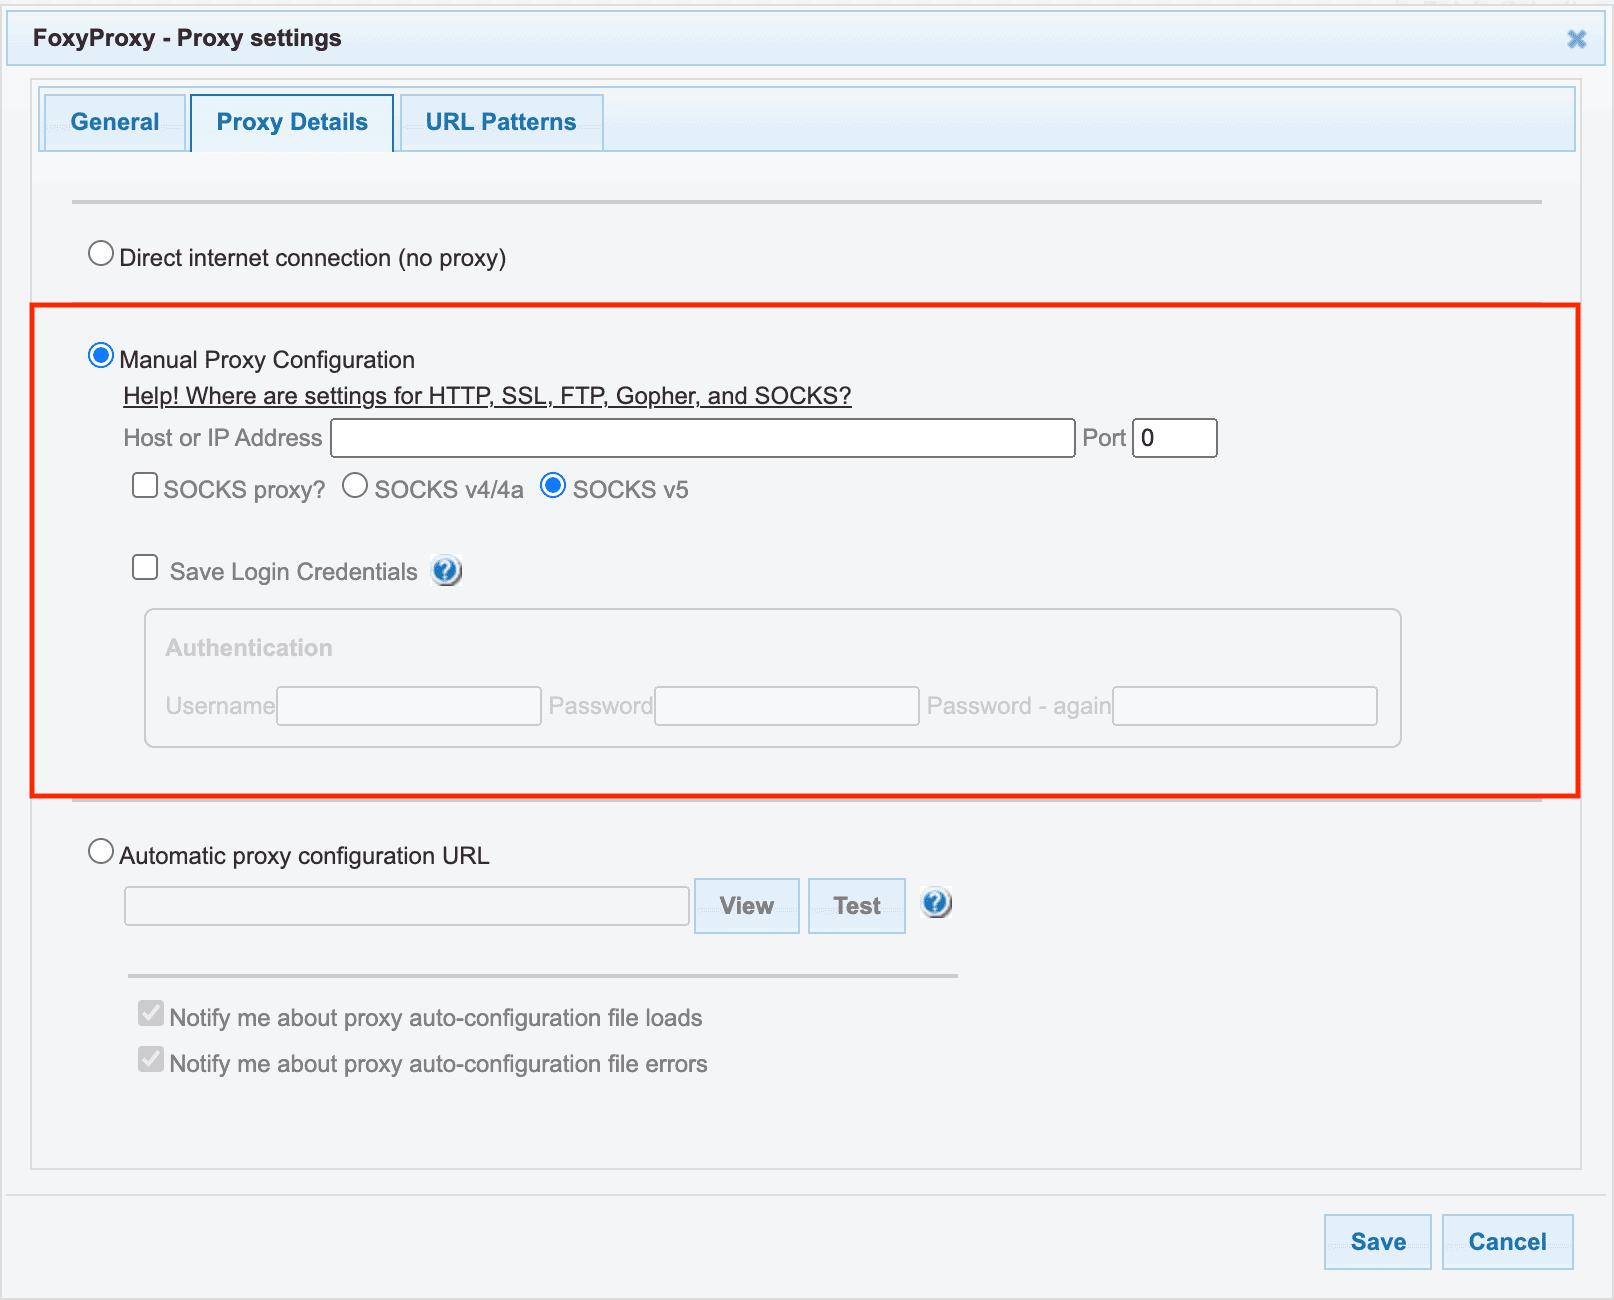
First, fill in the Host or IP Address field. You’ll have a hostname if you use backconnect proxies (these are usually residential or rotating IPs). Otherwise, you can enter a proxy IP address.
- Example of an IP: 127.168.0.1
- Example of a hostname: en.proxyprovider.net
Port asks you to enter the numbers that come after the IP or hostname. They are separated by a colon:
- Example of a port: en.proxyprovider.net:10000
If you’re using SOCKS proxies, tick the tickbox and choose the version of the protocol. Otherwise, you can leave it unticked.
Finally, if you’re authenticating via a username and password, tick the Save Login Credentials box and enter your credentials. You don’t need to do this if you have whitelisted your IP address.
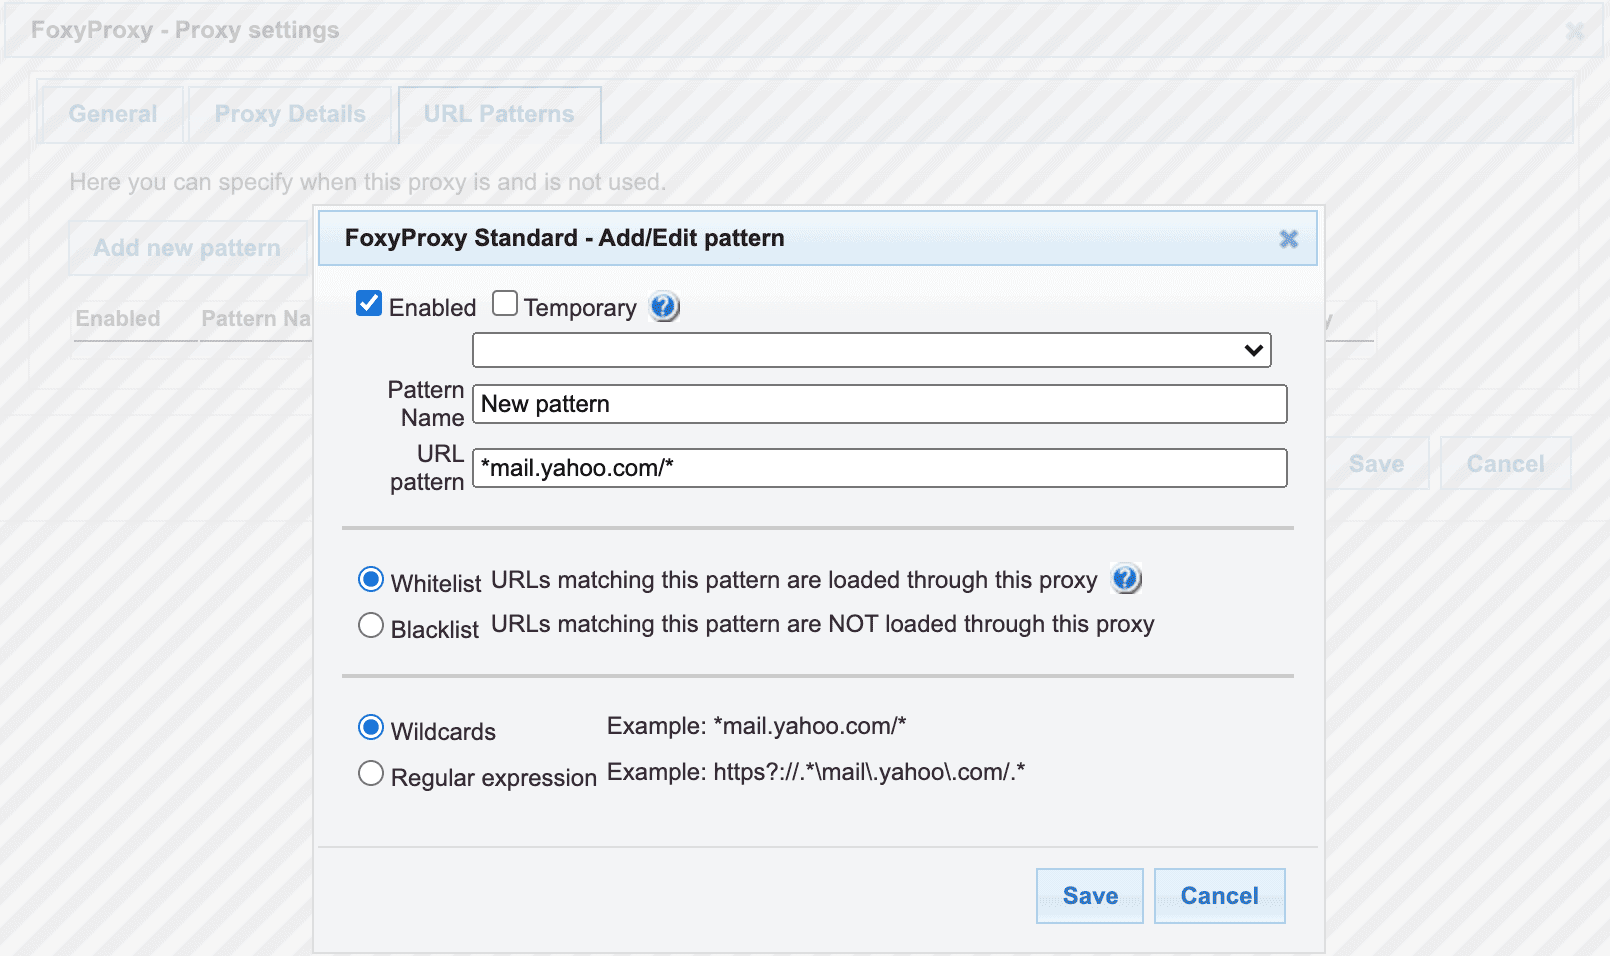
Step 6 (Optional). Set up your URL patterns.
You can do this by opening the URL Patterns tab and selecting Add new pattern. There, enter the pattern’s name and the URL addresses you want to affect.
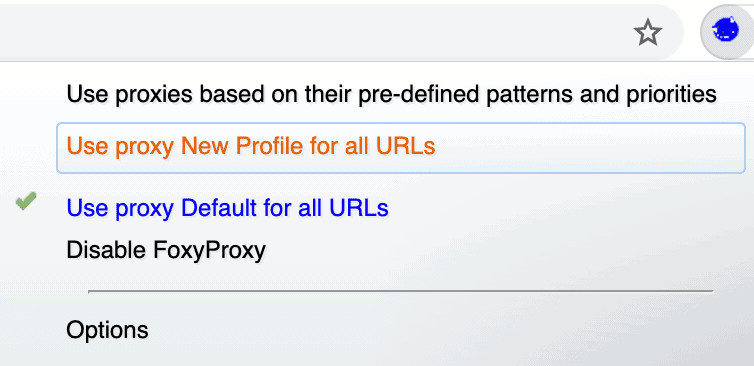
- Use proxy *profile name* for all URLs if you want to enable them for all websites; or
- Use proxies based on their pre-defined patterns and priorities if you’ve configured them to work on particular websites.
How to Use FoxyProxy on Firefox
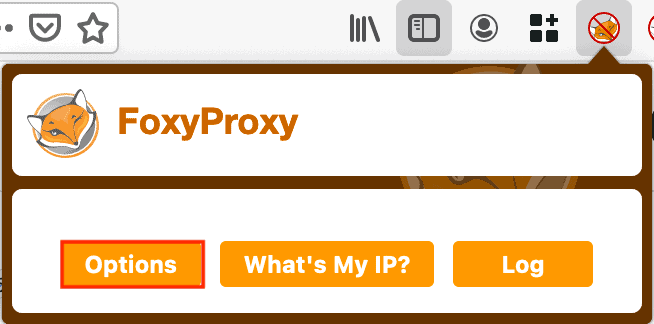
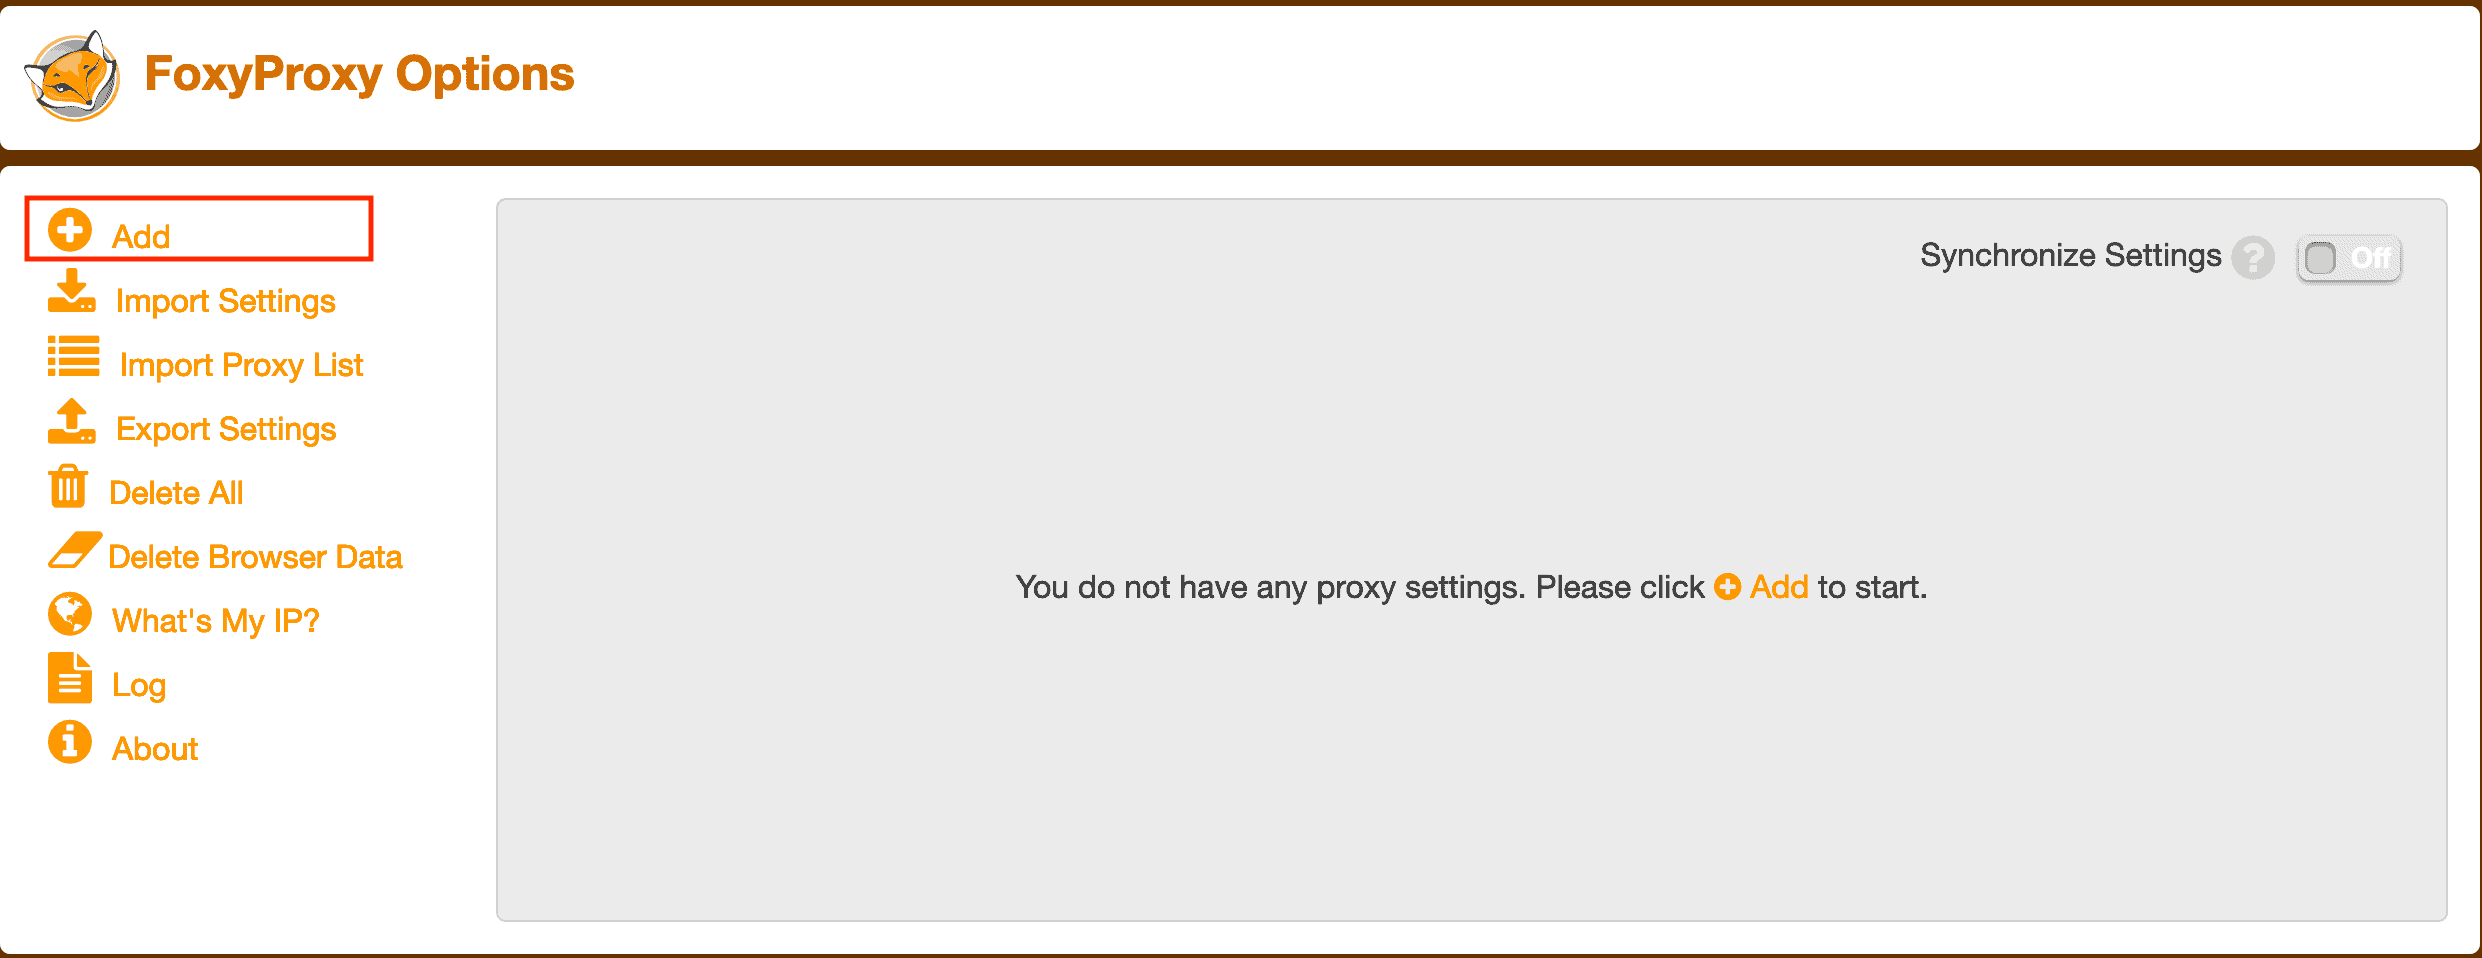
Step 3. Select Add.
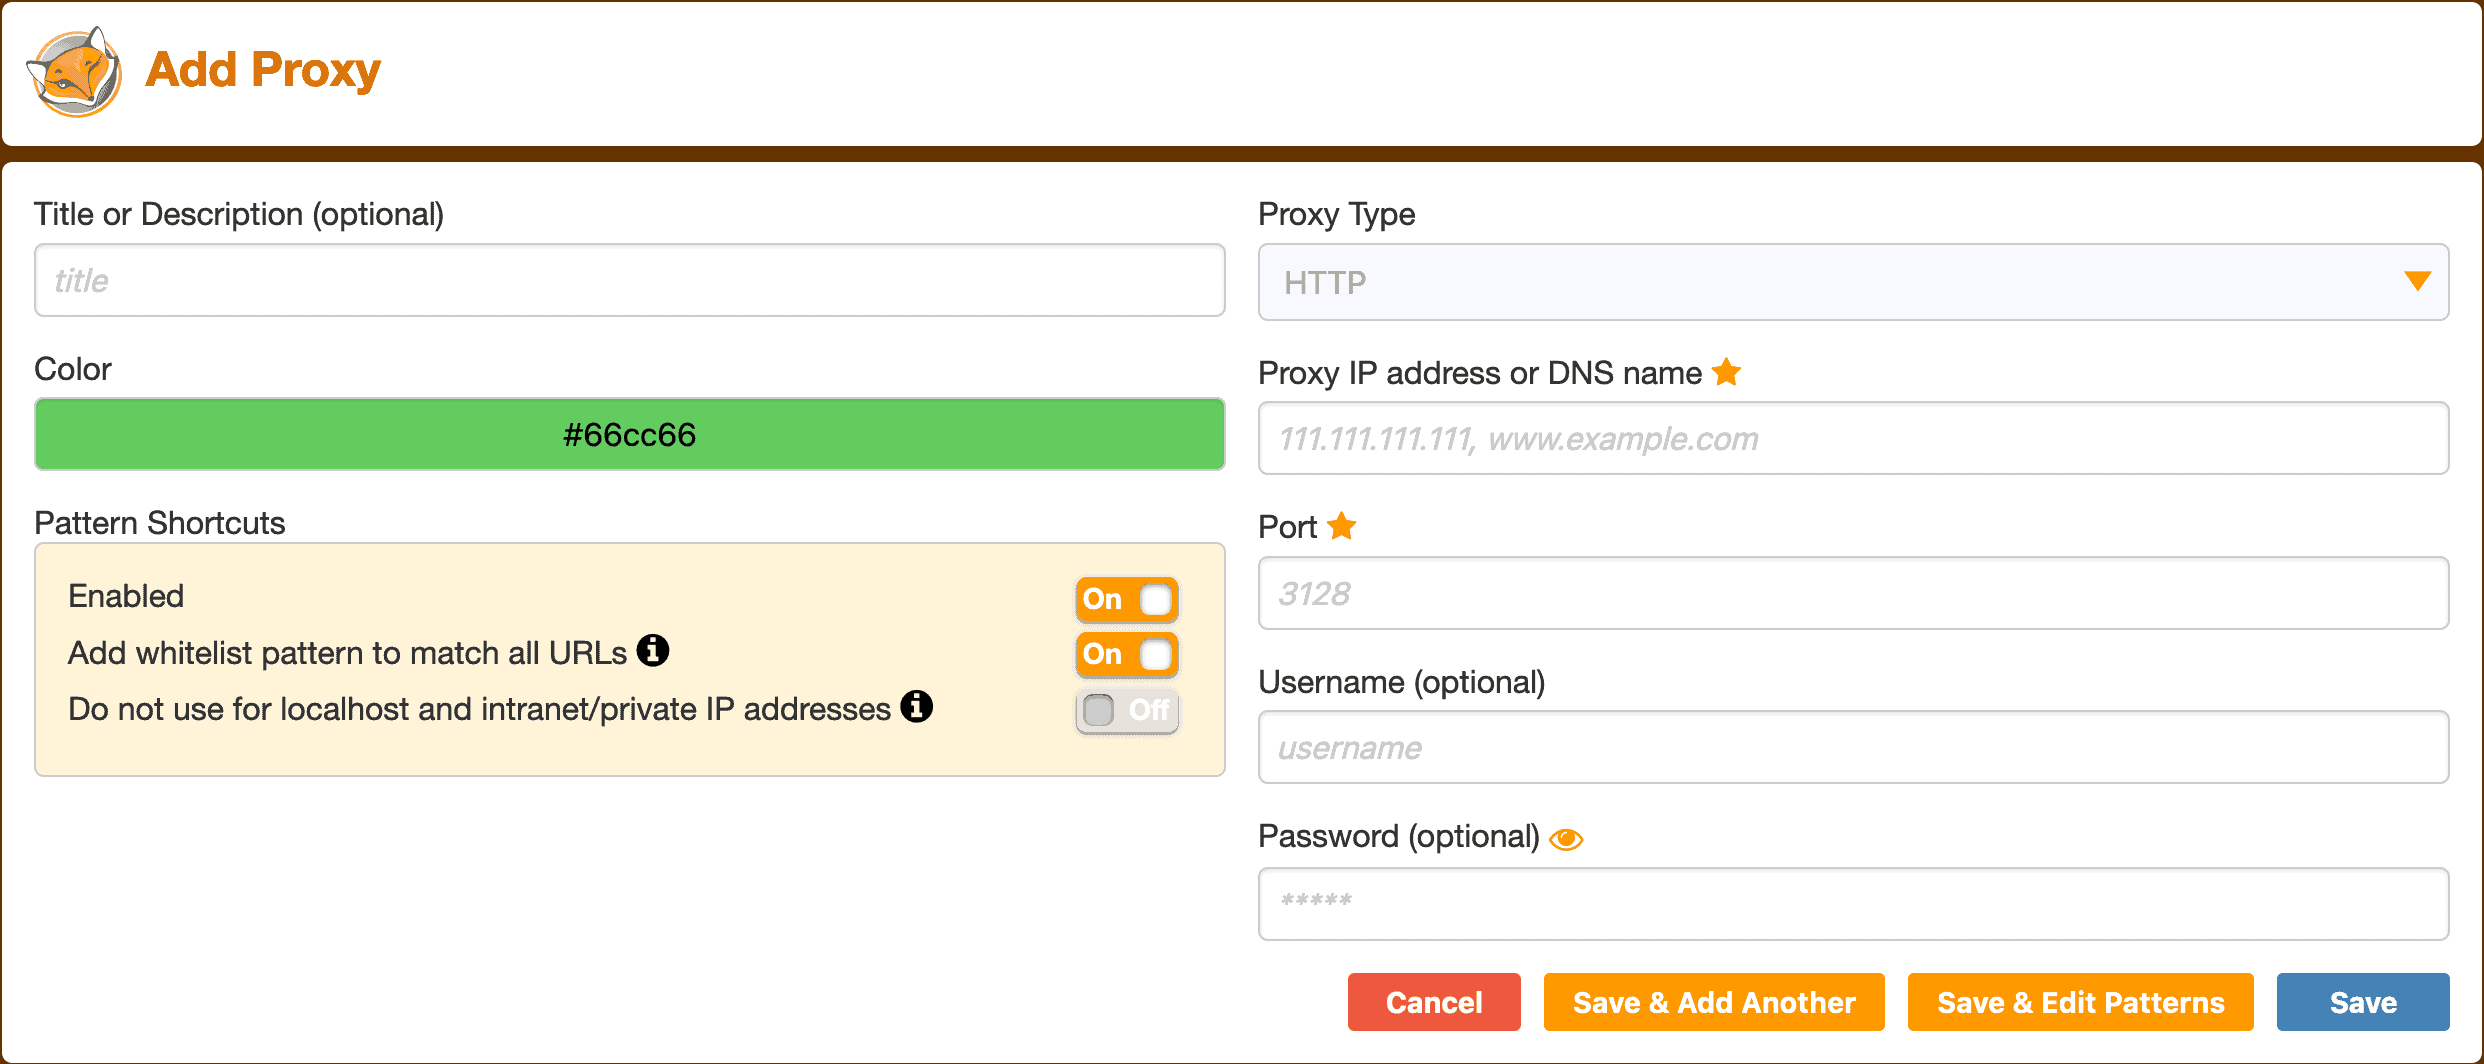
First, fill in the profile’s name and color. This is optional, but it’ll help you distinguish between different proxy profiles.
Second, choose the proxy type. The supported types are:

Then, enter the proxy DNS name or IP address. You’ll have a DNS name if you use backconnect proxies (these are usually residential or rotating IPs). Otherwise, you can enter a proxy IP.
- Example of an IP: 127.168.0.1
- Example of a hostname: en.proxyprovider.net
Enter the proxy server’s port. These are the numbers that come after the IP or hostname. They are separated by a colon:
- Example of a port: en.proxyprovider.net:10000
If you’re using username:password authentication, enter those as well. If you have whitelisted an IP address, you can leave the fields blank.
Finally, enable the Do not use for localhost and intranet/private IP addresses option.
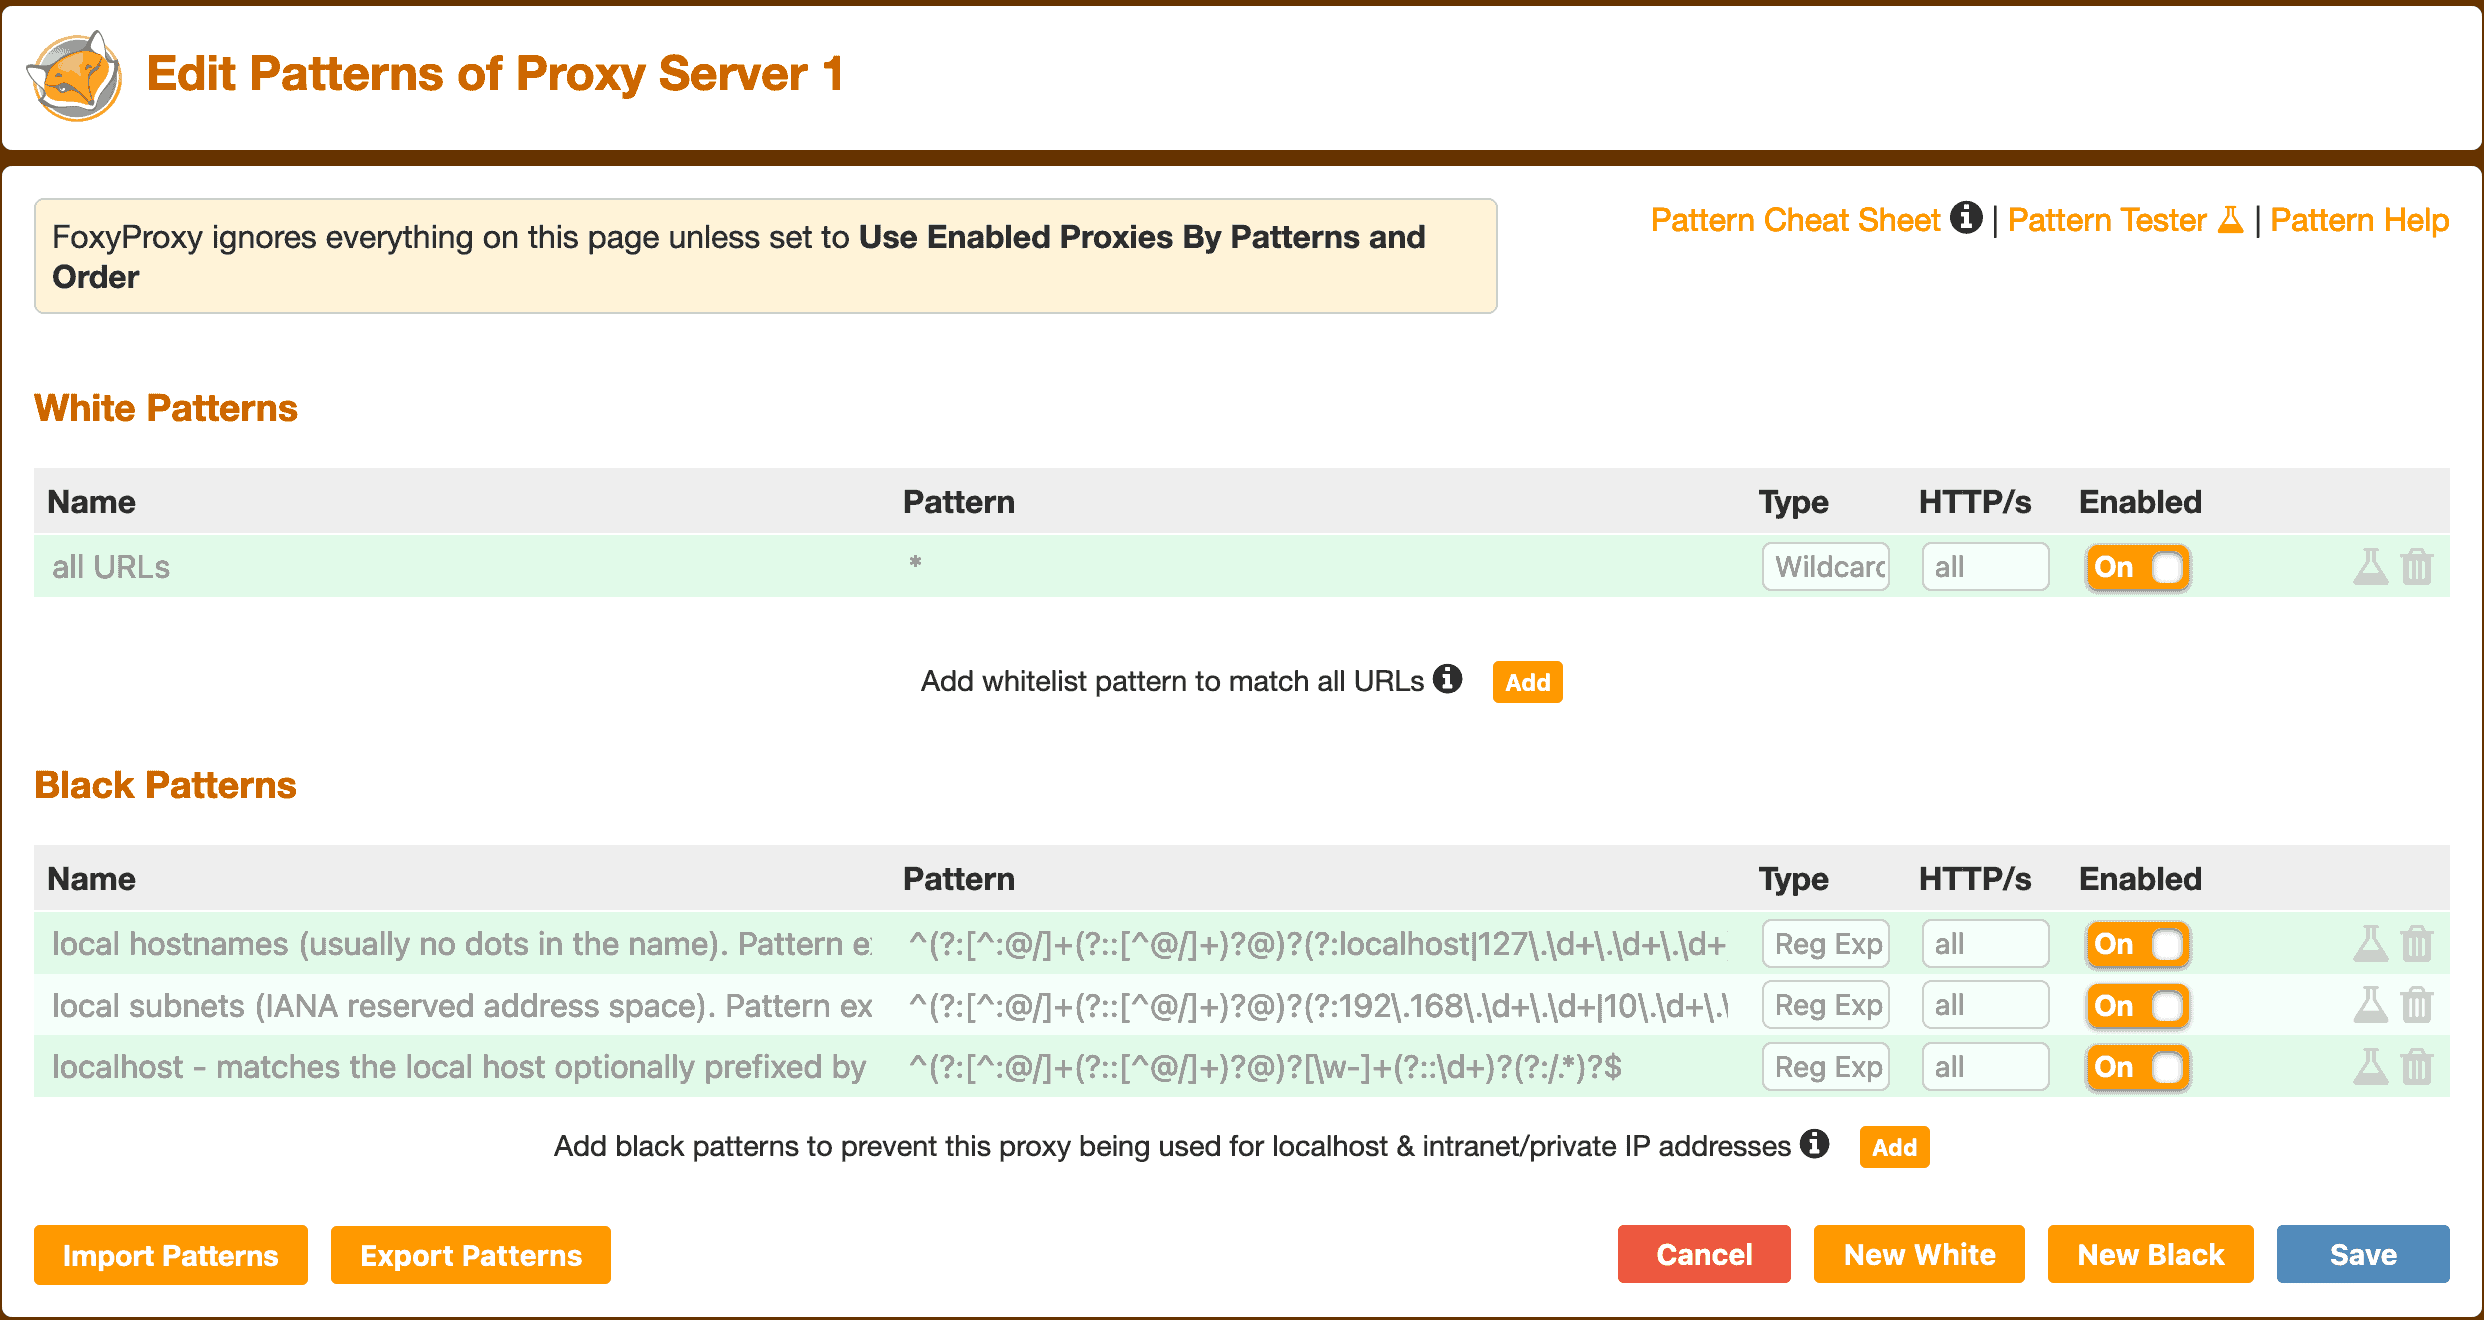
Step 5 (Optional). Set up your URL patterns. You can do this by clicking the Save & Edit Patterns button on your proxy server’s settings page.
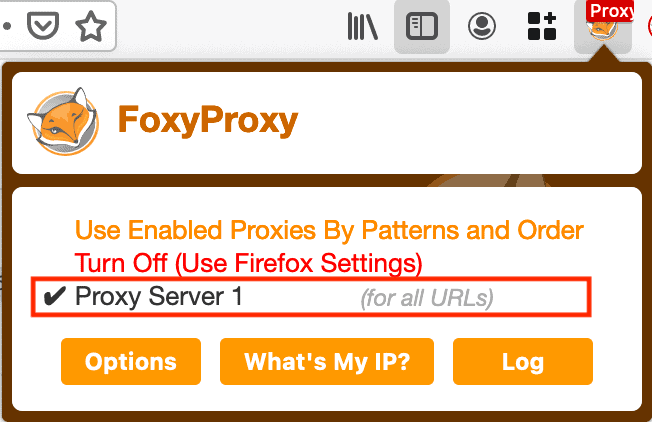
Step 7. Test your proxies.
Click on the fox icon and then select the What’s My IP? button. It will show you if your IP address and location have changed.
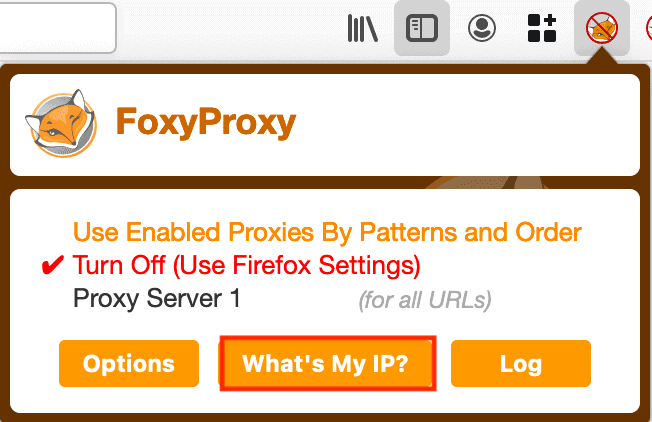
If you want to test the proxies in more detail, feel free to read our article on how to test proxies.
That’s it! You’ve successfully set up a proxy server on Firefox using FoxyProxy!
FoxyProxy Alternatives

Frequently Asked Questions About Using FoxyProxy
FoxyProxy is a browser extension for Chrome and Firefox that lets you set up and manage proxy servers on your web browser.
The extension itself is free of charge. But it doesn’t come with proxies out of the box – you’ll have to get them separately.
FoxyProxy Standard lets you configure a proxy server to work with specific websites. FoxyProxy Basic doesn’t have this functionality.