How to Set Up Chrome Proxy Settings
Learn how to configure & disable Chrome proxy settings.

A proxy server is an intermediary server that retrieves data from the internet on the behalf of the user. Setting up a proxy in your browser can secure web sessions, hide your IP address and location, allowing entrance to inaccessible websites and anonymous surfing on the internet.
However, manually enabling a proxy every time you want to use one takes time. To save you the hassle, you can add a proxy through your Chrome proxy settings.
This tutorial will show you how to use and configure a proxy server in Google Chrome, as well as how to disable proxy settings in this browser.
Chrome Proxy Settings for Windows
Even though Google Chrome doesn’t have its own proxy configuration options, it allows you to set up a proxy server through your operating system’s proxy settings.
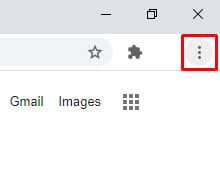
Step 1. To change the Chrome proxy settings, open the Chrome menu in the upper-right corner of your browser.
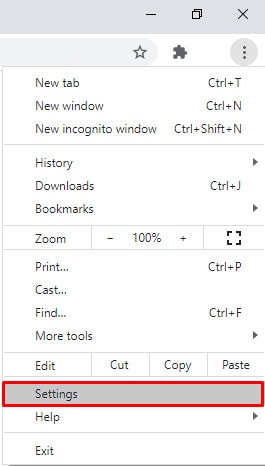
Step 2. Click on Settings.
Step 3. Click on Advanced and open the System option.
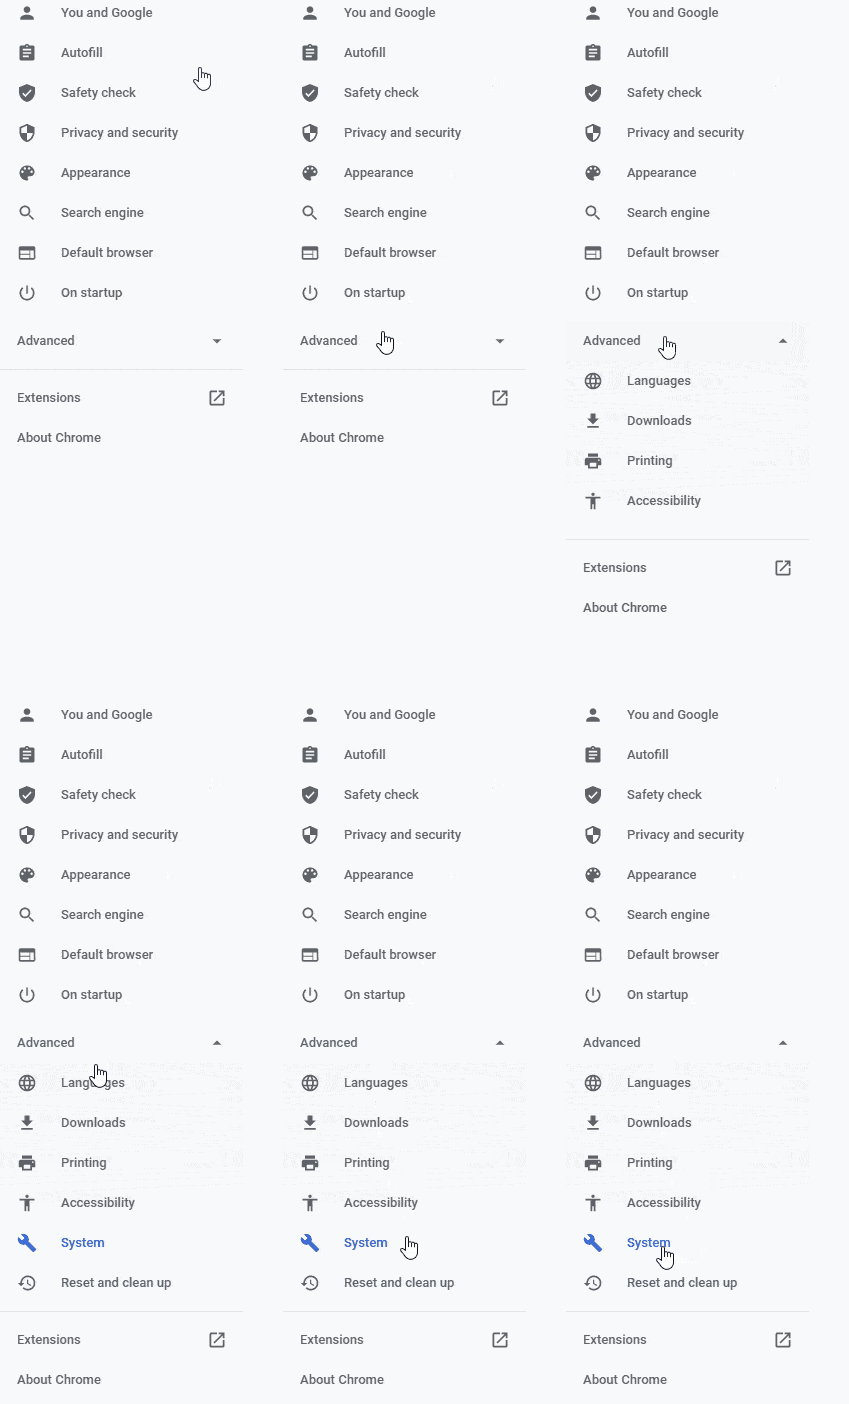
Step 4. In System, select Open your computer’s proxy settings.

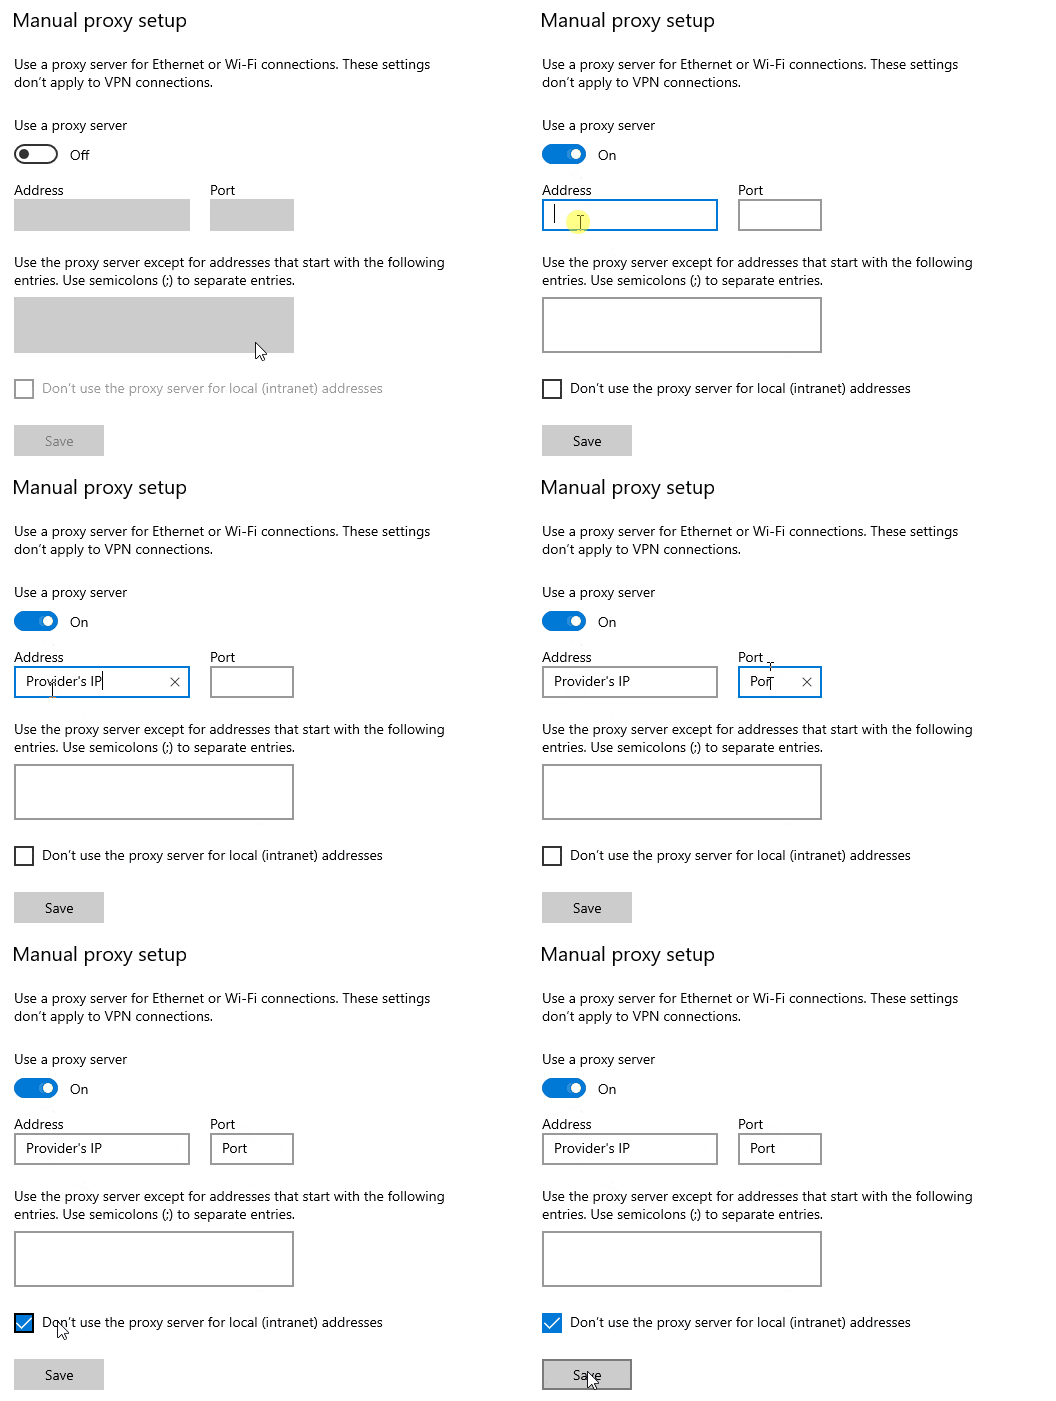
Step 5. With Chrome proxy settings displayed on your screen, scroll down till the section Manual proxy setup. Then, toggle Use a proxy server on, enter the IP address of your proxy server in the Address box, and the proxy server’s port in the Port field. Check Don‘t use the proxy server for local (intranet) addresses. Click Save to apply your settings.
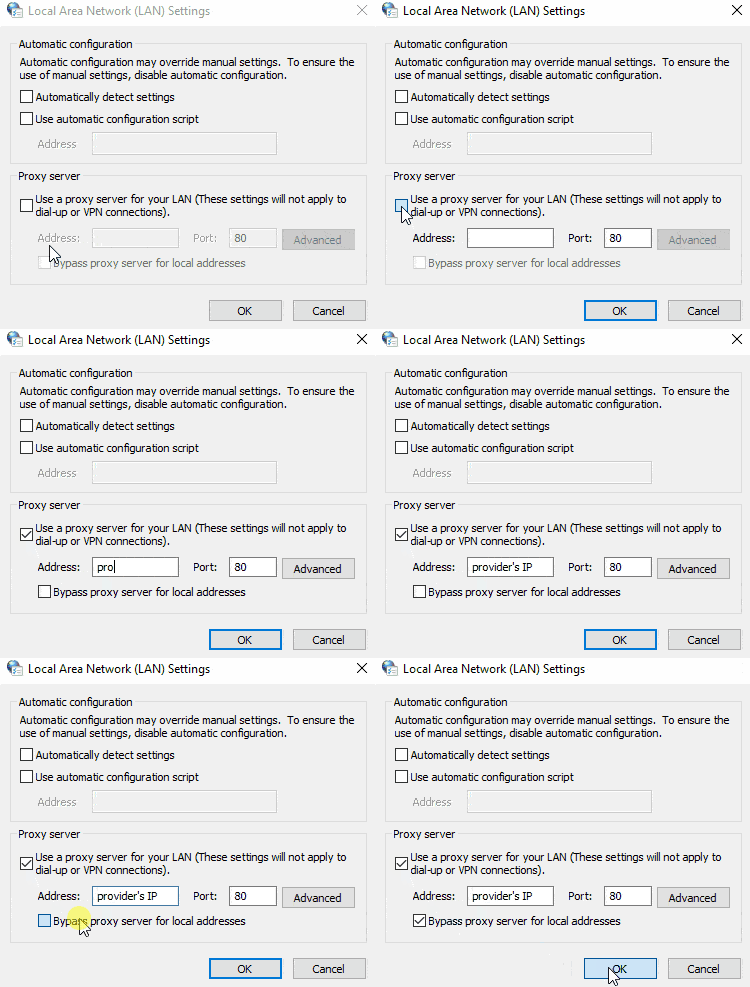
Important note: If you are using an older version of Windows (like Windows 7), opening the computer‘s proxy settings will direct you to Internet Properties. Once there, click on the Connections tab and open LAN settings.
For Windows 7 or older versions, check the box Use your proxy server for your LAN, fill in Address and Port fields with your proxy provider’s data, check the box Bypass proxy server for local addresses, and click OK.
Disabling proxies on Google Chrome
Disabling Google Chrome Proxy Settings for Windows
You can disable your Chrome proxy settings by following a nearly identical route.
Step 1. To access advanced settings, open the Chrome menu in the upper-right corner of your browser.

Step 2. Click on Settings

Step 3. Click on Advanced and open System.

Step 4. In System, select Open your computer’s proxy settings

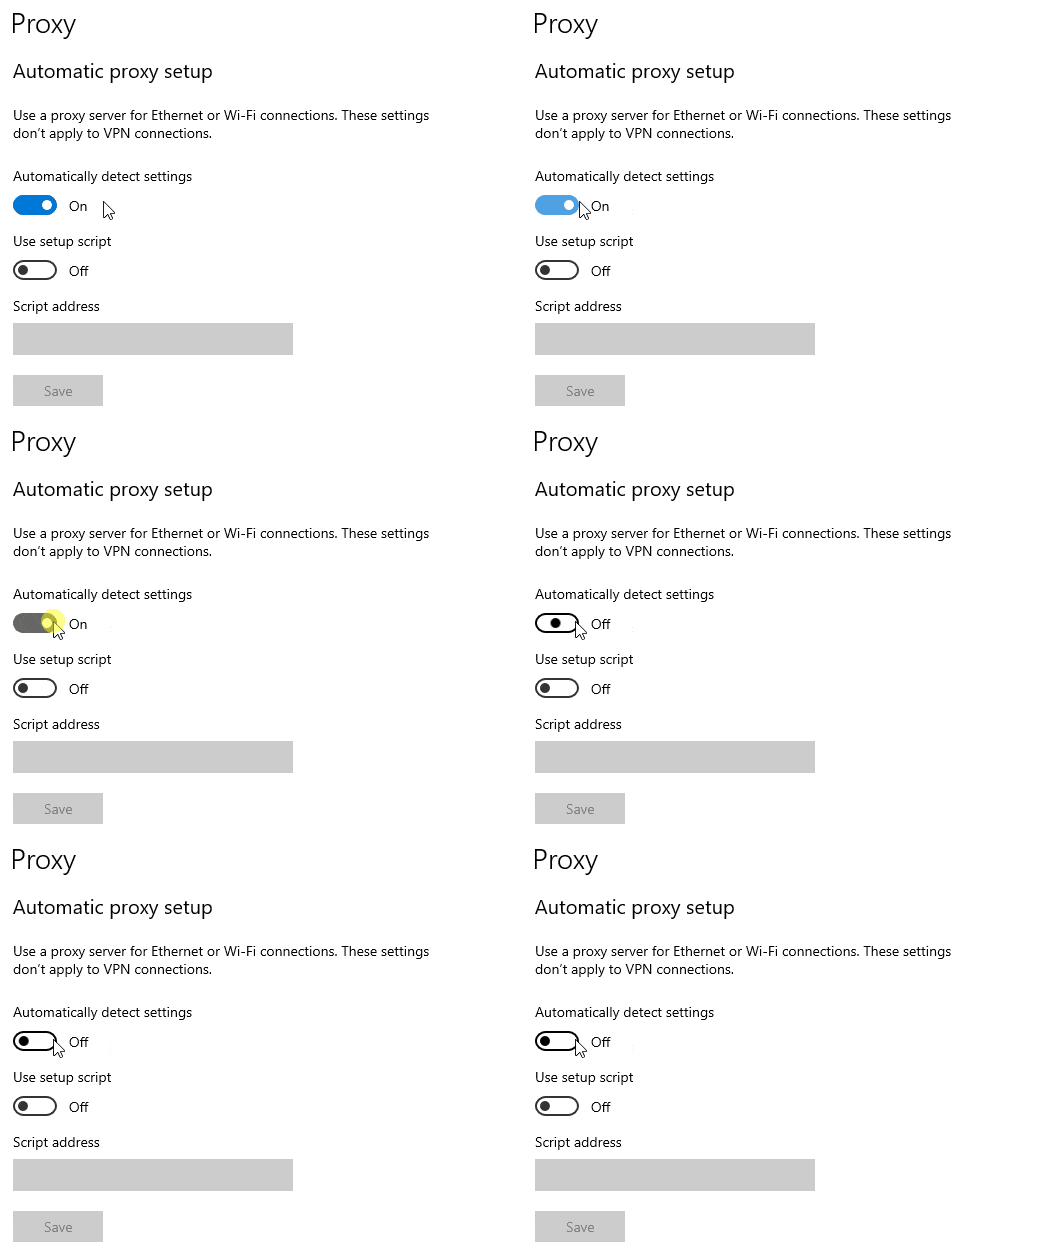
Step 5. With Chrome proxy settings displayed on your screen, under Automatic proxy setup, toggle Automatically detect settings off.
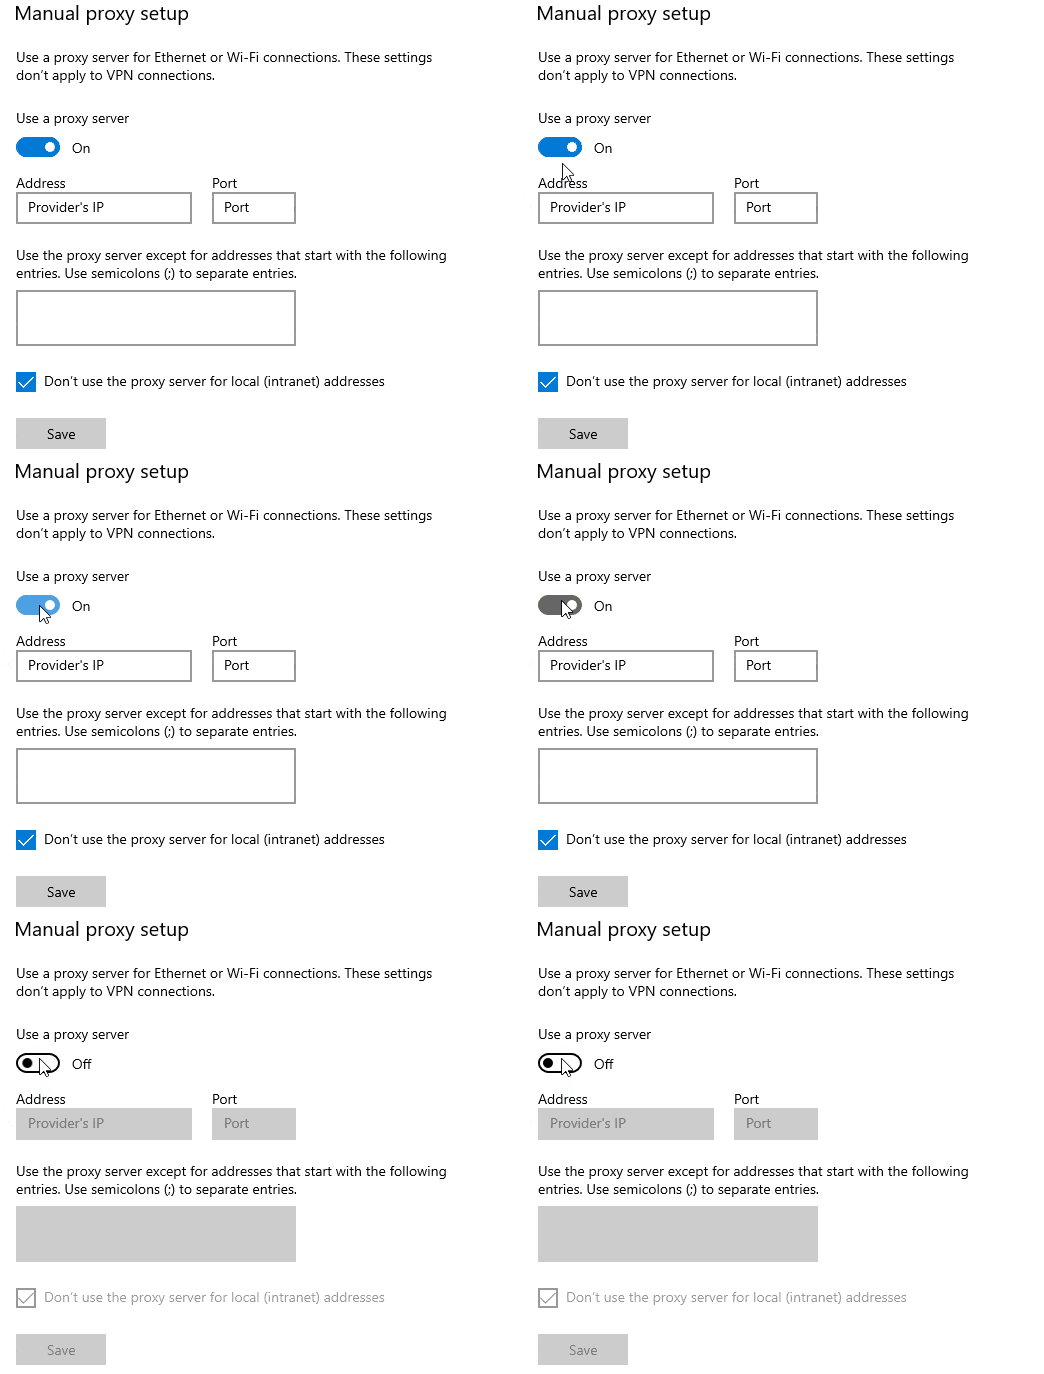
Step 6. Under Manual proxy setup, toggle Use a proxy server setting off.
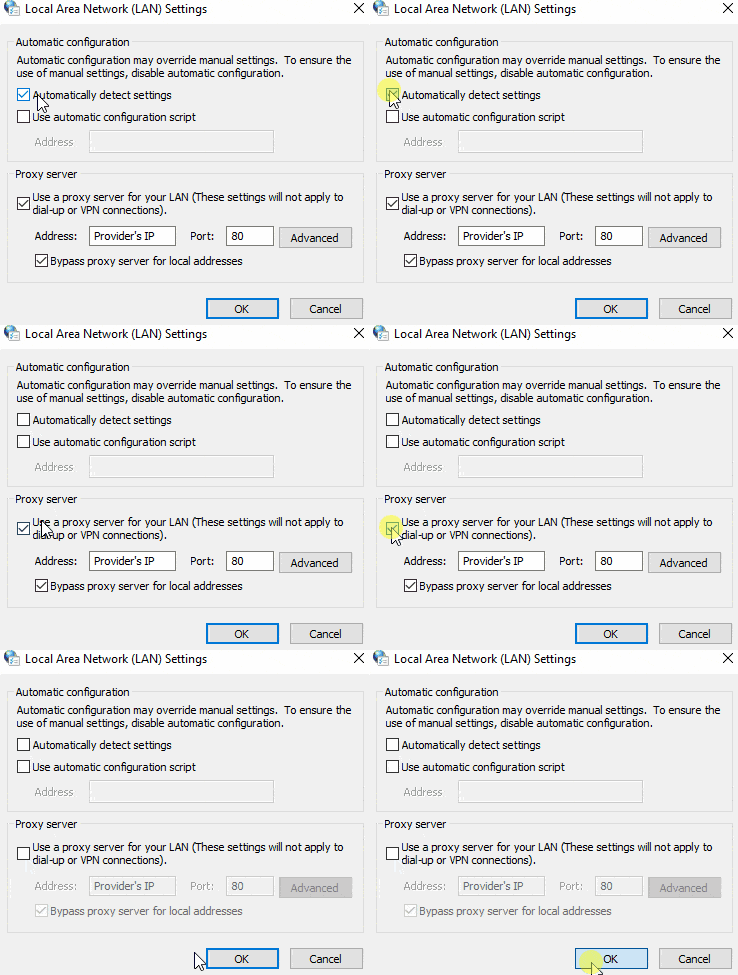
Important note: With an older version of Windows, opening proxy settings (as mentioned in Step 4) will direct you to Internet Properties. Once there, click on the Connections tab and open LAN settings.
For older Windows versions (Windows 7 or older), uncheck boxes Automatically detect settings & Use your proxy server for your LAN and click on OK button.
Most common errors
Fixing the Unable to connect to proxy server error
This common issue is most often resolved by resetting your internet options.
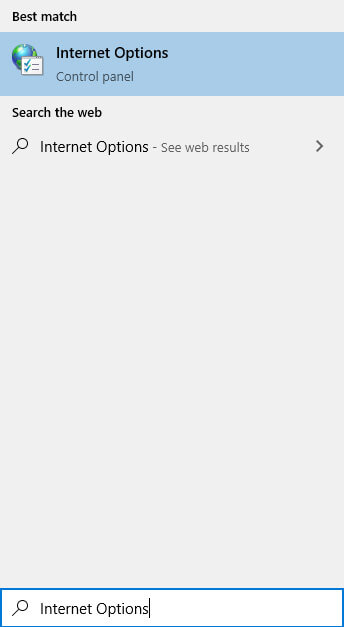
Step 1. Enter Internet Options into your Windows search box and select Internet Options.
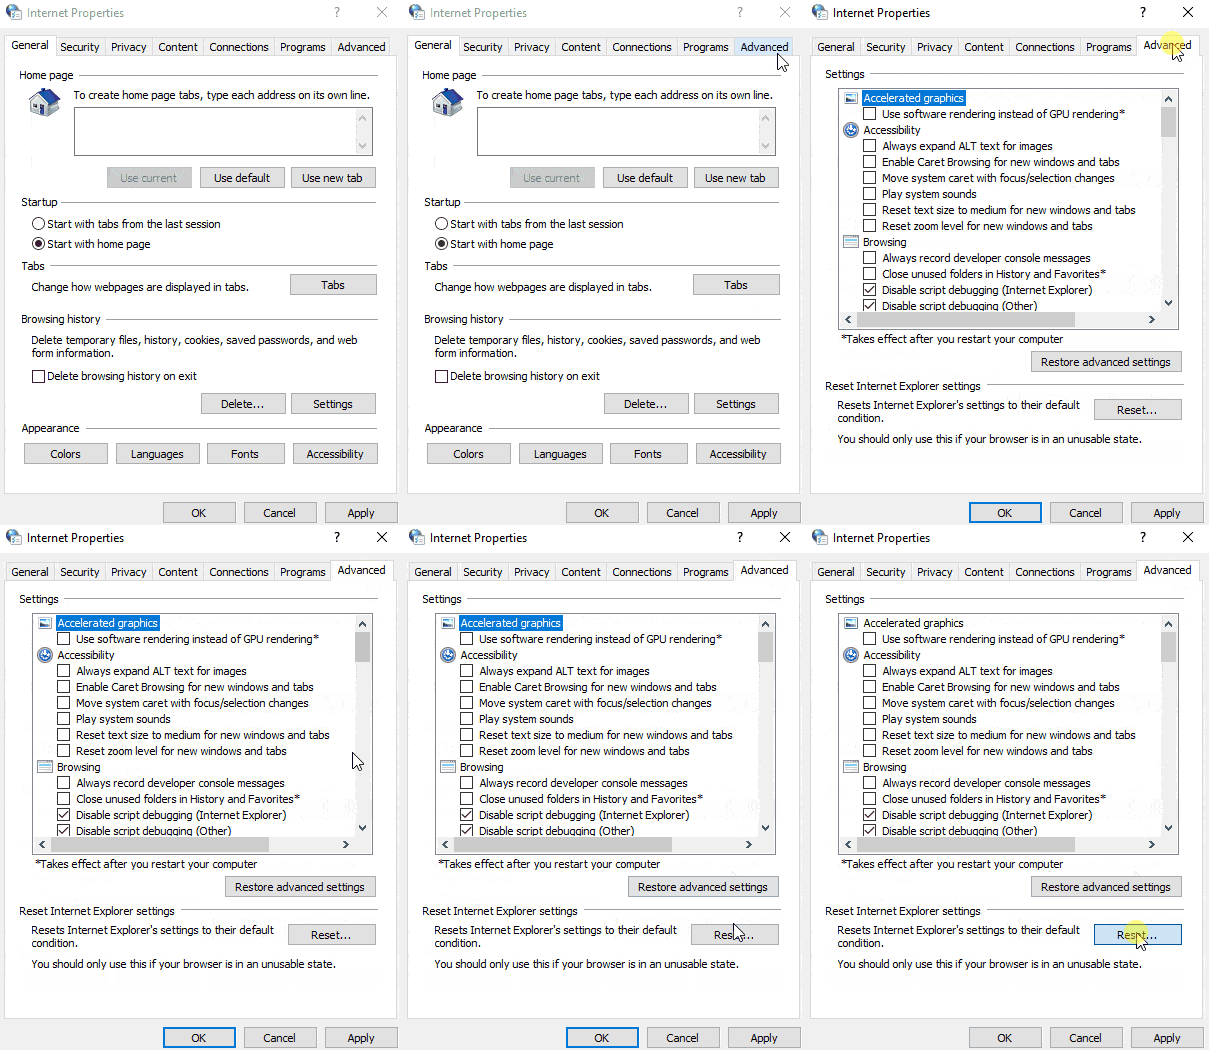
Step 2. In the Internet Properties window, click on the Advanced tab, and press the Reset button.
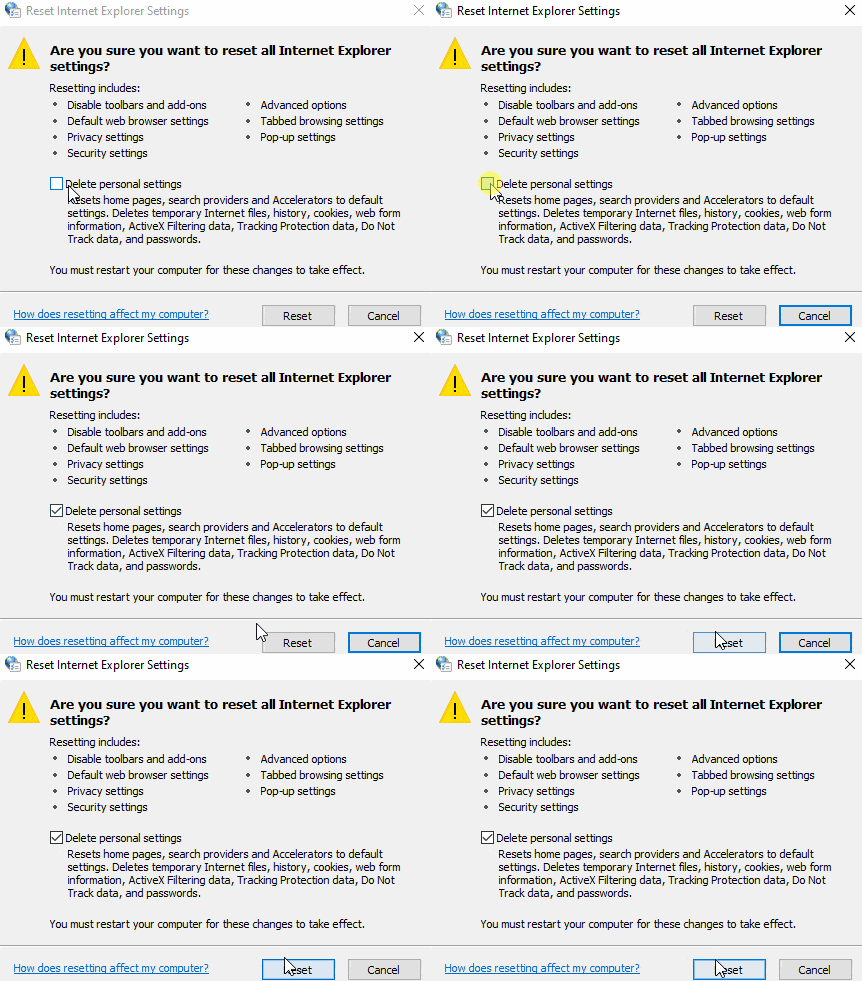
Step 3. Tick the Delete personal settings box and click Reset.

Frequently Asked Questions About Chrome Proxy Settings
Proxies are IP addresses. When you use a proxy, all your connection requests go through it, instead of connecting to a website directly.
You can reach them by pressing on the three dots, then choosing Settings -> Advanced -> System.
You can but probably shouldn’t – free proxies are dangerous.