Android Proxy Settings: How to Use a Proxy on Android
Learn how to configure the Android proxy settings on your phone or tablet.
When you use a proxy, all your connections go through it before reaching websites and apps. Proxies can help you hide your IP address, change your device’s location to unblock content, and more. It’s also possible for malware to enable proxies without your knowledge and consent.
This article will show you how to configure the Android proxy settings to set up or disable a proxy server on your Android device. Note that we use a OnePlus device; your proxy configuration settings might slightly differ.
How to Configure Android Proxy Settings
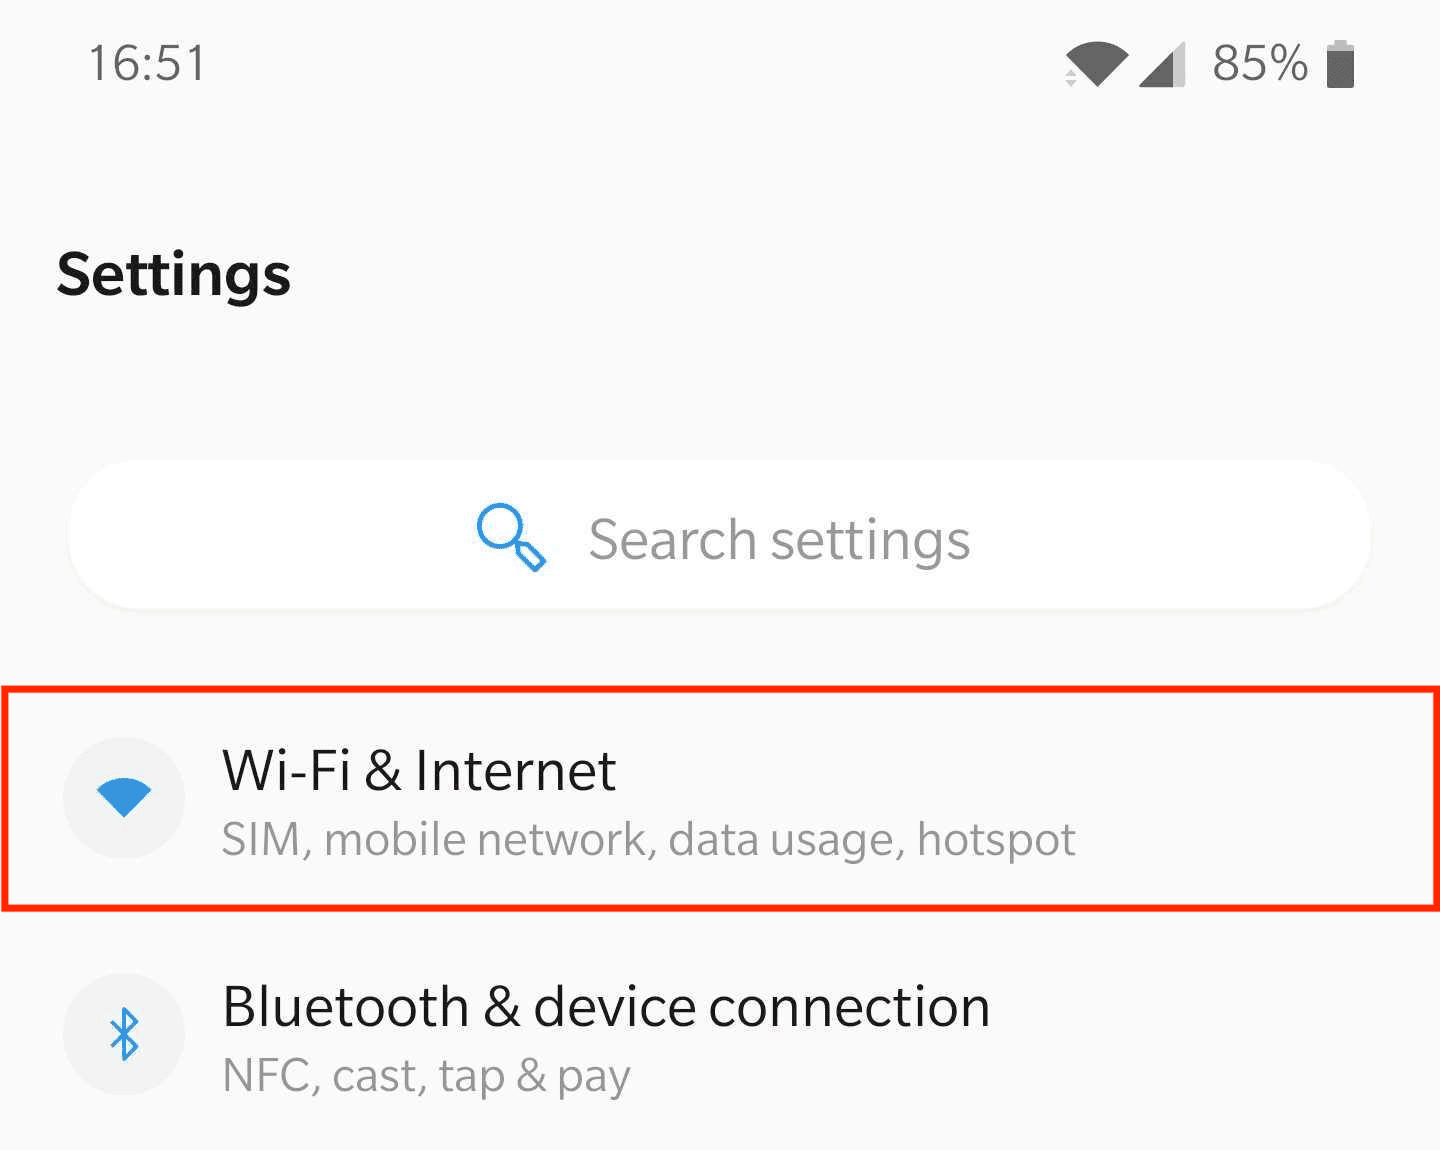
Step 1. Go to the Settings app and select Wifi & Internet.
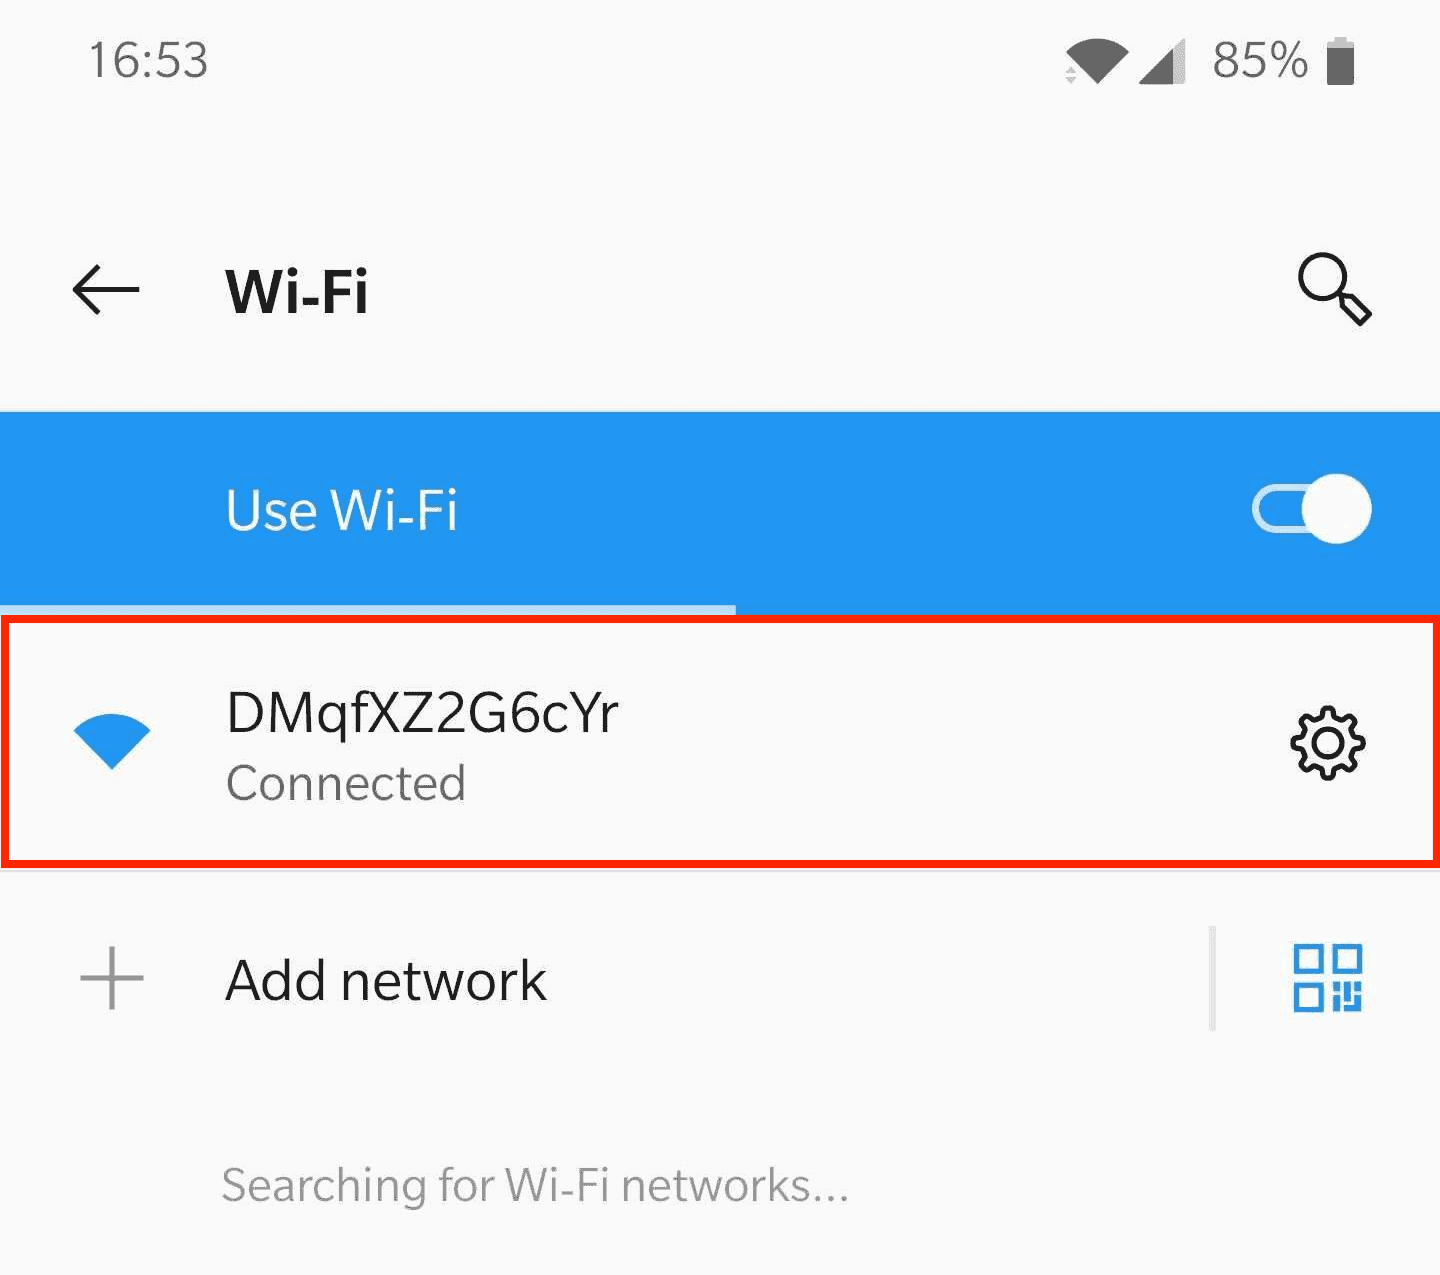
Step 2. Find your Wi-Fi network. If you’re currently connected to it, it should be the topmost option.
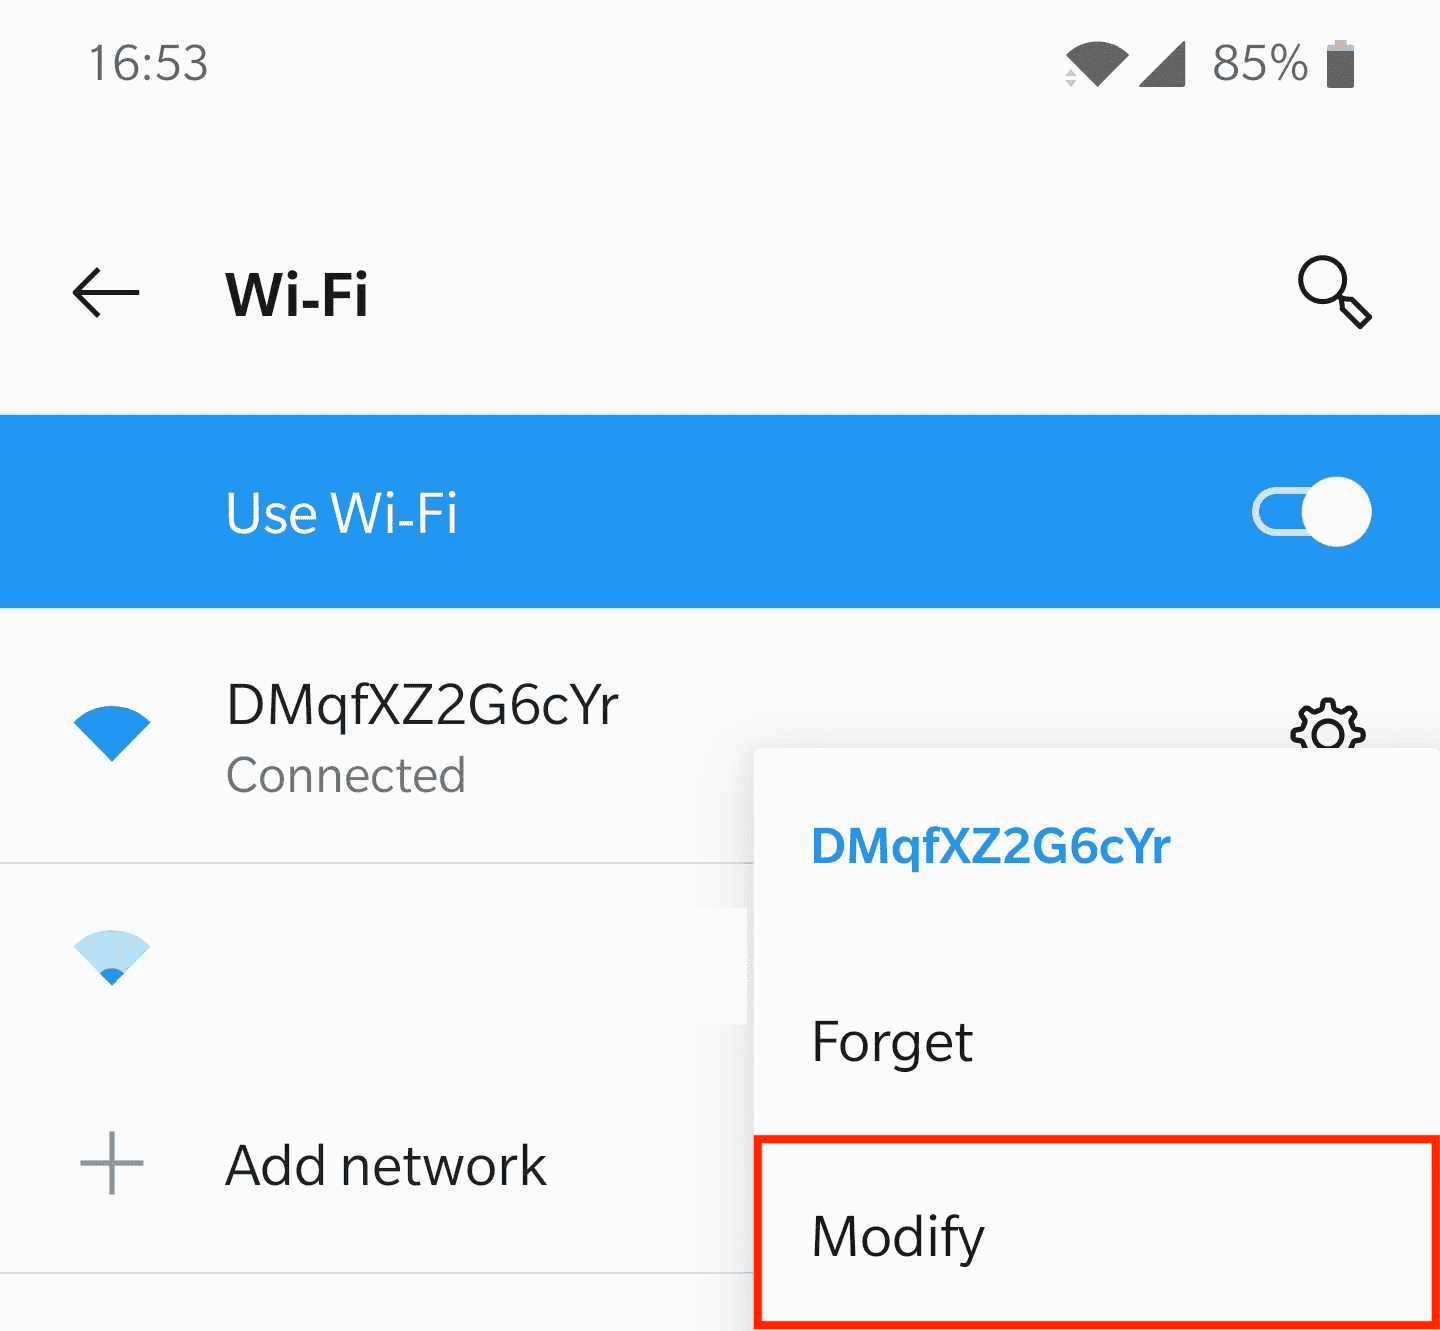
Step 3. Select the Gear icon on the right side and tap Modify. This will open a preferences popup. If you can’t see the Gear icon, touch and hold the network name and tap Modify network.
Step 4. In the popup, tap on Advanced options to extend the menu. You’ll see the Proxy dropdown. Expand it.
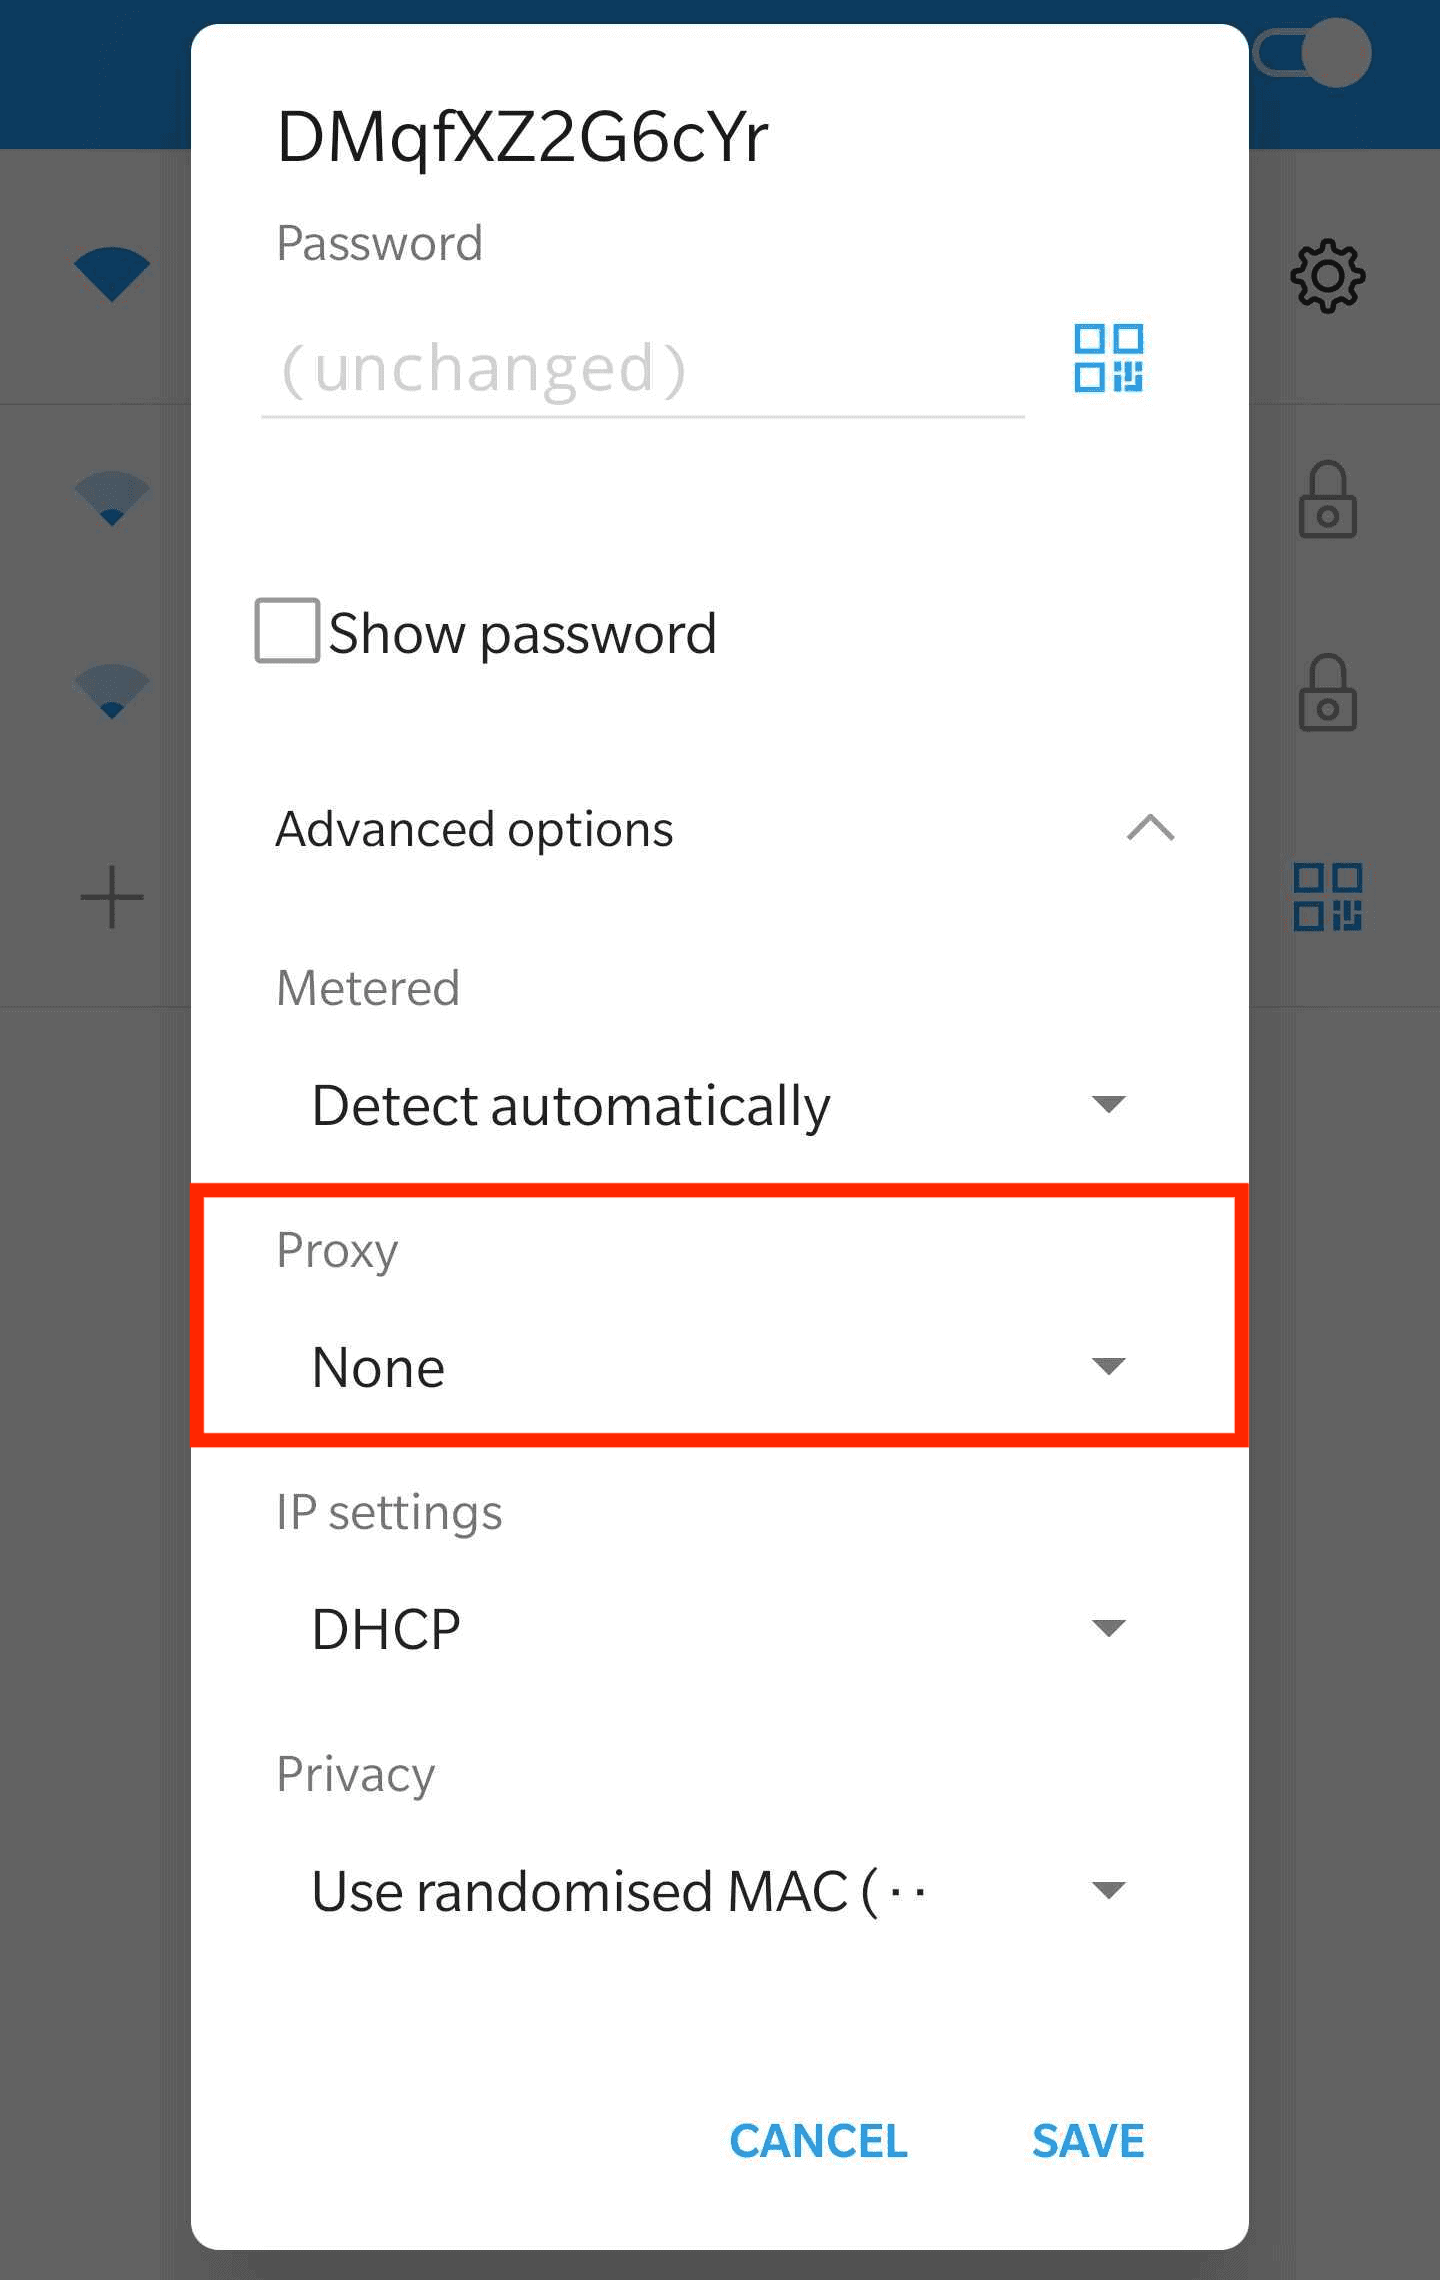
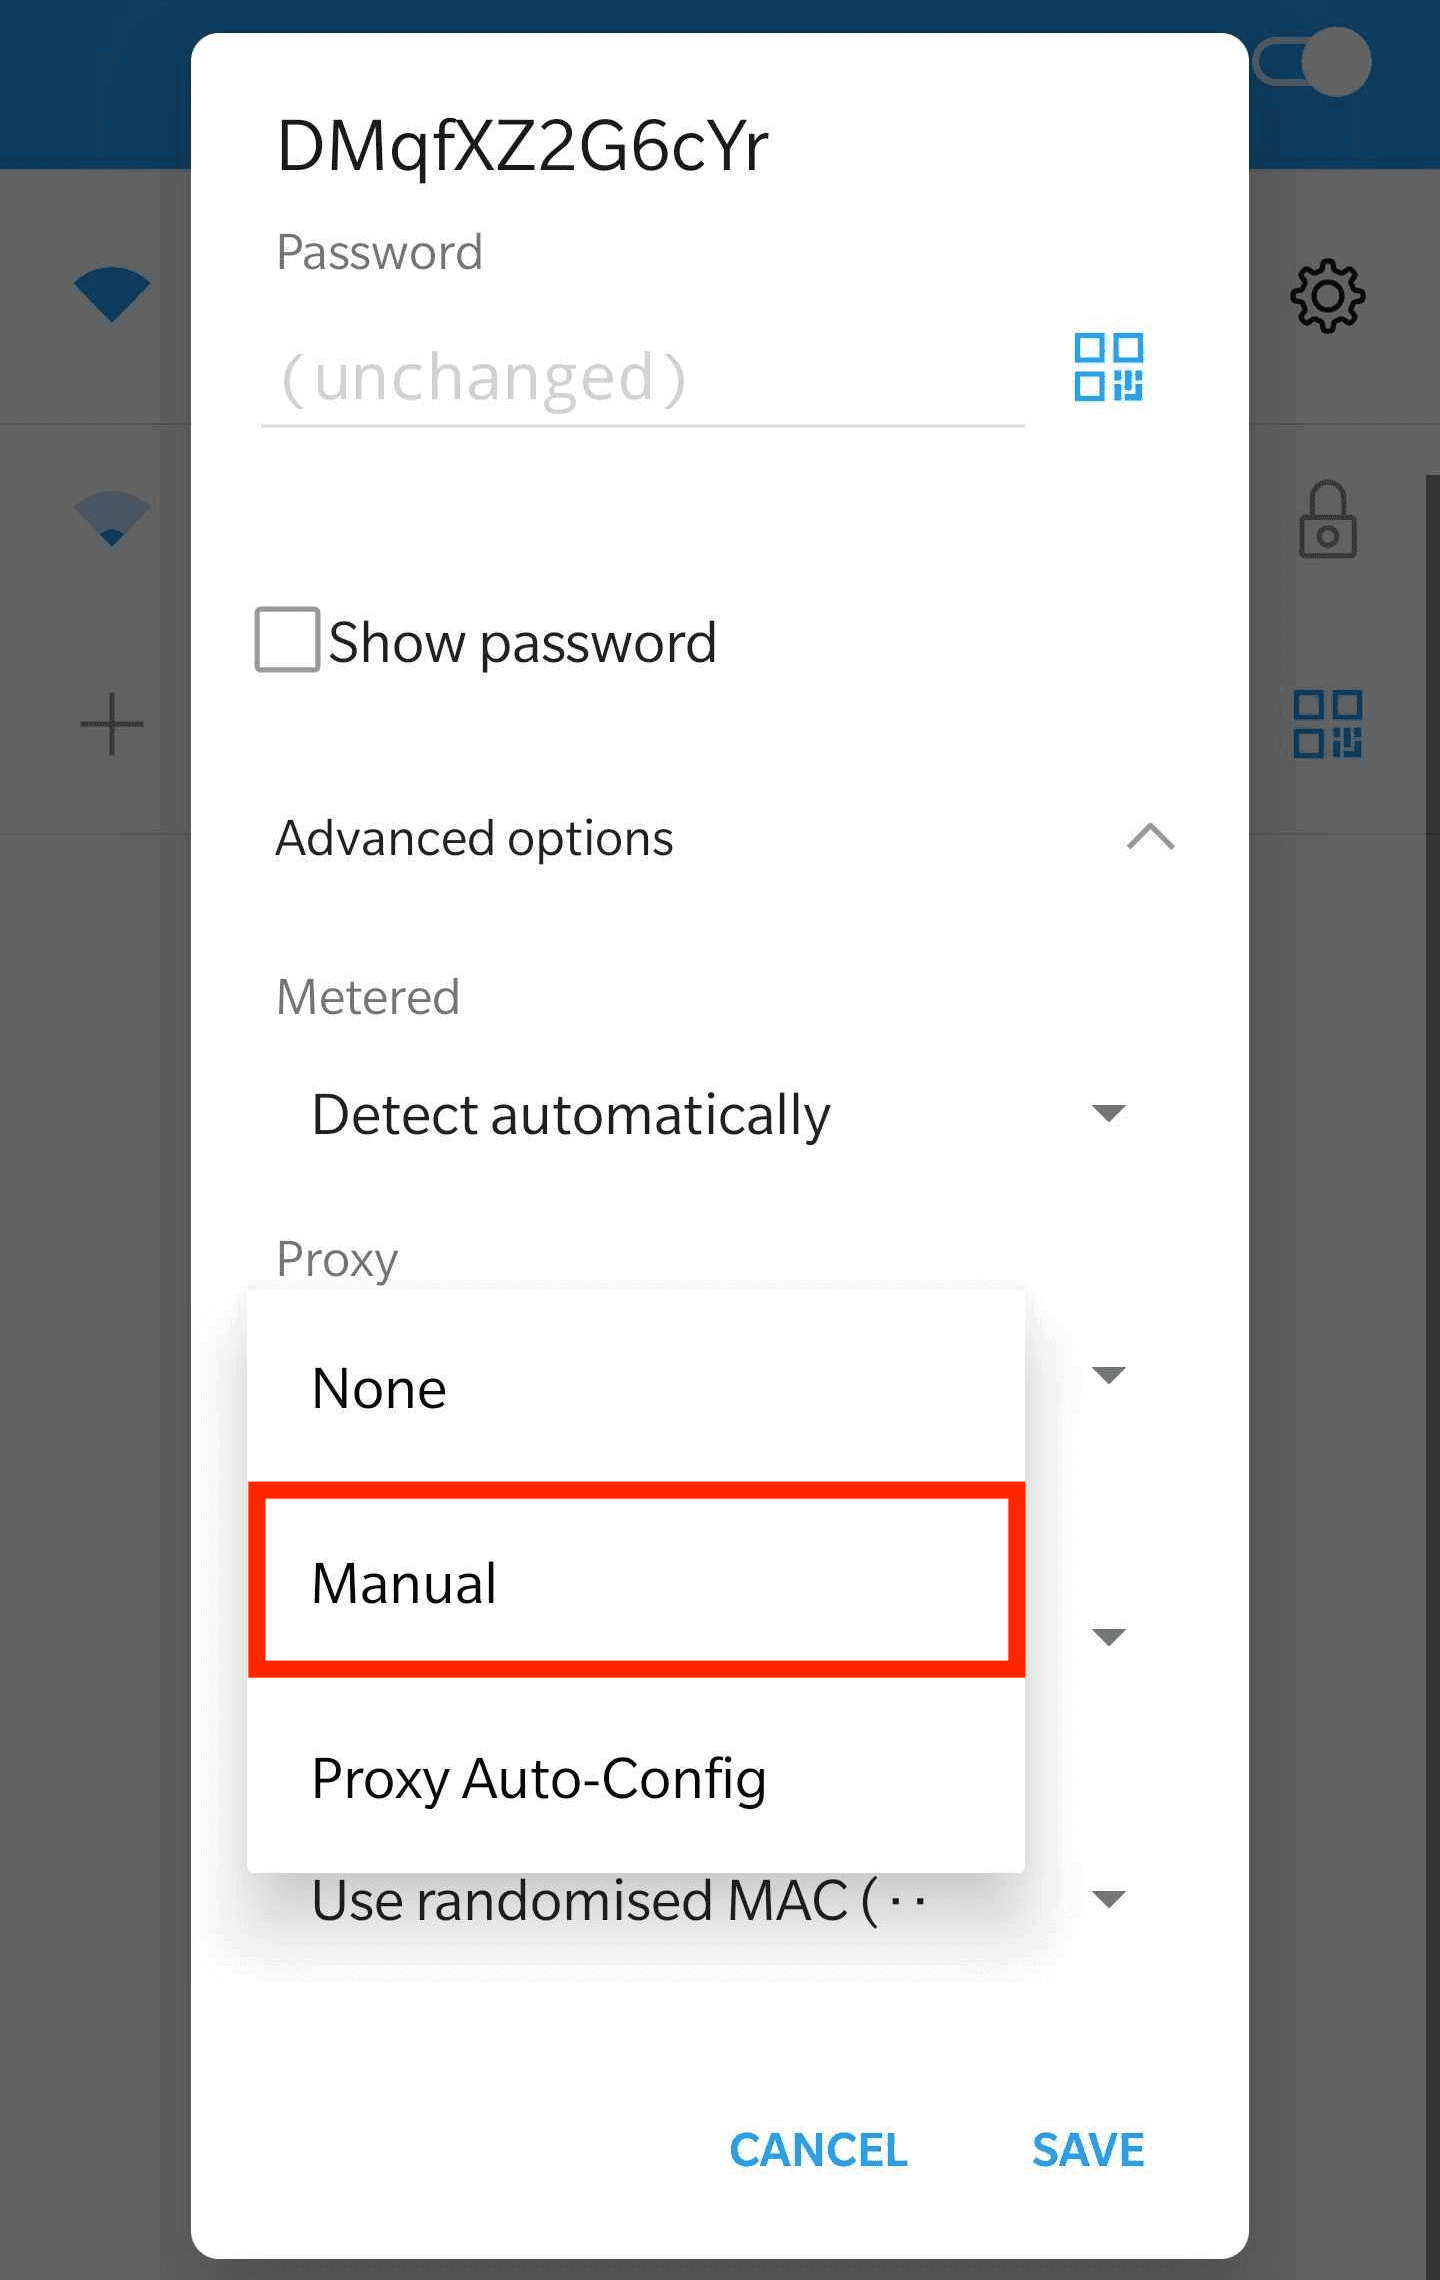
Step 5. In the dropdown, select Manual.
This means that you’ll enter your proxy server’s settings by yourself.
If you’re using a proxy at school or work, your network administrator might give you a PAC file to configure the settings automatically. Commercial proxy providers rarely do that.
Step 6. Enter your proxy server’s information.
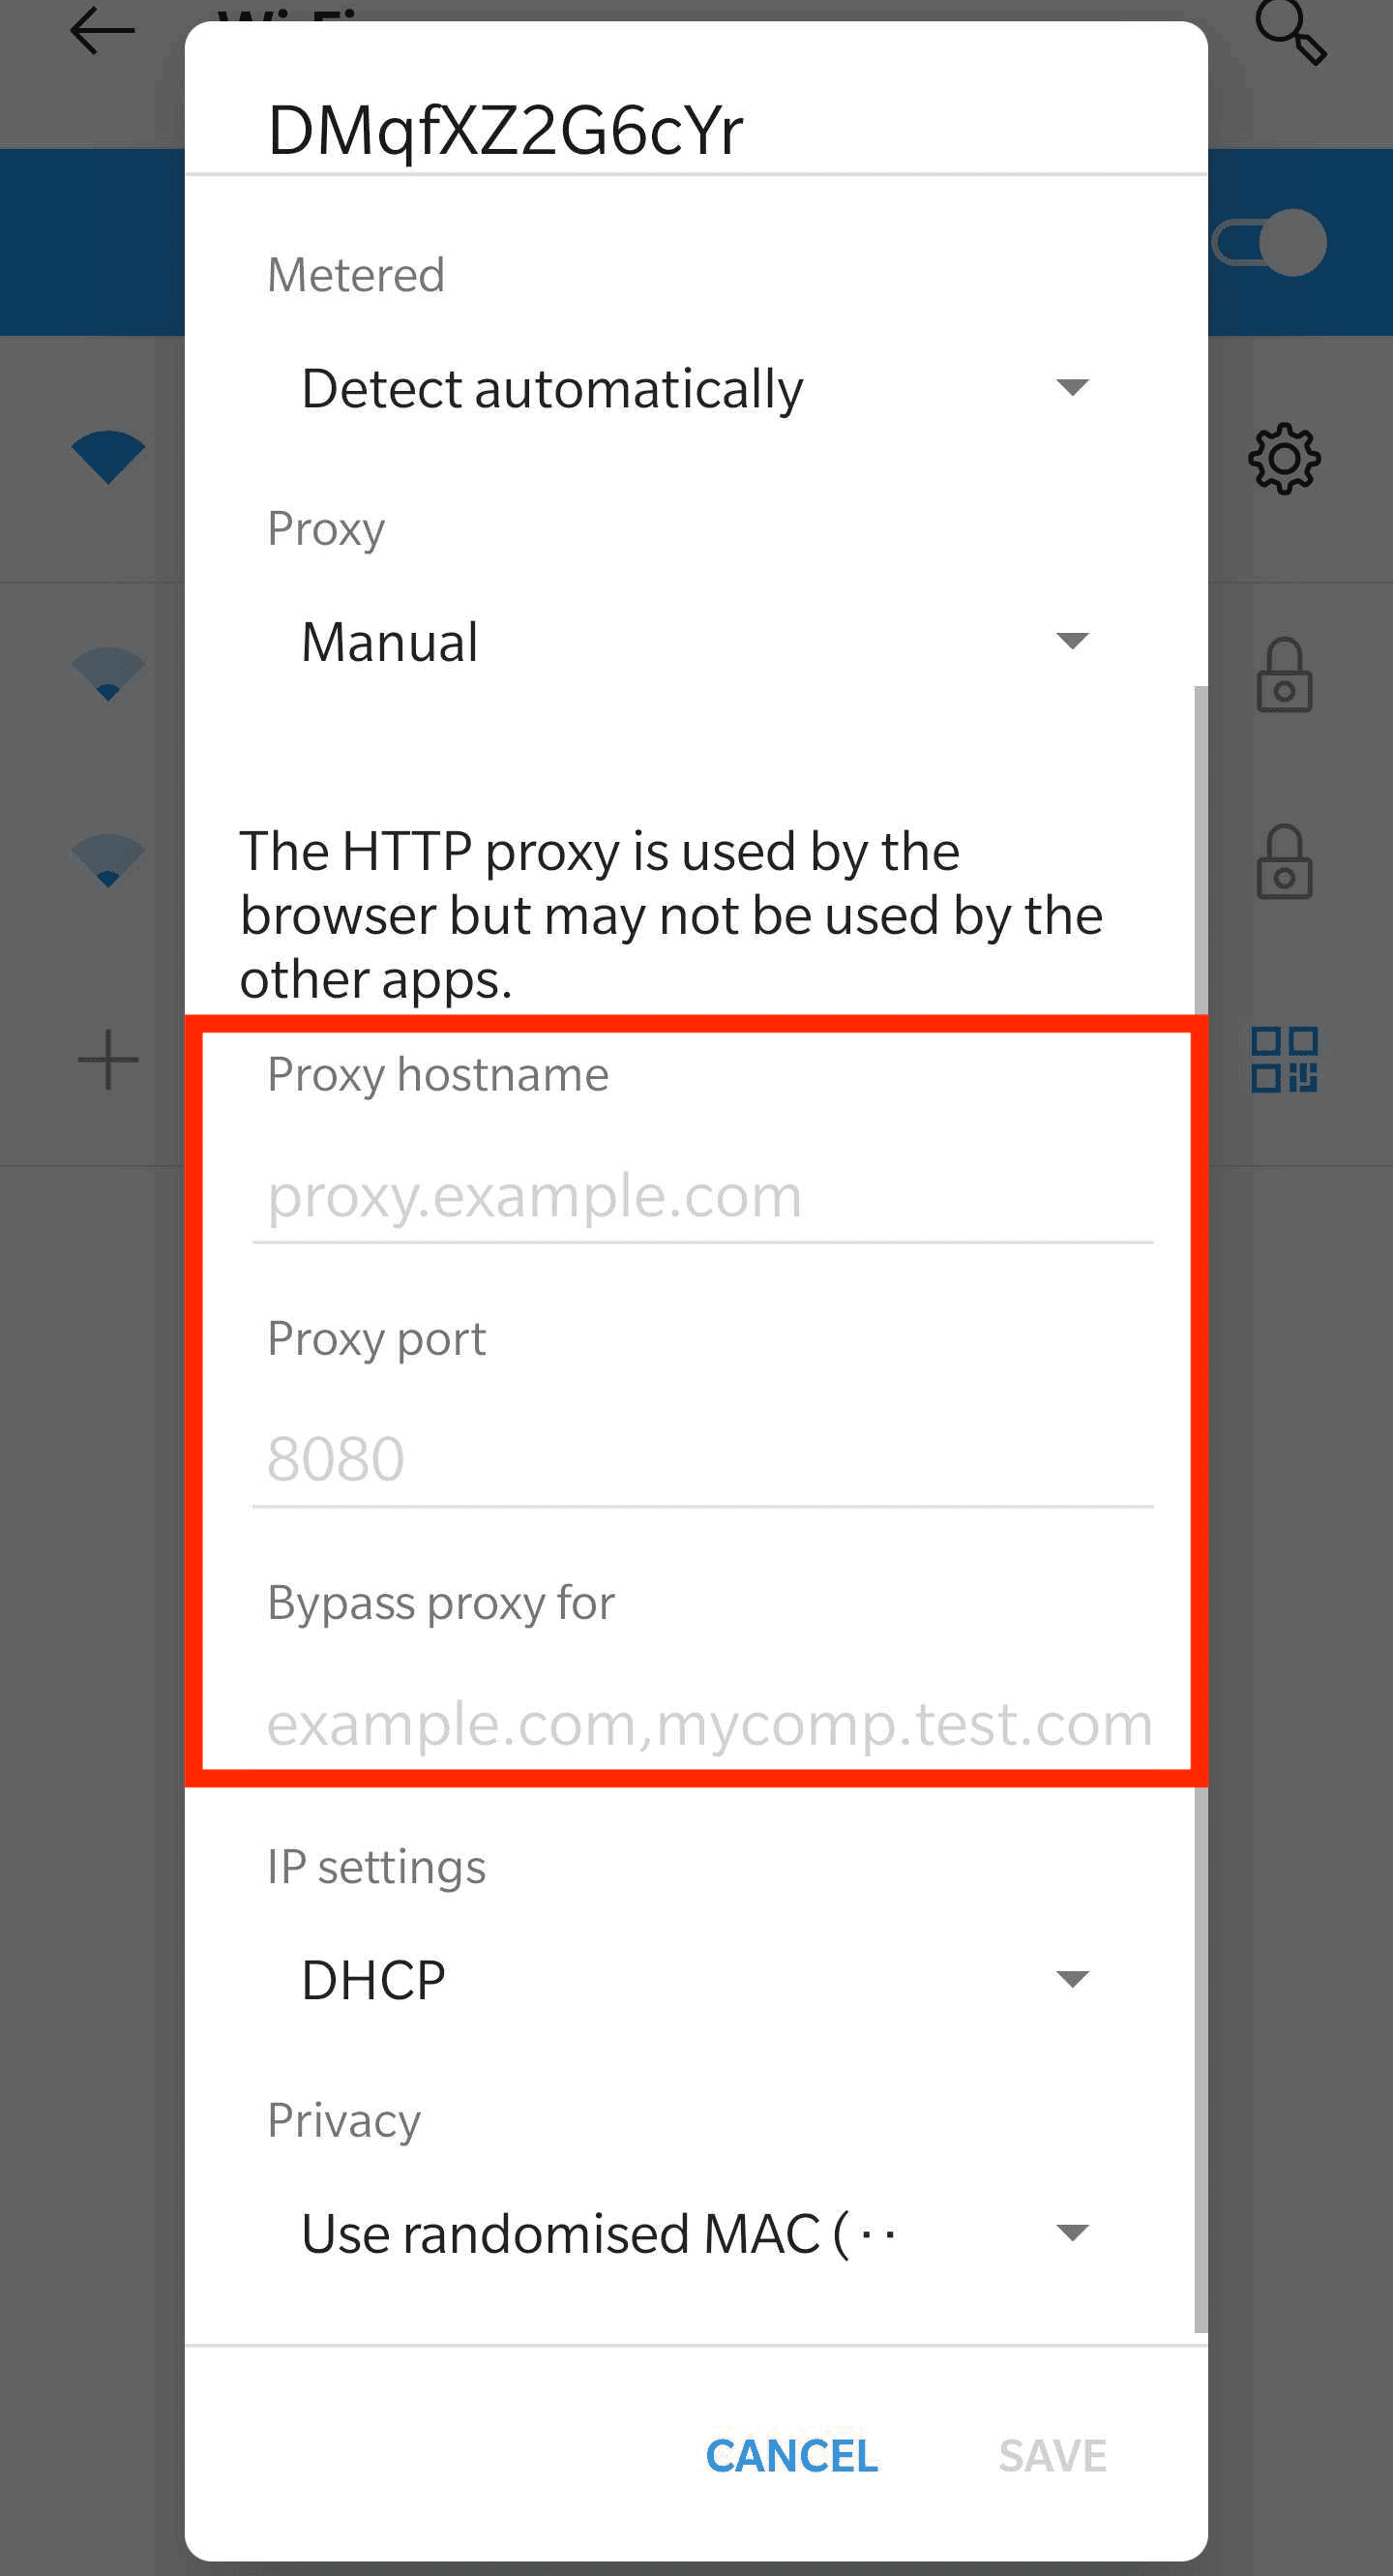
- Example of an IP:
127.168.0.1 - Example of a hostname:
en.proxyprovider.net
- Example of a port:
en.proxyprovider.net:10000
- Example:
google.com,bing.com
How to Use a Proxy on Android
- The proxy server only works on the Wi-Fi network where it’s enabled. If you connect to a different Wi-Fi, you’ll have to configure proxies anew. And this method won’t work on cellular connections at all.
- The proxy server may not affect apps. It’s up to the individual developers to choose whether to ignore proxies. So, they’re only guaranteed to work with your web browser. If you want to route all traffic through a proxy server, there are apps for that, but you’ll need to root your device first.
How to Disable Proxies on Android Device
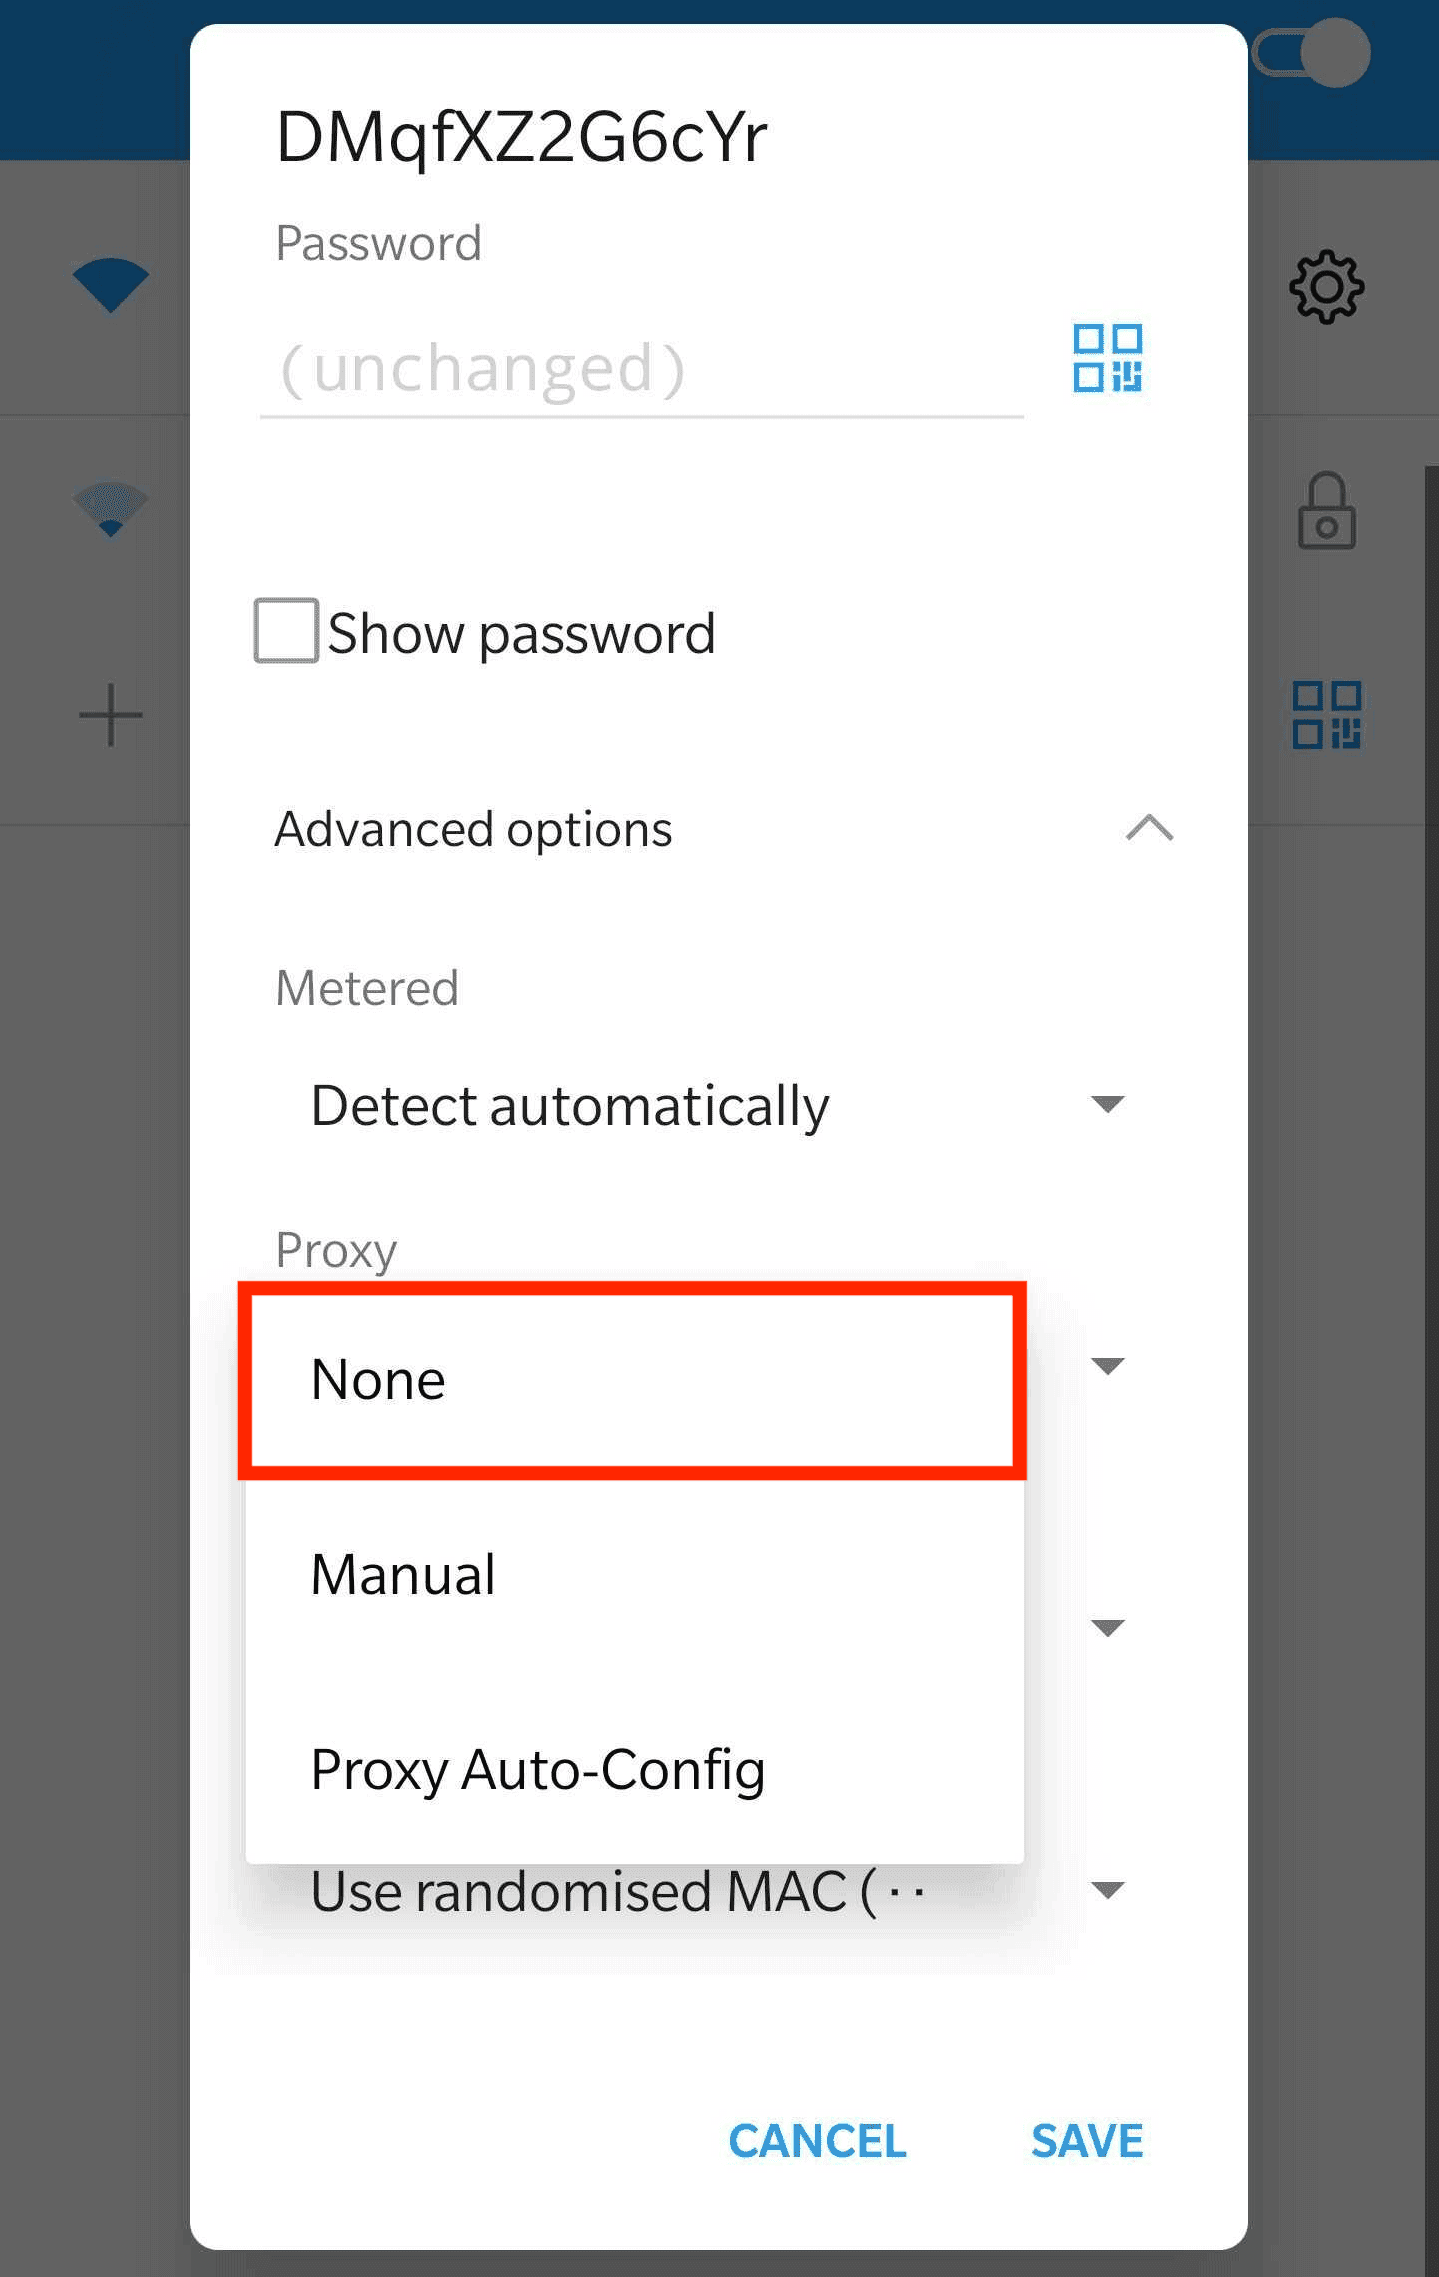
Follow Steps 1-5. Then, in the dropdown simply select None and tap Save.
Solving the ERR TUNNEL CONNECTION FAILED Error
The ERR TUNNEL CONNECTION FAILED error pops up whenever you’re trying to connect through a proxy or VPN and the connection fails. There can be various reasons why this happens, but in the case of proxies, the two most common ones are:
- The proxy server is down. Try turning it off and on again. If nothing happens, wait until the server comes back up.
- You haven’t authenticated the proxies. In other words, you’ve entered a wrong username or password, or whitelisted a wrong IP address.

Frequently Asked Questions About Android Proxy Settings
A proxy server is a middleman that routes your connection requests through itself. So, instead of accessing a website directly, you go through a proxy server first.
Yes, but you need to root your device first. Then, you can use an app like ProxyDroid to enable proxies for all traffic.
Yes, it’s legal to use proxies on Android. It’s how you use them that matters.