How to Configure Proxy on iPhone
Learn how to configure proxies on your iPhone or iPad and access content without restrictions.

A proxy server sends all your connection requests to websites and apps through itself. You can use proxies to hide your IP address, change your perceived location to unblock and access content, and more. It’s also possible for someone to enable proxies without your knowledge for malicious purposes.
This article will show you how to configure your iPhone or iPad proxy settings to set up or disable an iOS proxy server.
How to Set Up an iOS Proxy Server
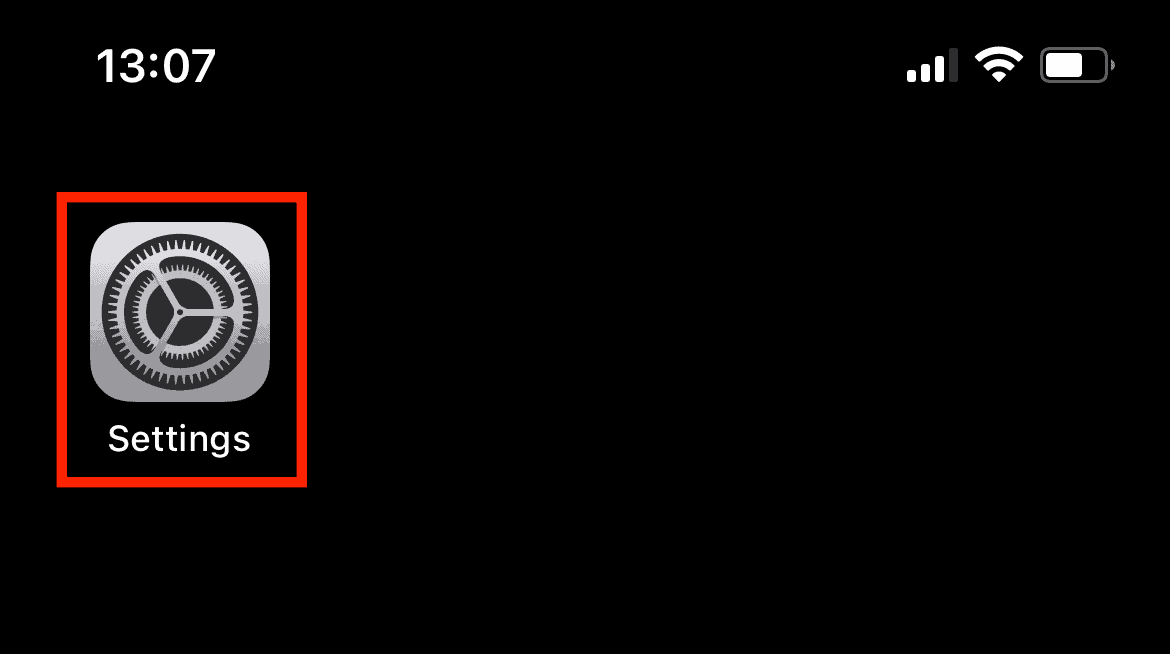
Step 1. Open your iPhone Settings.
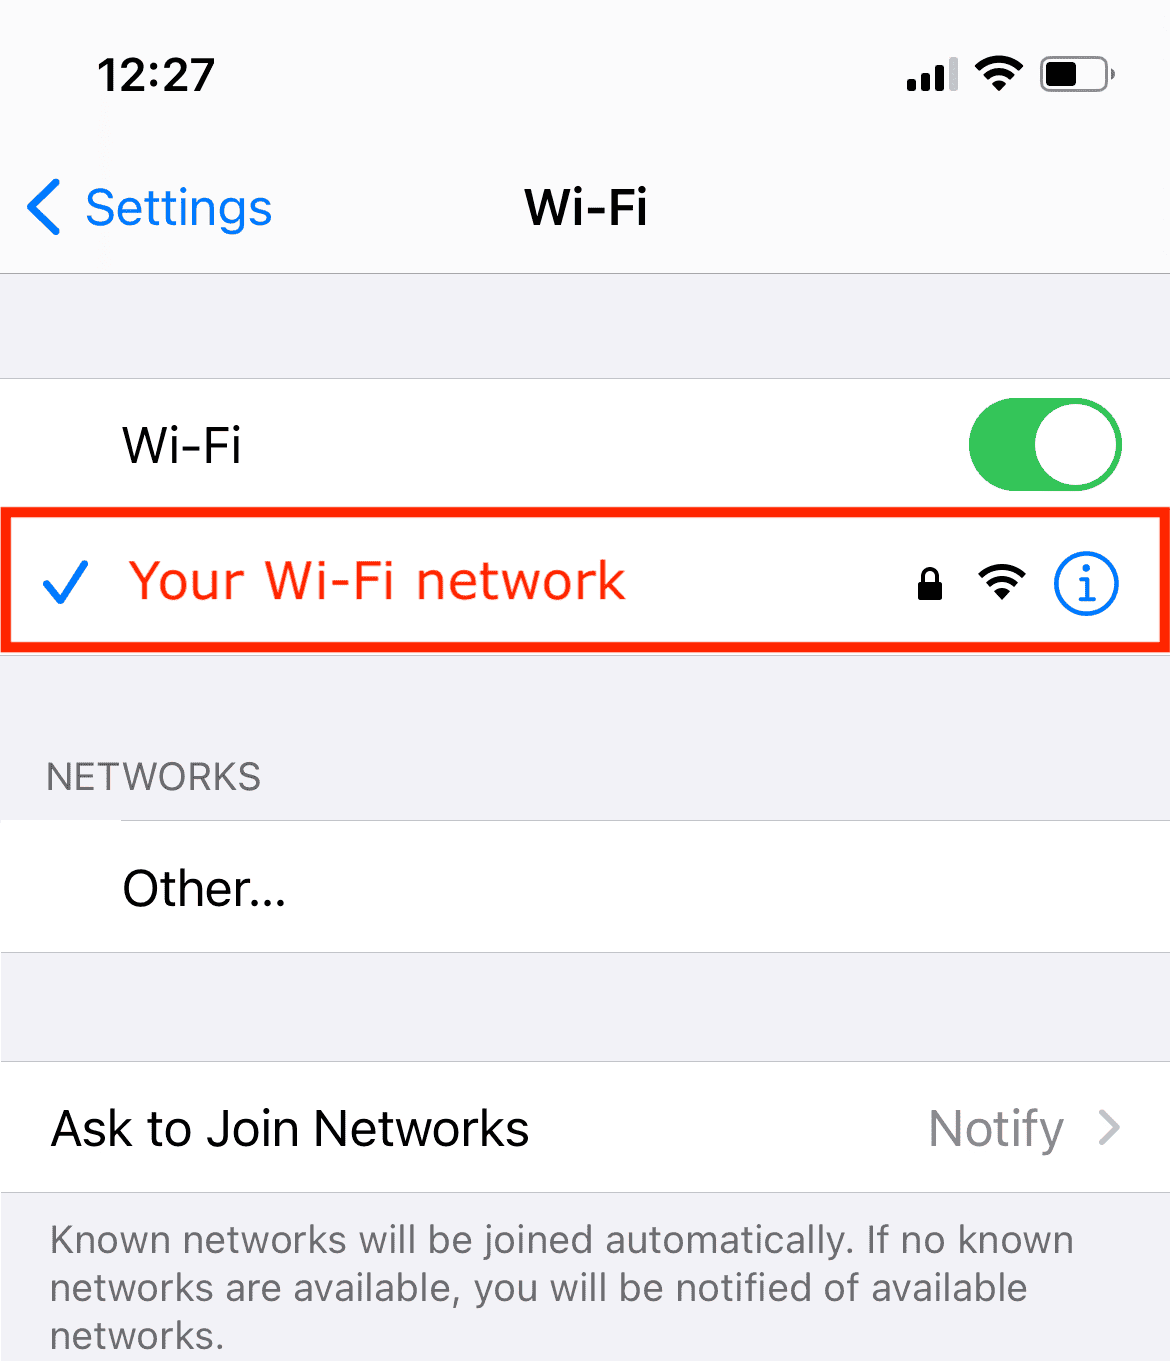
Step 2. Select Wi-Fi.

Step 3. Select the Wi-Fi network you’re connected to. It will have a blue checkmark on the left.
Step 4. At the bottom of the page, under HTTP Proxy, select Configure Proxy.

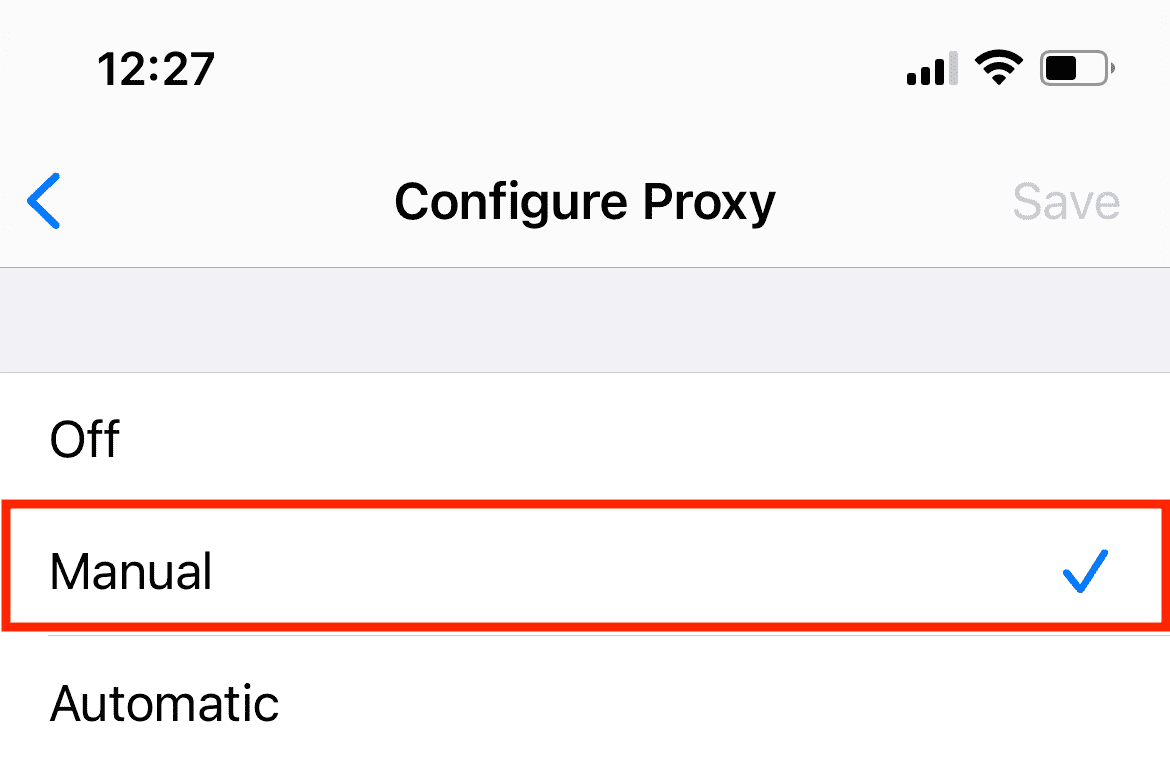
Step 5. Select Manual Configuration.
If your proxy provider has given you a link to the proxy configuration file, you can select Automatic Configuration instead. Most commercial proxy providers won’t give you one.
Step 6. Enter your proxy server’s settings.

In the Server field, you’ll have to enter the IP address you’ve received from your proxy providers. If you’re using backconnect proxies (so, residential or mobile IPs), you’ll have to enter a hostname instead.
- Example of an IP:
127.168.0.1 - Example of a hostname:
en.proxyprovider.net
In the Port field, enter the numbers that come after the IP or hostname. They will be separated by a colon.
- Example of a port:
en.proxyprovider.net:10000
You’ll also have to authenticate your proxy server. If you’re using the whitelisted IP method, there’s no need to do anything else. If you’re authenticating with a username and password, tick Authentication. It will expand and let you enter those credentials.

Note that iOS won’t let you set up a SOCKS5 proxy server through the settings. This works only for HTTP(S) proxies.
How to Use an iPad or iPhone Proxy
Once you’ve configured the iPad or iPhone proxy server on your iOS device, it will try to route all your connection requests through a proxy. It might not work with some applications if they’ve been programmed to ignore proxy settings.
Note that this only applies to the Wi-Fi connection where you have set up the proxies. Once you disconnect from it, or connect to a different Wi-Fi, you’ll stop using the proxy server.
How to Turn Off a Proxy Server on iPhone or iPad
Follow Steps 1-5. Then, simply select Off. A blue checkmark should appear on the right side.


Frequently Asked Questions About iPhone Proxy Settings
A proxy server is an intermediary device that sends your connection requests through itself. So, instead of connecting to a website directly, you first go through a proxy server.
It means that you can set up your Wi-Fi to use a proxy server. Proxies help you hide your IP, change location, and do other things. Sometimes, they can be used by malware.
If you’re not on a work or school Wi-Fi, by default they should be disabled.
