How to Use Proxifier: Instructions & 4 Common Scenarios
Proxifier is a powerful tool for working with proxy servers where they’re not supported. Learn how to make the best use of it.

What Is Proxifier?
Proxifier is a desktop program that lets network applications route requests via a proxy server – even when those applications don’t have built in proxy settings. In other words, you can take any app, set it up on Proxifier, and route its traffic via proxy connection to change or hide your real IP address.
Proxifier can affect all network connections, specific applications, or you can have a custom setup with flexible proxification rules. It also provides detailed live statistics for monitoring network traffic and logging network errors.
Proxifier has a 31-day free trial, but otherwise it’s not a free program. It costs $39.95 for lifetime access with minor version updates.
Note that the Proxifier Software doesn’t include proxies – you’ll have to buy a proxy server separately.
Why Use Proxifier?
Proxifier is a lightweight and highly flexible tool with many uses. Aside from enabling proxy servers where they’re not supported, it can:
- Help you reach web resources on restricted networks.
- Set up complex proxy chains to send traffic via multiple proxy servers.
- Use flexible proxy rule-based setups that apply to specific websites or apps.
- Reduce latency or change your location for gaming purposes.
- Enable protocols or authentication methods that an app doesn’t normally support (such as SOCKS5 for HTTP-only apps, and vice versa).
And that’s just brushing the surface of Proxifier’s capabilities.
Is There Proxifier for Mac, Linux, or Android?
Proxifier supports Windows (Standard or Portable) and macOS. Unfortunately, it’s not available on Linux-based operating systems or Android. For Linux, you can try using Proxychains, while Android has Postern.
How to Configure Proxifier
This part will show you four common scenarios for using Proxifier. One will configure it to run a proxy server with all system connections; the second will confine it to a particular app, letting others use your direct internet connection; the third will show you how to make your proxy IP list rotate; and the final scenario will show you how to enable HTTP protocol support for proxy servers that require it.
The scenarios assume that you don’t need to install Proxifier, or that it’s up and running on your computer already.
Scenario 1: Use a Proxy Server to Route All Computer Traffic
This scenario will configure Proxifier to send all your traffic through a proxy server. It functions the same way as setting up proxies on Windows or macOS. But this method makes it easier to turn them off once you no longer need them.
Step 1. Select Profile -> Proxy Servers.


Step 3. Enter your proxy details.
You can do this by selecting your protocol type and then manually entering the proxy server’s information: IP (or hostname if you’re using backconnect proxies) and port.
- Example of an IP: 127.168.0.1
- Example of a hostname: en.proxyprovider.net
In the Port field, enter the numbers that come after the IP or hostname. They will be separated by a colon.
- Example of a port: en.proxyprovider.net:10000

Step 4. Authenticate the proxy server.
Commercial proxy servers will ask you to authenticate access before you can start using them. There are two authentication methods: IP whitelisting and credentials. If you have whitelisted your IP, you don’t need to do anything here. Otherwise, click Enable under Authentication, then enter your credentials (username and password) into the fields and press OK.

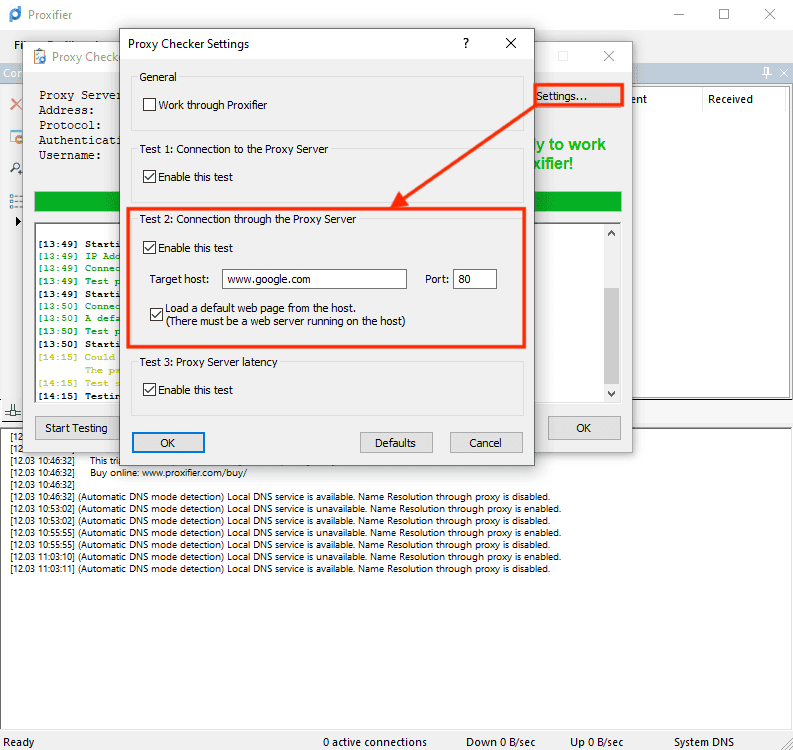
Step 5. Test the proxy server.
In the list of proxy servers, select Check…, then Start Testing. Proxifier will check if the proxy server is working.

That’s it! Proxifier will now route all your connection requests through a proxy server!
Scenario 2. Use a Proxy Server with a Particular Application
This scenario will enable a proxy server for individual applications instead of routing all traffic on your device. You may find it useful when you only need change your connection for certain apps (such as a web browser or game).
Step 1. Follow Steps 1-4 in Scenario 1.
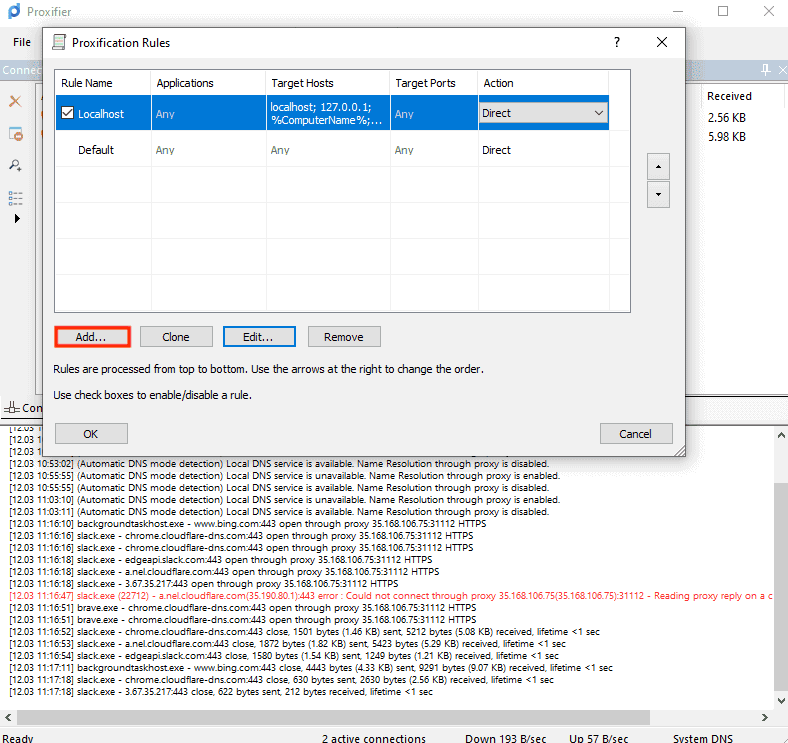
Step 2. Select Profile -> Proxification Rules.


Step 3. Enter the details.
First, name the rule. It can be any name you wish.
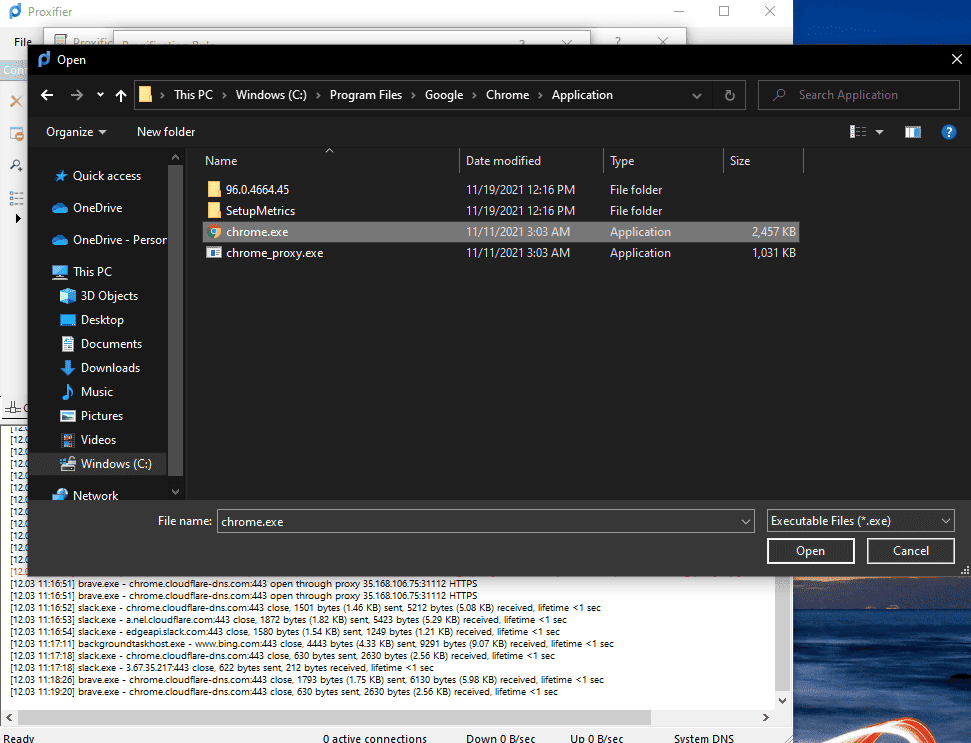
Then, you’ll have to select an application. Clicking Browse… will open the File Explorer window.


Advanced users have futher options, such as enabling the rule for particular domains (like google.com) or ports.
Once done, confirm the changes by pressing OK.
Step 4. Enable the rule.
In the list of rules, check the rules you want to enable. Note that they follow a hierarchical order: rules above take precedence over everything below them.
The Default rule applies to all connections on your device.

Step 5. Test the proxy server.
In this case, we can do this by launching Chrome and going to an IP checker like IPinfo.

That’s it! Your application will now route its connection requests through a proxy server!
Scenario 3. Rotate Requests through a List of Proxies
This scenario will show you how to rotate a static list of IP addresses using Proxifier. It can be useful if you’ve bought dedicated proxies and need simple IP rotation.
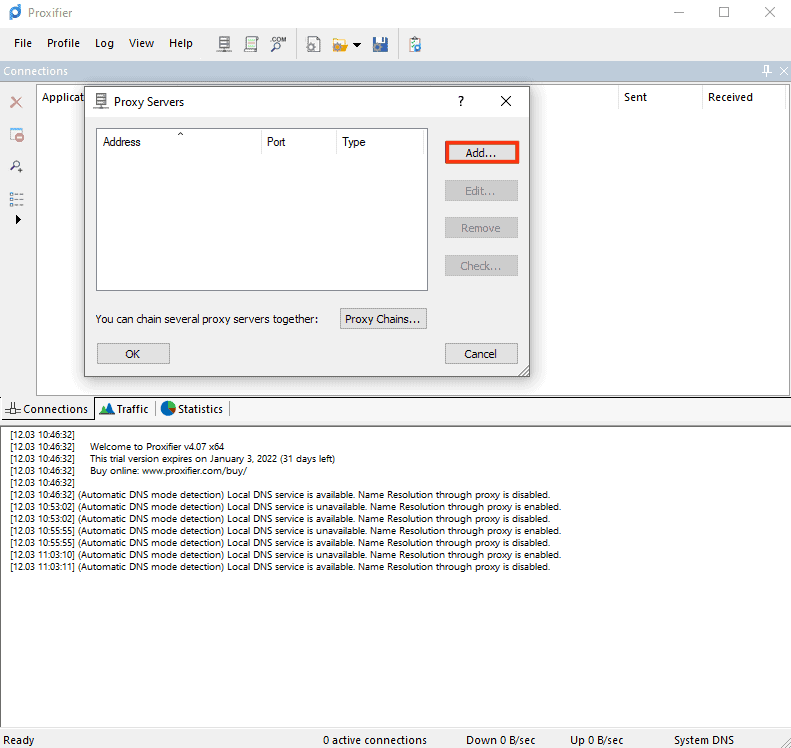
Step 1. Add multiple proxy servers following Scenario 1.

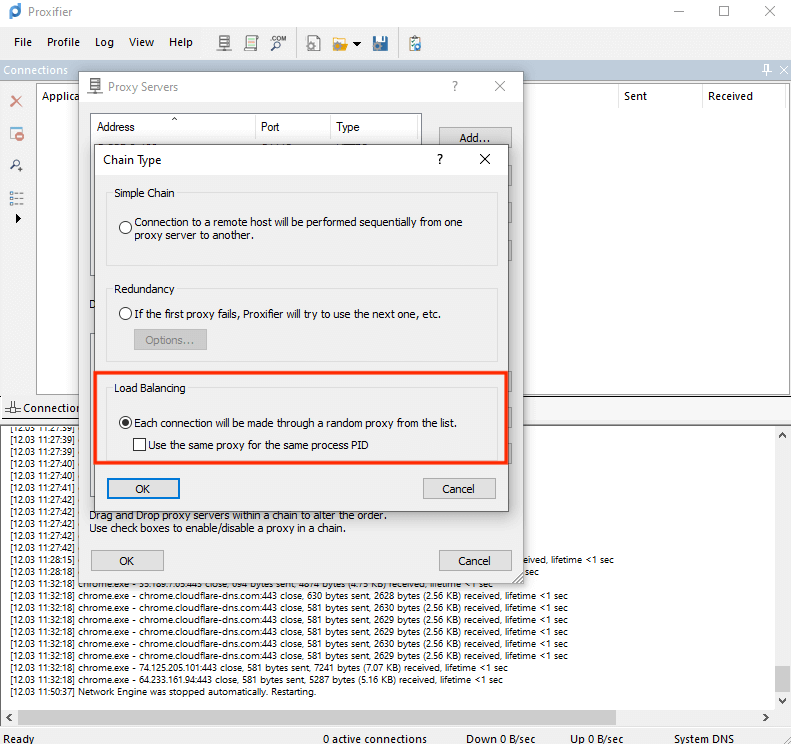
Step 2. Create a proxy chain.
This involves selecting the Create button, naming the chain, and dragging proxy addresses into it.

Step 4. Return to the main Proxifier window, select Profile -> Proxification Rules, and assign the chain in the Action column.
You can do that with a rule you created or with all connections by changing the Default rule.

That’s it! Proxifier will now automatically rotate your static list of proxy IPs!
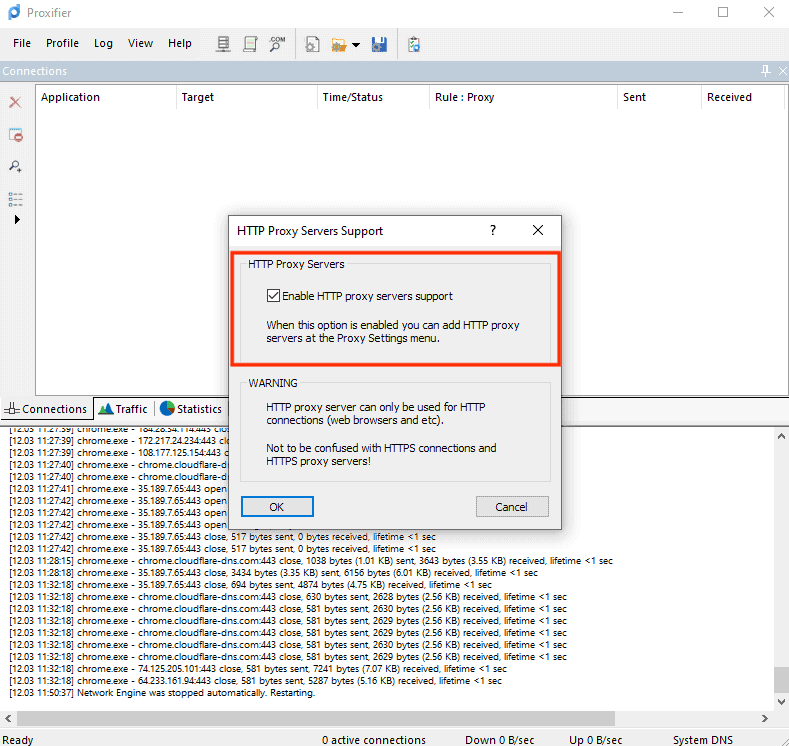
Scenario 4: Enable Support for HTTP Proxies
This scenario will show you how to enable HTTP proxy support in Proxifier. You’ll want to do this if your proxy server doesn’t support any other protocol. Also, some providers of residential or mobile proxies connect to their gateway server via HTTP, even when the actual proxy IP uses HTTPS.
Step 1. Select Profile -> Advanced -> HTTP Proxy Servers.


That’s it! You should now be able to work with HTTP proxy servers!

Frequently Asked Questions About Proxifier
Yes. Proxifier is a reputable program that’s been available for many years without issues.
Proxifier has a 31-day free trial, but it’s otherwise paid. The program costs $39.95 for lifetime access with minor updates.
No, you’ll have to buy a proxy server separately.
