How to Use Wget with a Proxy: A Tutorial
Wget is a great tool for quickly downloading web content. It also offers the flexibility to route your requests through a proxy server. Here you’ll learn how to use Wget with a proxy.

There are many command-line tools for downloading web content, such as cURL. However, if you want to handle recursive downloads and resume tasks when your connection is unstable, Wget is your best option.
What Is Wget?
Wget is a GNU Project command-line utility built to download HTTP(S) and FTP(S) files. It’s a non-interactive tool, making it especially useful for downloading content in the background while completing other tasks.
Wget was specifically designed to handle content downloads on unstable networks: if you lose internet, the tool will automatically try to resume the job once the connection restored.
Wget is typically used on Unix-like operating systems such as Linux and macOS. However, it’s also available on Windows.
Key Wget Features
Even though Wget was first introduced in the 90s, it’s still widely used due to its simplicity and reliability. Here are some key features of Wget:
- Resuming interrupted downloads. If a download is interrupted because of connectivity issues or system shutdown, Wget will automatically retry the task once the connection is restored – no manual input is needed.
- Automated file download. Wget can batch process downloads or schedule them for repetitive tasks.
- Recursive download support. You can create a local copy of a website with Wget to view it offline or archive the website’s snapshot for future reference.
- High control over downloads. You can script Wget to limit bandwidth, change request headers, as well as adjust retries for downloads.
- Proxy support. Wget supports HTTP and HTTPS proxies if you need to download geo-restricted or otherwise protected content.
Wget vs. cURL: the Differences
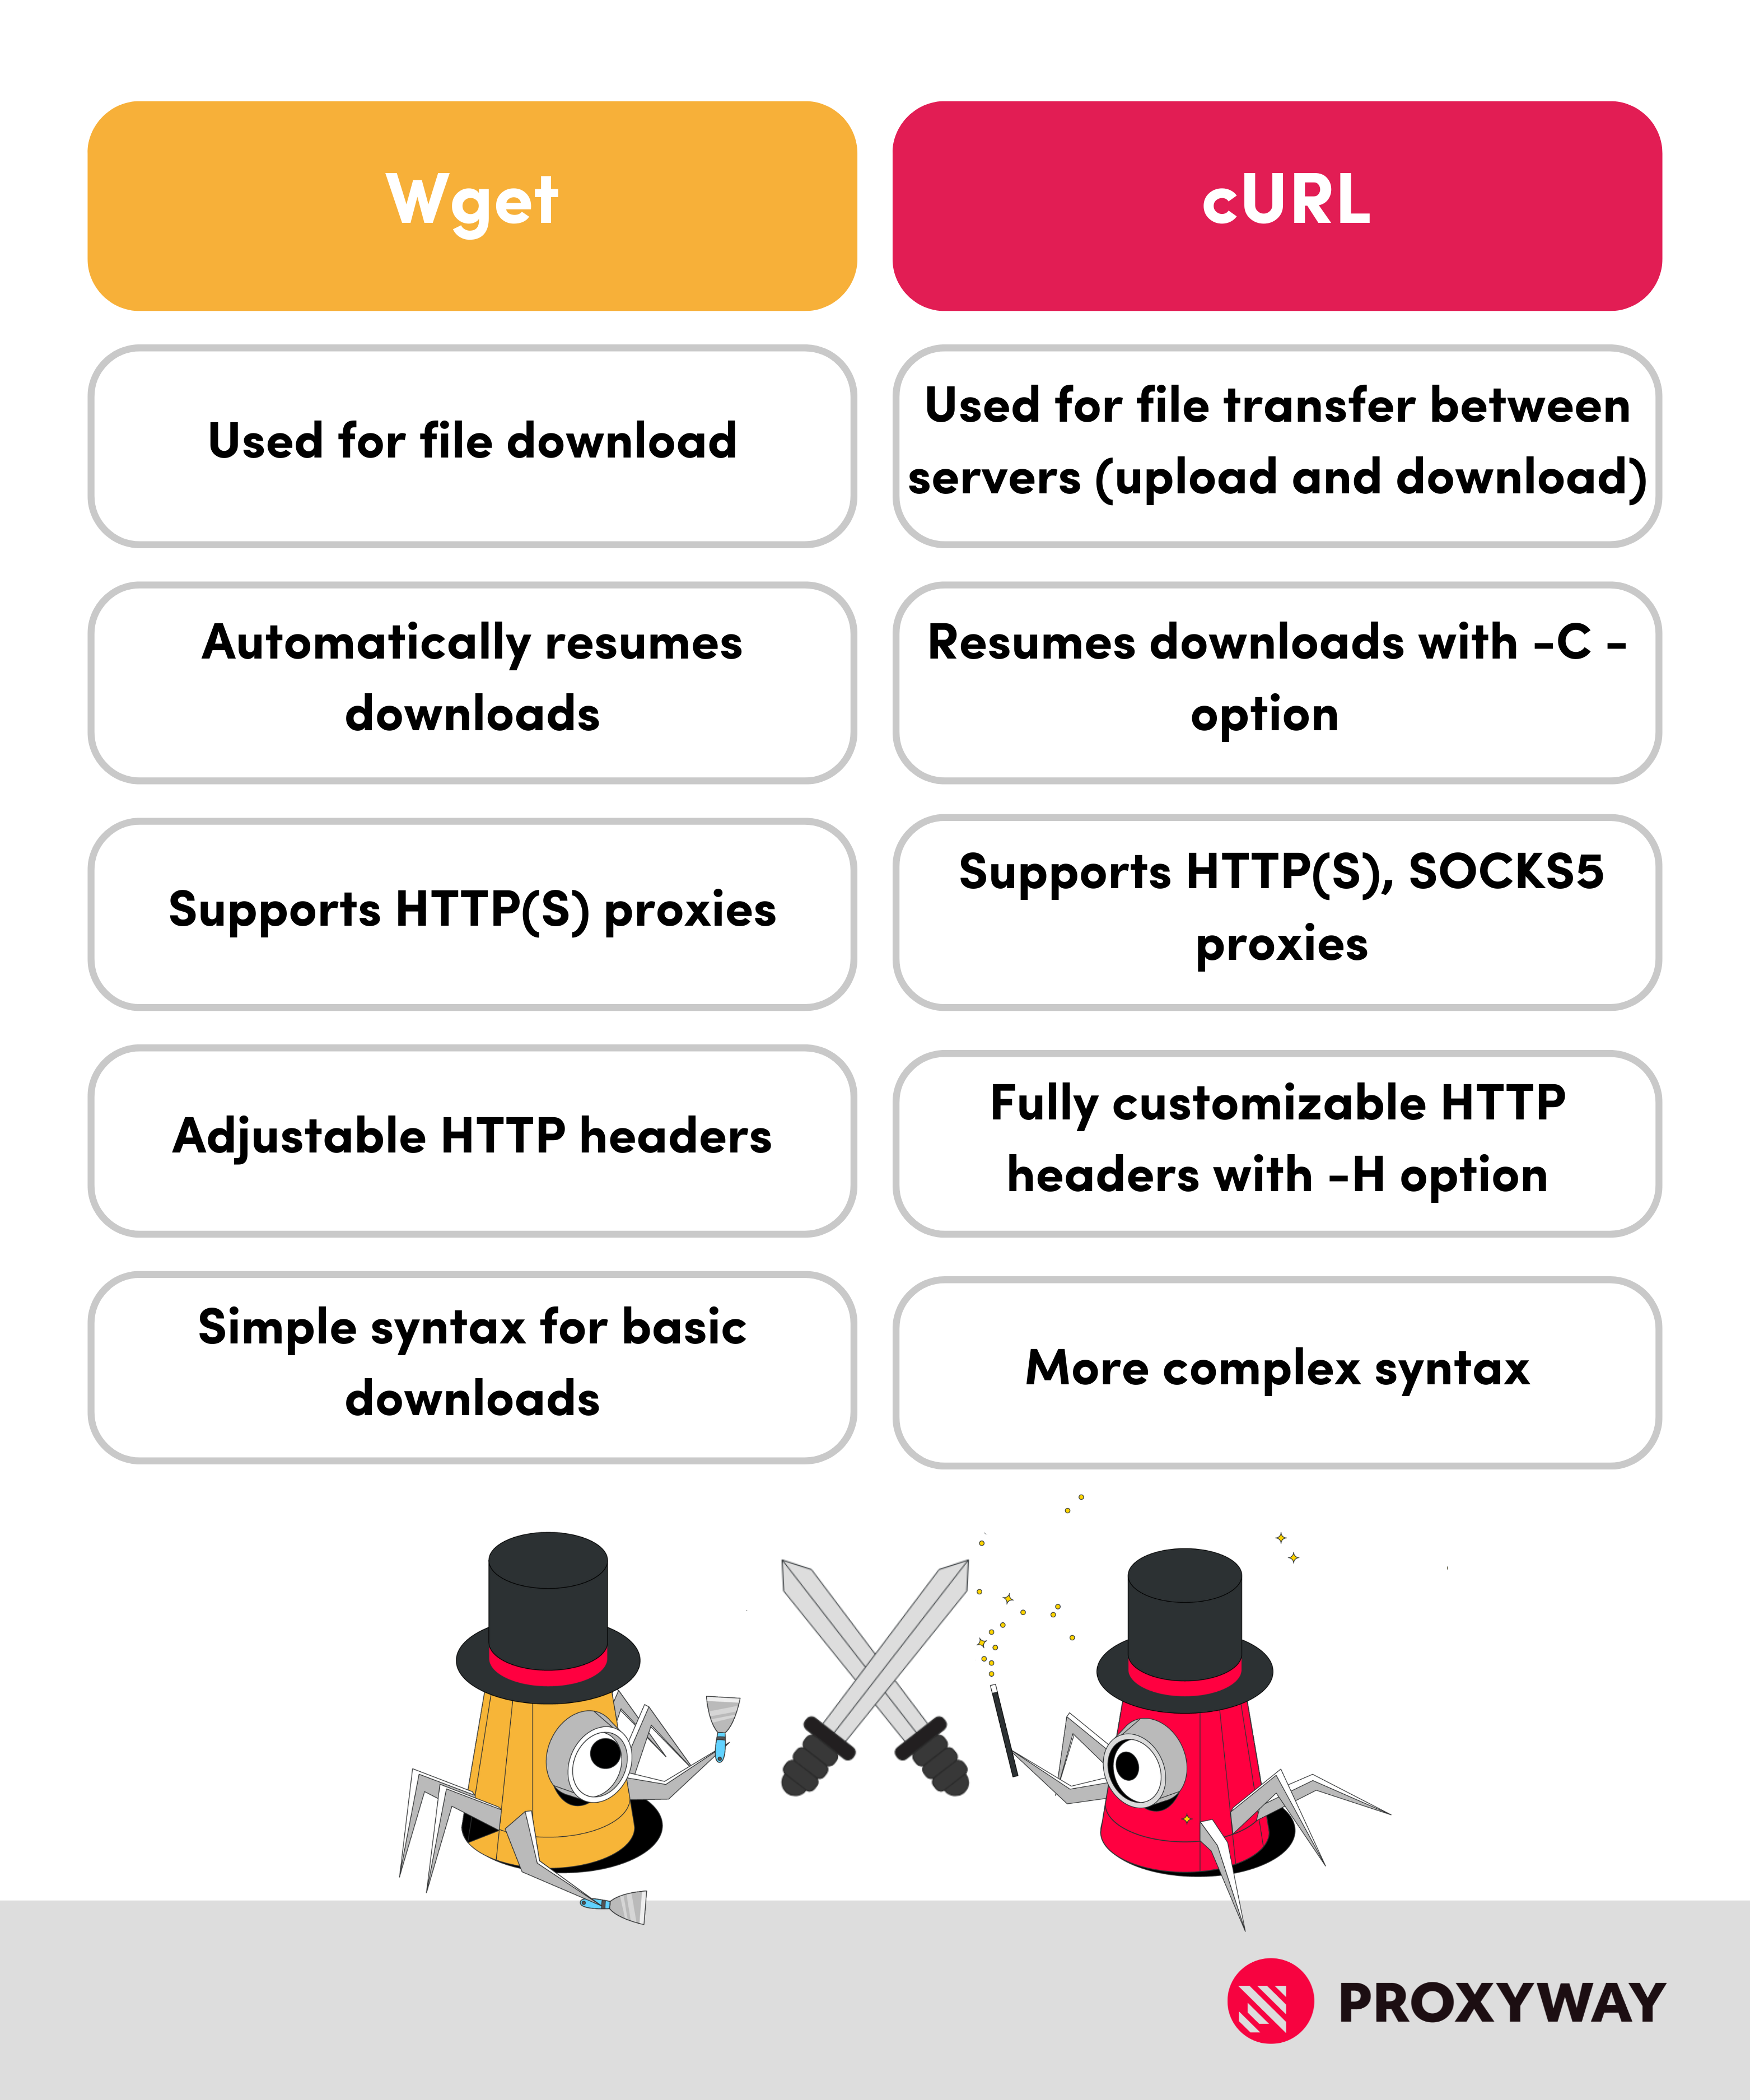
Both Wget and cURL are command-line tools used for data transferring. However, their functionality and niches slightly differ.
Wget is primarily used to download content from the web. On the other hand, cURL is used for data transfer (upload and download), as well as working with APIs. Therefore, cURL is more versatile but also more complex.

How to Install Wget
Wget’s installation process is straightforward, but may differ based on your operating system.
Being a command-line utility, Wget run in a command-line interface. In other words, if you have a Mac or Linux computer, that will be terminal Terminal. The default for Windows is CMD (Command Prompt).
- Windows users will need to download and install the Wget package first. Once that’s done, copy and paste the wget.exe file to the system32 folder. Finally, run wget in Command Prompt (CMD) to check if it works.
- For those on MacOS, you’ll need to get the Homebrew package manager by running xcode-select –install in your Terminal. Then, you can install Wget by running wget -v.
Once you have Wget installed, it’s important to also have the configuration file – .wgetrc. It will be useful for when you need to add proxy settings to Wget.
To create the file on the Windows OS, run C:\Users\YourUsername\.wgetrc in CMD. MacOS users should use run -e ~/.wgetrc in Terminal. If the file doesn’t exist in your system, this command will automatically create and open it.
How to Use Wget
Let’s take a look at how to download files and retrieve links from webpages using Wget.
Downloading a Single File with Wget
Retrieving a single file using Wget is simple – open your command-line interface and run wget with the URL of the file you want to retrieve:
wget https://example.com/new-file.txt
Downloading Multiple Files with Wget
There are a couple of ways to download multiple files with Wget. The first method is to send all URLs separated by a space. Here’s an example with three files:
~$ wget https://example.com/file1.txt https://example.com/file2.txt https://example.com/file3.txt
This method is ideal when you have a limited number of URLs. However, if you want to download dozens of files, it becomes much more complex.
The second method relies on writing down all URLs in a .txt file, and using the -i or –input-file option. In this case, Wget will read the URLs from the file and download them.
Let’s say you named the file myurls.txt. You can use the –input-file argument:
~$ wget --input-file=myurls.txt
Getting Links from a Webpage with Wget
You can also use Wget to extract links directly from a webpage.
If you want Wget to crawl a page, find all the links, and list them without downloading, you can run this command:
wget --spider --force-html -r -l1 https://example.com 2>&1 | grep -oE 'http[s]?://[^ ]+'
If you’d like Wget to find the URLs and download them for you, simply remove the –spider and –force.html commands that crawl and parse the HTML pages. Instead, your command should look something like this:
wget -r -l1 https://example.com
Changing the User-Agent with Wget
If you’re planning to use Wget for downloads often, you should modify your user-agent string to rate limits. You can change your user-agent for all future uses by editing the .wgetrc file, or write a command for one-time use.
Modifying the User-Agent for a Single Download
Whether you’re on Windows or macOS, the syntax for changing the user agent is the same. Make sure to use the user-agent string of a new browser version.
wget --user-agent="Mozilla/5.0 (Windows NT 10.0; Win64; x64) AppleWebKit/537.36 (KHTML, like Gecko) Chrome/110.0.0.0 Safari/537.36" https://example.com
Modifying the User-Agent Permanently
If you’d like to consistently use a different user-agent, you can change the Wget configuration in the .wgetrc file. The custom user-agent string you’ll put there will be used for all future jobs until you change it.
Simply locate the .wgetrc file and add user_agent = “CustomUserAgent”
It should look something like this:
user_agent = "Mozilla/5.0 (Macintosh; Intel Mac OS X 10_15_7) AppleWebKit/537.36 (KHTML, like Gecko) Chrome/110.0.0.0 Safari/537.36"
How to Use Wget with a Proxy
You can either set up proxy settings in the configuration file or pass proxy settings in the command line for one-time downloads.
Wget only supports HTTP and HTTPS proxies, so make sure you’re not using SOCKS5 proxy servers.
If you’re looking for a proxy server, free proxies may work with simple websites. For anything more – or larger scale – we recommend choosing one of the paid proxy server providers. You’ll find our recommendations here:
Discover top proxy service providers – thoroughly tested and ranked to help you choose.
Using Wget with a Proxy for a Single Download
For using proxies with multiple downloads, we recommend setting a proxy configuration in the .wgetrc file instead. However, you can also specify proxy settings for Wget if you’re planning to use Wget with a proxy once. Instead of modifying the .wgetrc file, you can run a command directly in Terminal or CMD.
It should look like this:
wget -e use_proxy=yes -e http_proxy=https://username:password@proxyserver:port https://example.com/file.zip
Note: the example uses http_proxy, but Wget supports HTTPS proxies too, so you can use https_proxy for your proxy settings.
Checking Your Current IP Address
It may be useful to check if your IP address has indeed changed to the proxy server’s. You can do that by sending a request to the HTTPBin IP endpoint with Wget:
wget -qO- https://httpbin.io/ip
You should receive an output similar to the one below:
					{
“origin”: “123.45.67.89:000”
}
Note: this is not a real IP address, rather an example to familiarize you with the format.
Set Up a Proxy for Wget for Multiple Uses
To set up a proxy for Wget, you’ll first have to get the proxy server’s details. Then, set the proxy variables for HTTP and HTTPS in the .wgetrc file that holds the configuration content for Wget.
Add proxy settings to the file:
					use_proxy = on
http_proxy = http://proxyserver:port
https_proxy = https://proxyserver:port
Note: use actual proxy server address and a correct port number when editing the file. These will be given to you by your proxy service provider.
Once you write down proxy settings, you can send a request to HTTPBin to check if the IP address has changed.
Wget Proxy Authentication
Most reputable proxy server providers will require authentication to access the proxy server. Typically, you’ll need to specify your username and password.
You can do that by adding a couple of lines to the .wgetrc file.
					proxy_user = YOUR_USERNAME
proxy_password = YOUR_PASSWORD
So, the entire addition to the file should look like this:
					use_proxy = on
http_proxy = http://proxyserver:port
https_proxy = https://proxyserver:port
proxy_user = YOUR_USERNAME
proxy_password = YOUR_PASSWORD